Configure Custom Project Settings
The KAS Runtime is used to modify specific configurations within a user's application without needing to access the KAS-IDE, recompile and re-downloading the project file to the controller.
- This functionality streamlines configuration management, particularly for customers commissioning multiple machines using a single KAS project file.
- This custom project configuration feature supports modifying the Server IP addresses of the EtherNet/IP IO Scanner (Client) defined in the KAS project.
Procedure
- Create the controller settings file.
- Create a text file named controller_settings.xml with this content:
The alias IP addresses must match exactly the Server IP Address specified in the KAS project under the Fieldbus Editor > EtherNet/IP IO Scanner (Client) -> Server nodes.
- Replace the canonical IP addresses in the configuration file with the actual EtherNet/IP addresses of your adapter controllers.
<?xml version="1.0" encoding="utf-8"?> <KasControllerConfig xmlns="KasControllerConfig"> <IpAddrMapping> <IpAddrAlias alias="1.1.1.1" canonical="192.168.1.91" /> <IpAddrAlias alias="2.2.2.2" canonical="192.168.1.177" /> <IpAddrAlias alias="3.3.3.3" canonical="192.168.1.213" /> </IpAddrMapping> </KasControllerConfig> - Upload the file to the scanner controller.
- Open a command prompt.
- Using curl, run these commands to upload the file:
curl.exe -k -X POST -d "username=administrator" -d "password==<<administrator_account_password>>" -G https://(IP_Address)/authorize/login -c cookie.txtcurl.exe -k -F "sendfile=@<<controller_settings.xml file path>>" -F "filename=controller_settings.xml" https://(IP_Address)/userfiles -b cookie.txt
- Replace the (IP_Address) with the actual IP address of your scanner controller (PxMM or PCMM2G).
- Example:
curl.exe -k -F "sendfile=@<<C:\tmp\controller_settings.xml" -F "filename=controller_settings.xml" https://192.168.0.10/userfiles -b cookie.txt
- Example:
- Replace <<administrator_account_password>> with the actual password of your controller Web server.
See User Authentication. - If your controller is AKD PDMM or PCMM, use http:// instead of https://.
- See HTTP Commands for User Data File Management.
- Replace the (IP_Address) with the actual IP address of your scanner controller (PxMM or PCMM2G).
- Verify the file upload.
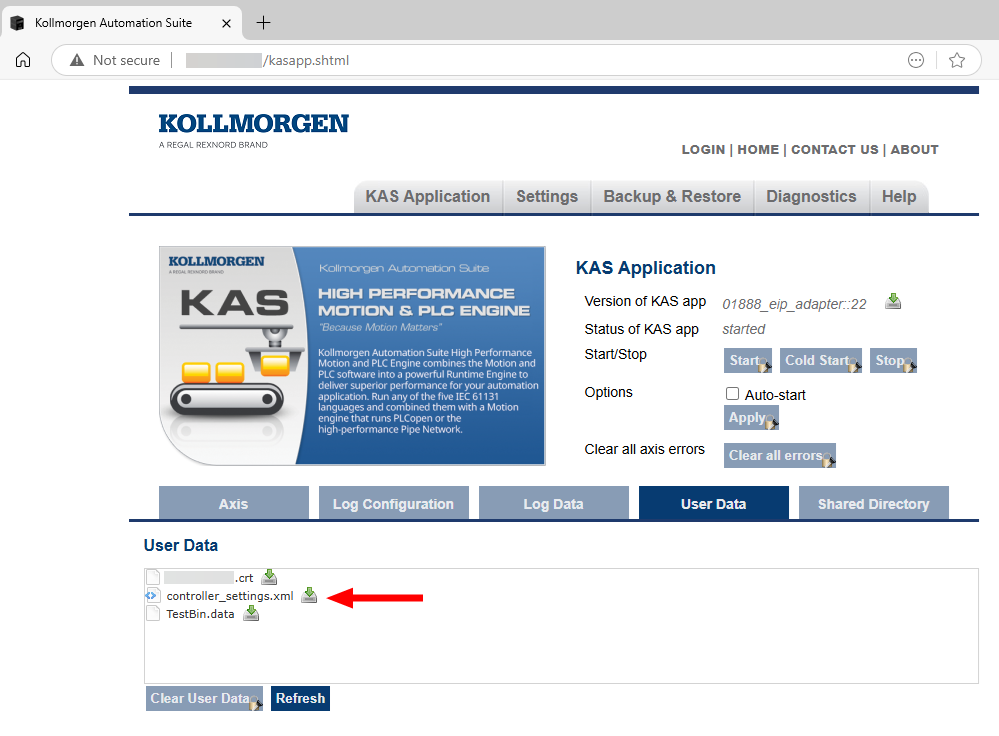
- Open a web browser and navigate to https://(IP_Address).
- Navigate to: KAS Application > User Data page.
- Locate the controller_settings.xml file and click the Download (
 ) icon next to it. (Figure 1)
 - Once the file is downloaded, open it and verify that its contents are correct and as expected.
- Configure the KAS project.
- In the KAS-IDE, open the KAS application project.
- Stop the project if it is currently running.
- In the Project Explorer, double-click Fieldbus to open the FieldBus Editor.
- Under the Server nodes, update the IP address to match the alias values from the XML file. (Figure 2)

- Verify the operation.
- Compile and download the project to the controller.
- Start the project and wait for the application to fully initialize.
- Confirm that all EtherNet/IP I/O Scanners are operating correctly and communicating as expected.
See Also


