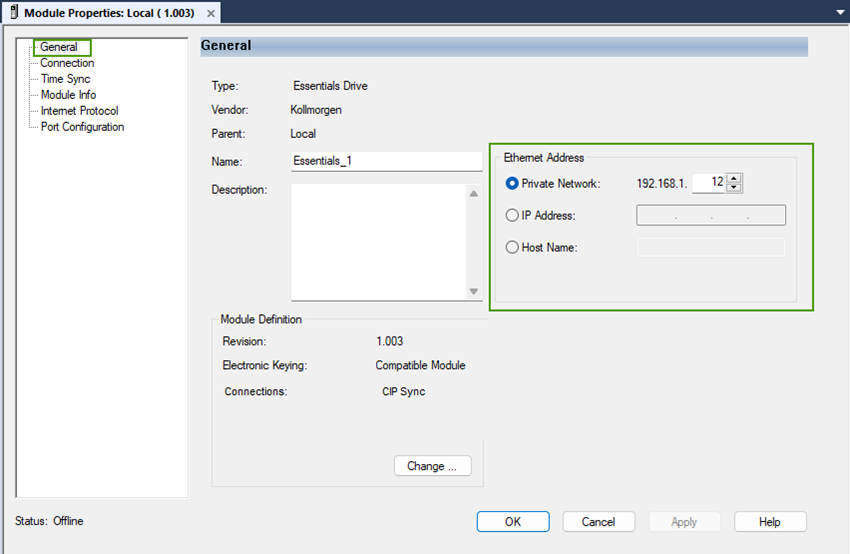
Set the Ethernet Address to the Target Drive's IP Address
After changing the controller's PLC processor and model number, the next preliminary setup procedure for CIP Sync is setting the Ethernet address to IP Address of the target drive's fieldbus ports.
- In Studio 5000, under the Ethernet group in the Controller Organizer, select the drive.
- Set the Ethernet Address to the target drive’s IP Address for the Industrial Ethernet ports. (Right-click the drive name under Ethernet and choose Properties > General).
- To Set or Verify the drive's IP Industrial Ethernet Port Address, connect to the X20 Service port on the
-
-
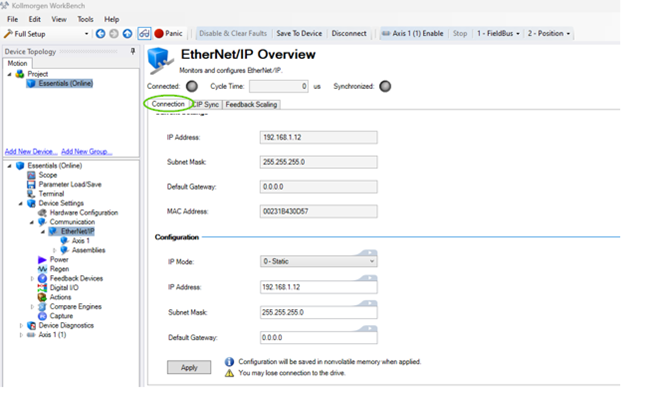
- The Kollmorgen Essentials Drive has a dedicated IP Address for EtherNet/IP (Fieldbus ports X11 [Port 2] and X12 [Port 1]).
- The Industrial Ethernet port settings can be accessed in WorkBench from Project > drive_name (Online) > Device Settings > Communication > EtherNet/IP > Connection tab.
- Change these settings as required for your network.
The settings shown match the IP Address in the Sample project.
The Connection tab in the EtherNet/IP Overview view displays the Current Settings and the Configuration to be applied.
-
-
- WorkBench can access the drive over Ethernet via the Industrial Ethernet port(s), but the RPI may need to be extended while polling the drive with WorkBench and EtherNet/IP simultaneously.
- Optionally, the Service/HMI X20 port may be used for a dedicated WorkBench connection and/or to an HMI (i.e., Modbus TCP) independent of EtherNet/IP.
- Commissioning and tuning via WorkBench should be conducted using the X20 Service Port.
- X11/X12 do not support the PST (Performance Autotuner) or firmware downloads.
- See AKD2GKollmorgen Essentials Drive Port Errors.


