OPC UA - Insert a Variable
- In the Fieldbus Editor tree, select the OPC UA Server data group to assign a new variable to.
The Insert Variable button in the vertical toolbar is activated. (Figure 1) - On the vertical toolbar, click the Insert Variable button (
 ).
).
The OPC UA - Insert Variable dialog box opens. (Figure 2) - In the Symbol row, double-click the Value column cell to open the Variables combo-box. (Figure 3)
- In the Variables combo-box, select the applicable variable.
-
-
Only a single variable can be selected in the combo-box.
- Click OK to save the selection and close the combo-box.
The variable is added to the Value column cell. - In the TAG Name Value column cell, double-click the cell to open the TAG Name - Value text box.
- In the TAG Name - Value text box, enter the name used by the OPC UA client to address the variable.
- Press <Enter> to save the information and close the text box.
- In the Mode - Value column cell, double-click the cell to open the Mode - Value list box.
- Double-click an option in the Mode - Value list box.
The Insert Variables dialog box returns showing the selection. - In the TAG Type Value column cell, double-click the cell to open the TAG Type - Value list box.
- Double-click an option in the TAG Type - Value list box.
The Insert Variables dialog box returns showing the selection. (Figure 4) - Click OK to save the changes or selections and close the dialog box.
The new variable is added to the data group. (Figure 5) - Optional:
- Repeat Steps 2 to 13 to add more variables.
- Continue with OPC UA - Add Multiple Groups and Variables to the Driver Configuration.
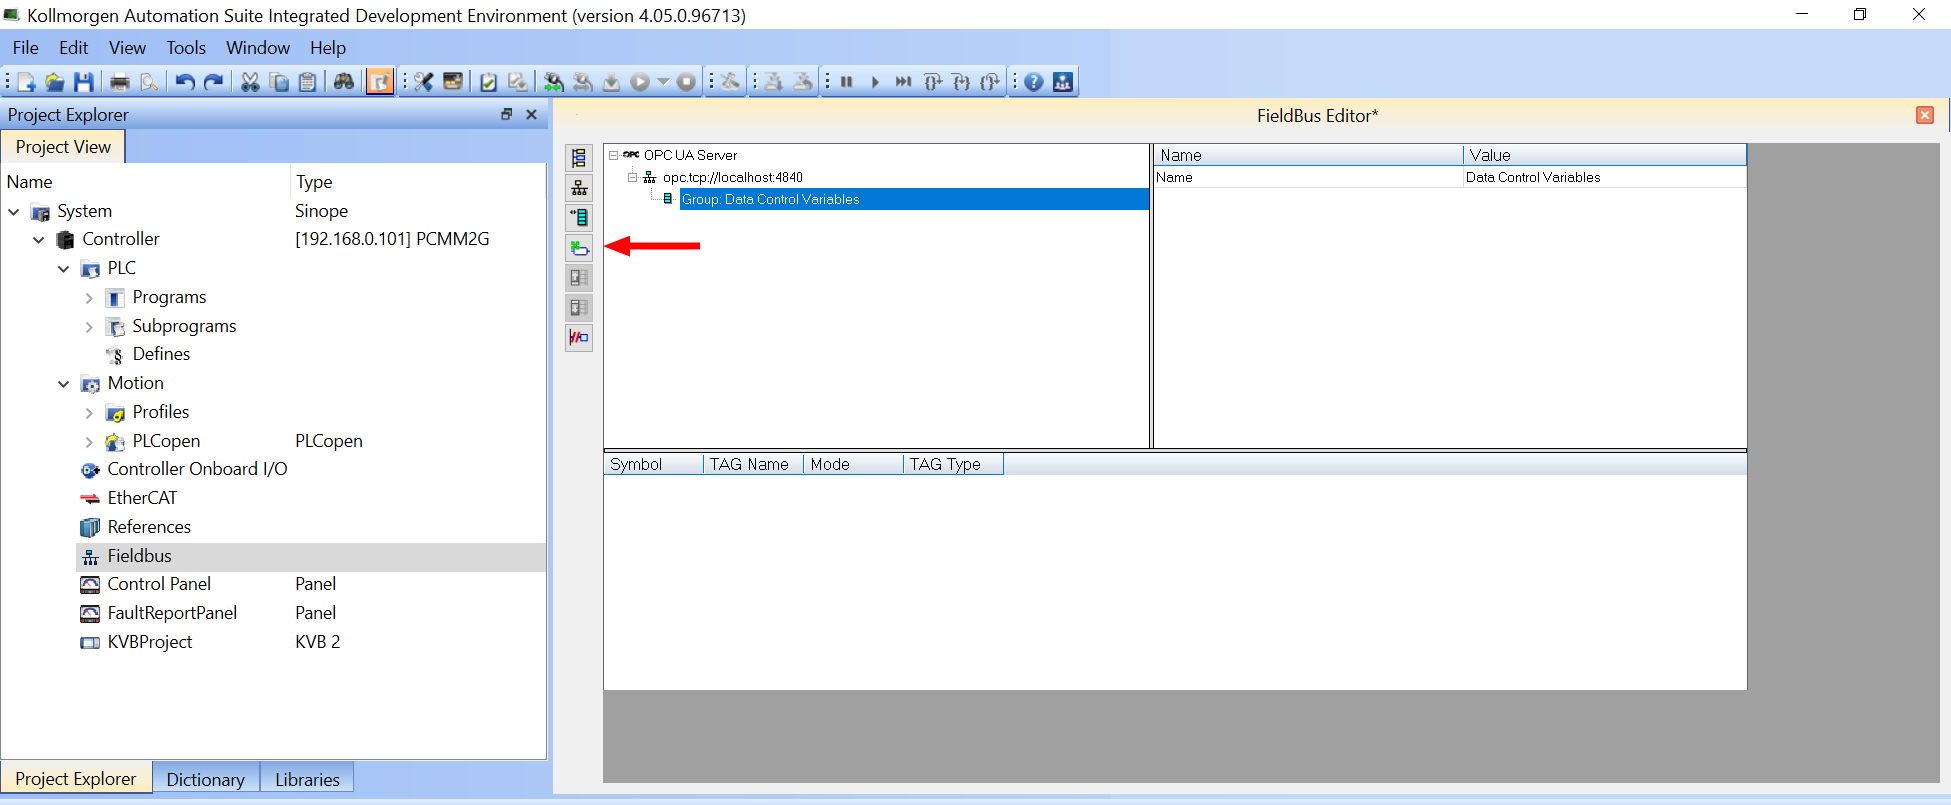
Figure 1: Insert Variable button
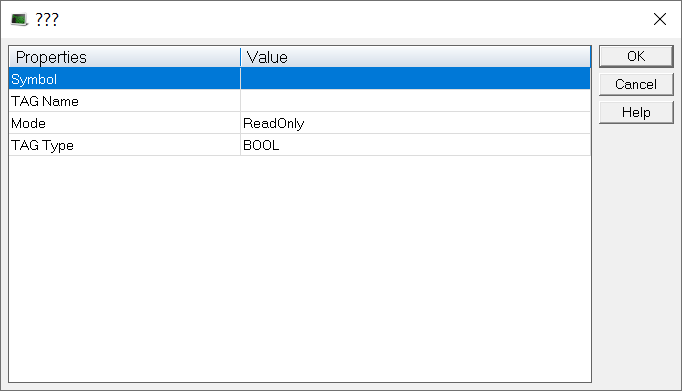
Figure 2: Insert Variable (???) dialog box
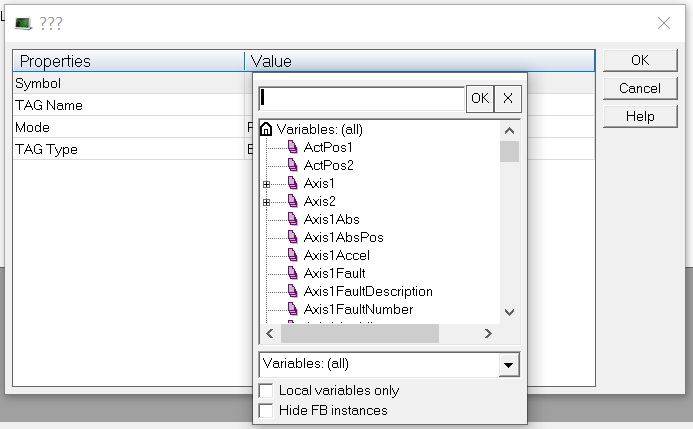
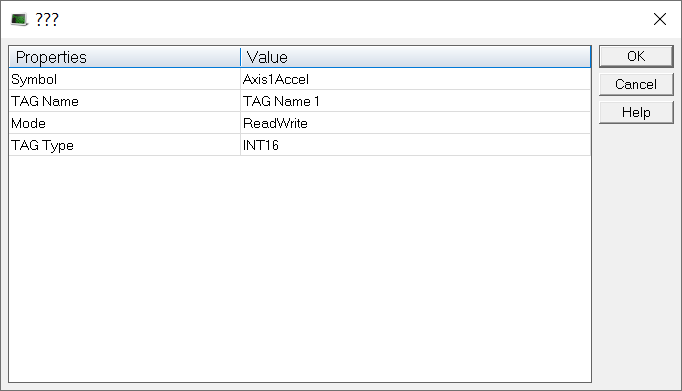
Figure 4: Example: Completed Insert Variables dialog box
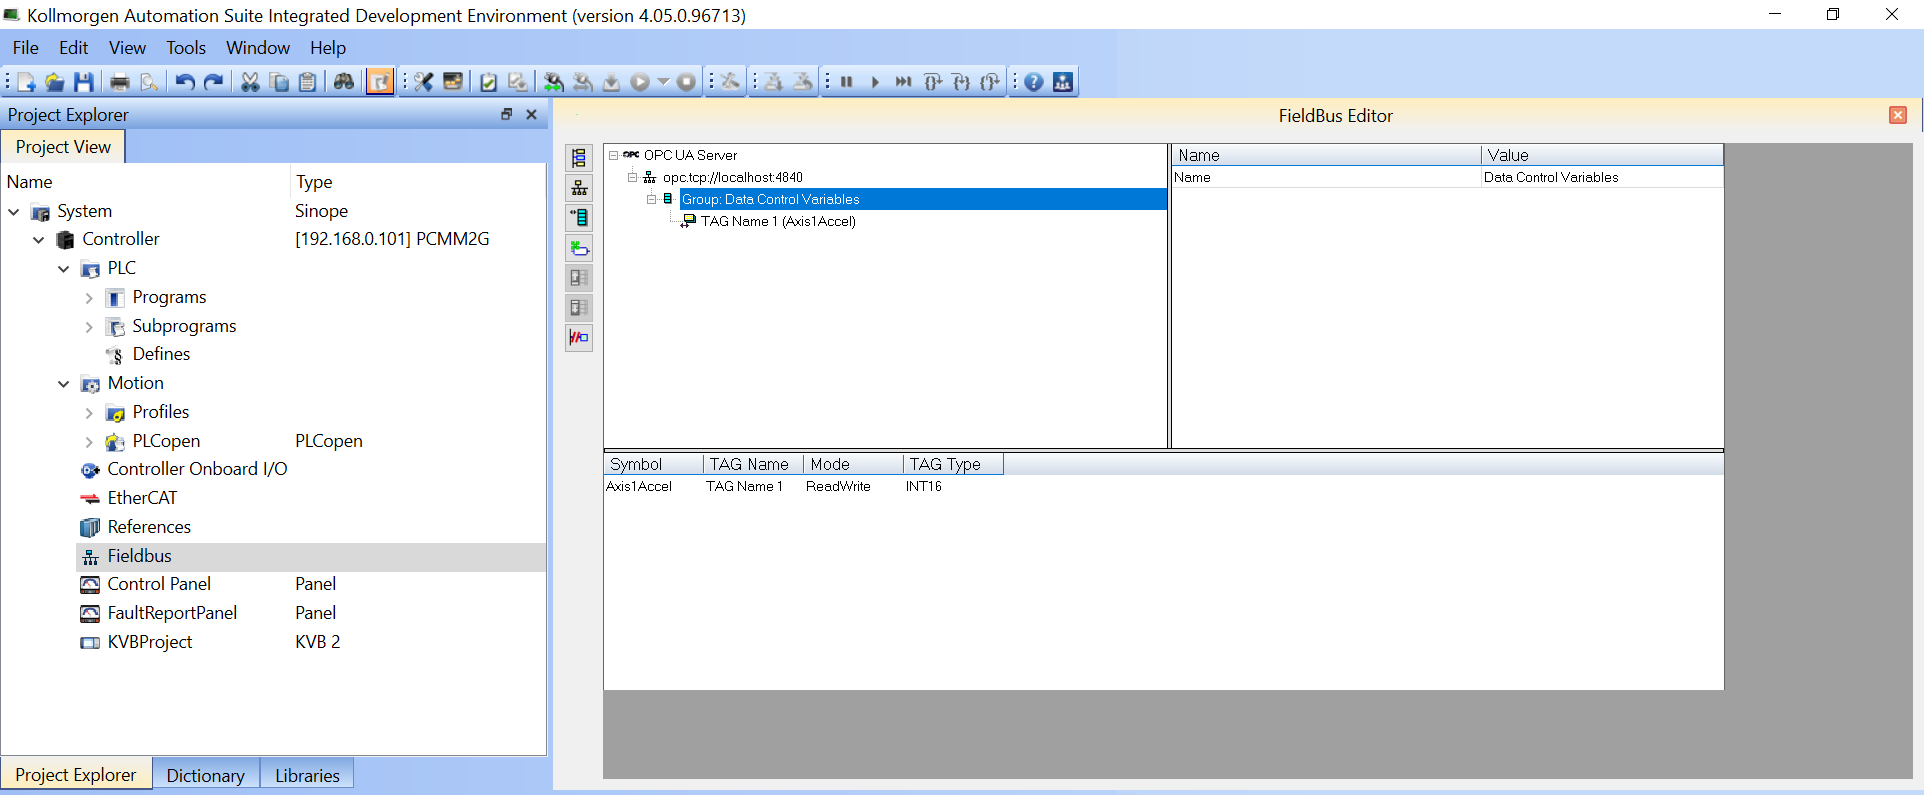
Figure 5: Fieldbus Editor with added variable
-
-
- Do not manually add variables to be exchanged (e.g., Mode = RO, WO, RW)!
- Use the OPC UA - Add Multiple Groups and Variables to the Driver Configuration procedure instead.
See Also


