Add and Configure I/O Slices
This topic discusses adding AKT (K-Bus) and AKT2G (EtherCAT![]() ***EtherCAT is an open, high-performance Ethernet-based fieldbus system. The development goal of EtherCAT was to apply Ethernet to automation applications which require short data update times (also called cycle times) with low communication jitter (for synchronization purposes) and low hardware costs/E-Bus) I/O devices. All devices are children of the EtherCAT node in the Project tree.
***EtherCAT is an open, high-performance Ethernet-based fieldbus system. The development goal of EtherCAT was to apply Ethernet to automation applications which require short data update times (also called cycle times) with low communication jitter (for synchronization purposes) and low hardware costs/E-Bus) I/O devices. All devices are children of the EtherCAT node in the Project tree.
- AKT2G (E-Bus) devices are each directly under the EtherCAT node.
- AKT (K-Bus) slices are children of the coupler, which is a child of the EtherCAT node.
| AKT2G example | AKT example |
|---|---|
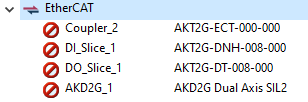
|
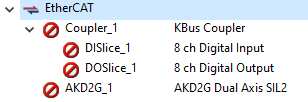
|
For local I/O, refer to Configure Onboard I/O.
- AKT2G (E-Bus)
- AKT (K-Bus)
Add an AKT2G (EtherCAT) I/O Coupler
-
- Select the Add Device command
(this option is only enabled when you are not connected to the controller)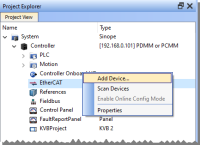
- Select the system coupler and click Ok

- In the Project Explorer, right-click the coupler node and select the Rename command to change the name
- Click Ok
- The device is added to the EtherCAT node.


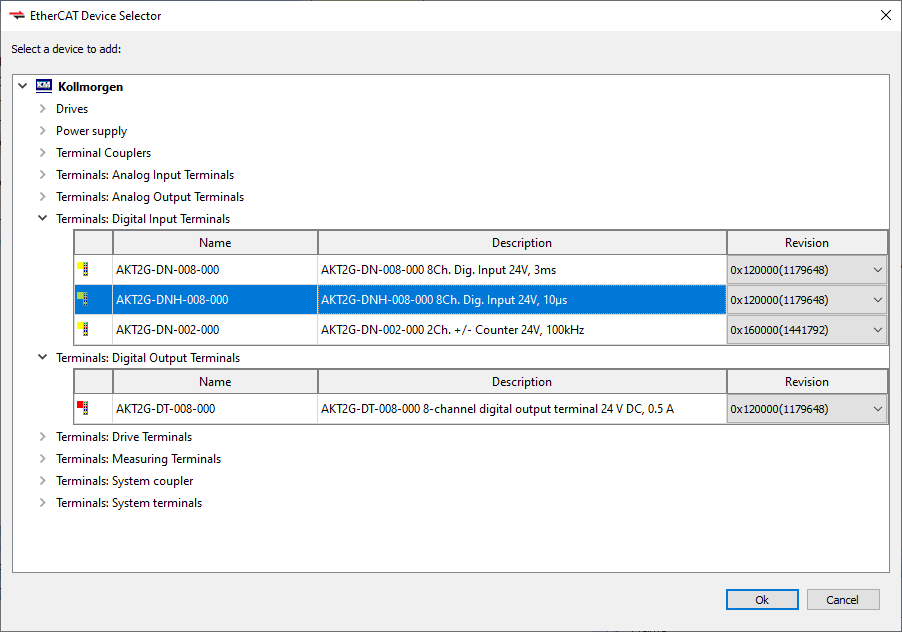
Add an AKT2G (E-Bus) I/O Slice
- In the Project Explorer, right-click the EtherCAT node to open the menu
- Select the Add Device command
- Choose an I/O slice from the list. In this example an 8 channel digital input is being selected.
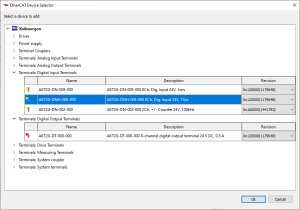
- Click OK
- The device is added to the EtherCAT node.
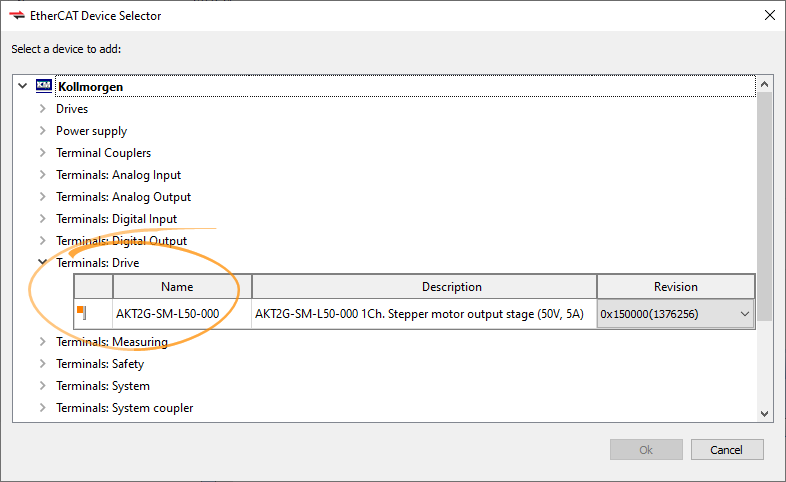
Add an AKT2G Stepper Drive
- In the Project Explorer, right-click the EtherCAT node to open the menu
- Select the Add Device command
- Open the Terminals:Drive group and choose a devicefrom the list.
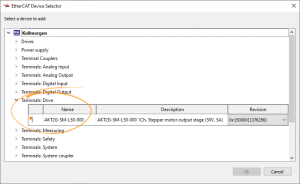
- Click OK
- The device is added to the EtherCAT node.
For more information see:
- AKT2G-SM-Lxx Stepper Drive I/O Tab
- AKT2G-SM-L15-000 for product information
- AKT2G-SM-L50-000 for product information
Add an AKT (K-Bus) I/O Coupler
-
- Select the Add Device command
(this option is only enabled when you are not connected to the controller) - Select the coupler and click Ok
- In the Project Explorer, right-click the coupler node and select the Rename command to change the name
- Click Ok
- The coupler is added to the EtherCAT node.
Add an AKT (K-Bus) I/O Slice
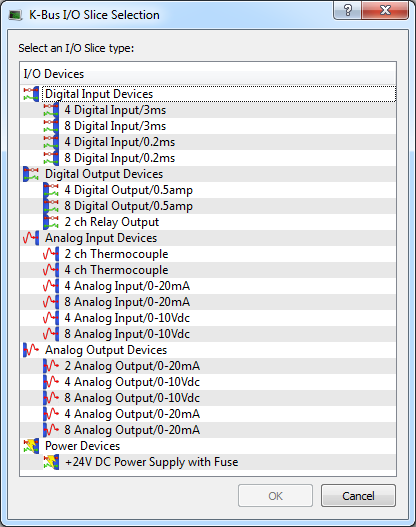
Configure the I/O Slice
For more details, refer to Map Input and Output to Variables


