


Part 1: Enable the Axis
Part 1 demonstrates how to enable an axis.
Assuming everything is ready for the axis/motor to be enabled (HW enable, STO, the basic drive and axis setup is complete such as motor, feedback, etc.), the status at the bottom of WorkBench will display following:

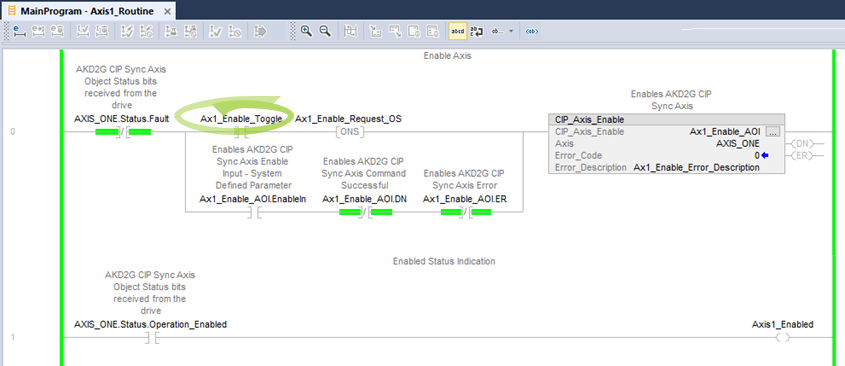
In Studio 5000, view the Axis1_Routine and note the CIP_Axis_Enable rung - this AOI is used to enable the axis. There is a normally open contact called Ax1_Enable_Toggle before the one-shot. In the Sample project this can be toggled when online to trigger the CIP_Axis_Enable AOI. This convention is followed throughout the Sample project.
To enable the axis:
-
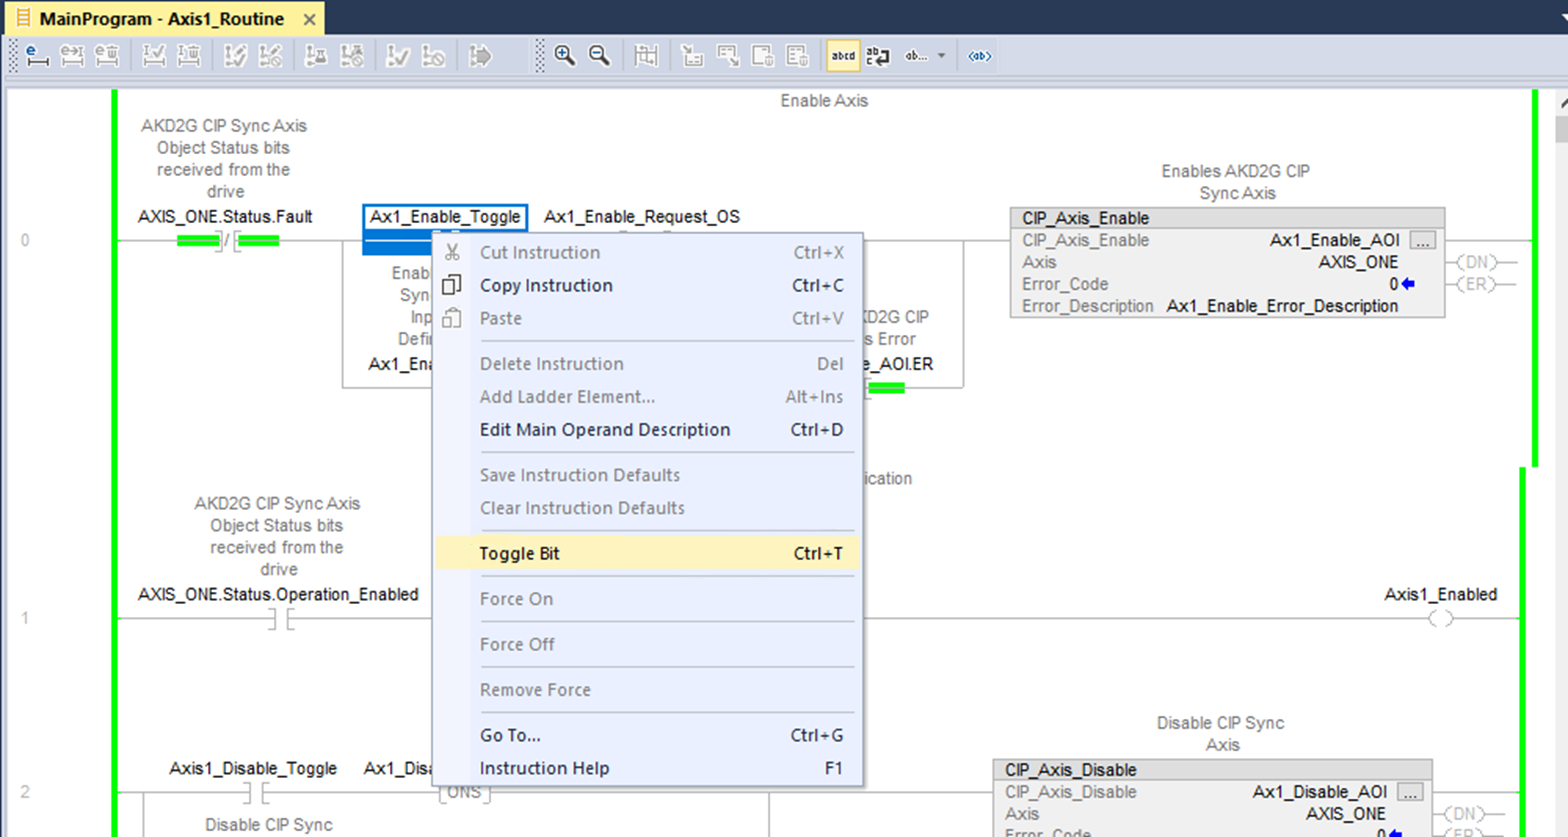
Right-click on the Ax1_Enable_Toggle normally open contact and select Toggle Bit to trigger the CIP_Axis_Enable AOI.
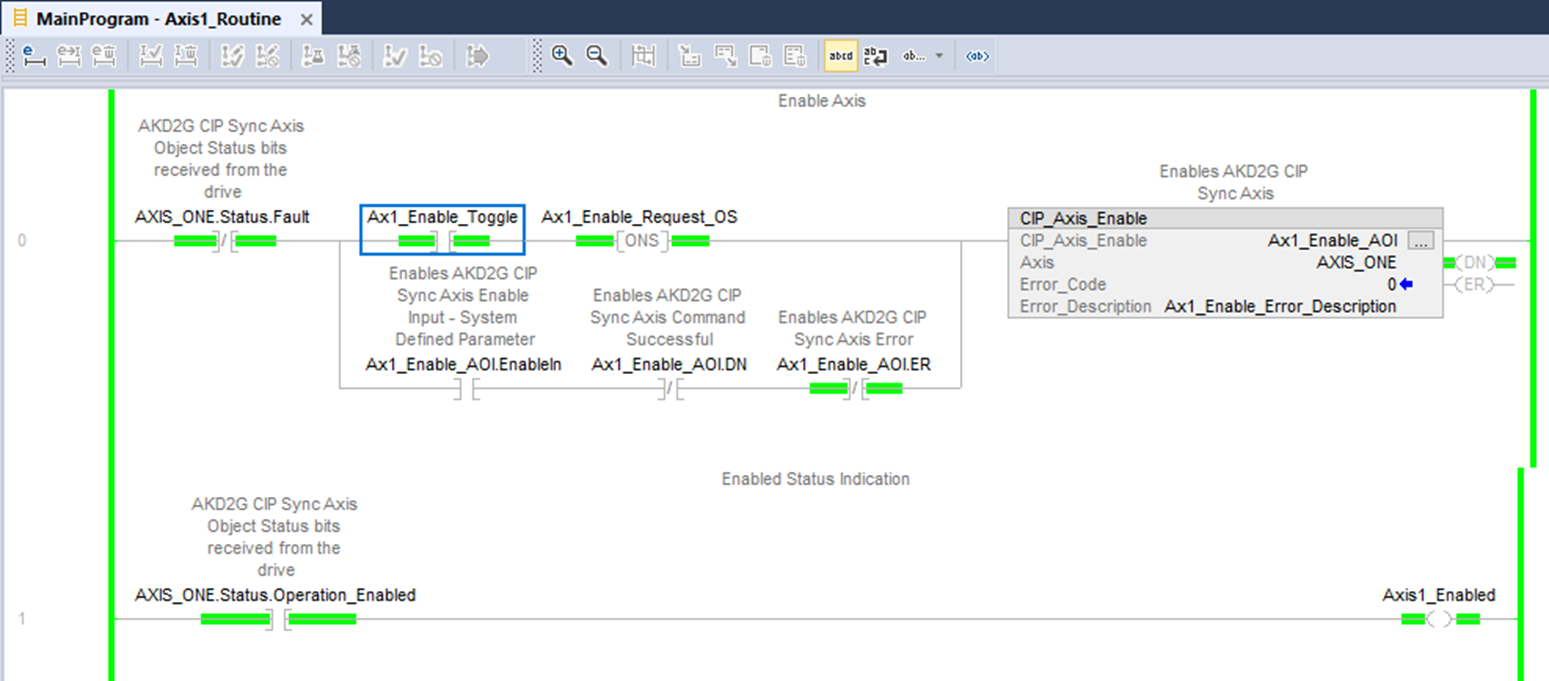
The .DN (Done) bit turns ON and the status Axis1_Enabled coil in the following rung turns ON. This is based on the axis’ state machine moving to the Operation Enabled state.
WorkBench now shows that Axis 1 was successfully enabled.
In WorkBench's Axis 1 Enable/Disable view, the Software Enable has turned ON (TRUE) and the Power Stage is ON.

The operation Enabled/Disabled status can also be viewed in the status output bits of the CIP_Axis_State_Machine AOI for Axis 1.
-
- The CIP_Axis_State_Machine can be viewed under MainProgram → MainRoutine_with_CIP_Axis_State_Machines.
The following axis status bits will be ON when the request to operation enable succeeds:
- AxisReadyToSwitchOn
- AxisSwitchedOn
- AxisOperationEnabled
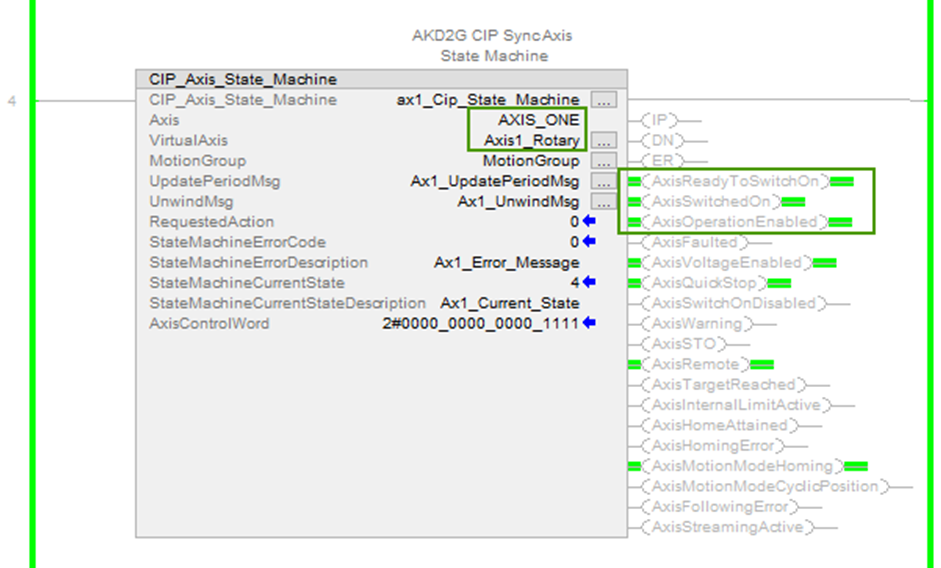
The Current State of the State Machine for Axis 1 can be viewed as a current state number in the StateMahineCurrentState field or as a string message when the cursor is hovered over the StateMachineCurrentStateDescription tag.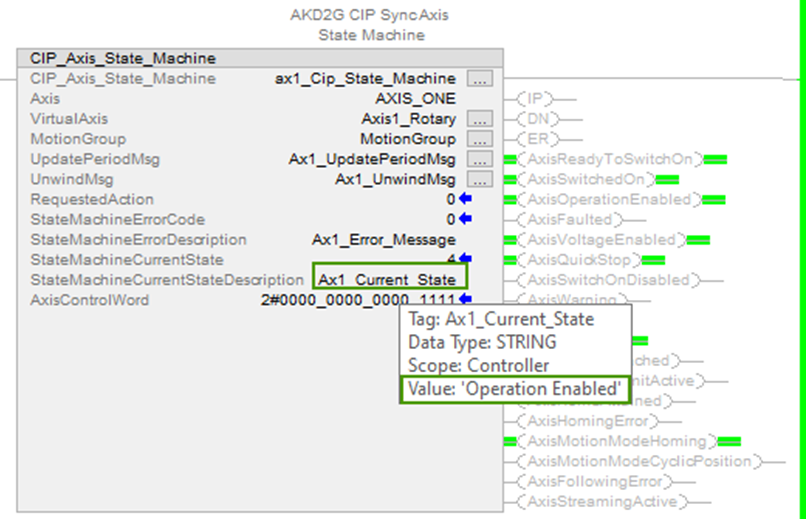
-
Toggle the Ax1_Enable_Toggle contact OFF before proceeding.


