


Part 4: Home the Axis
The following steps will guide the user through homing the axis.
Homing the Axis
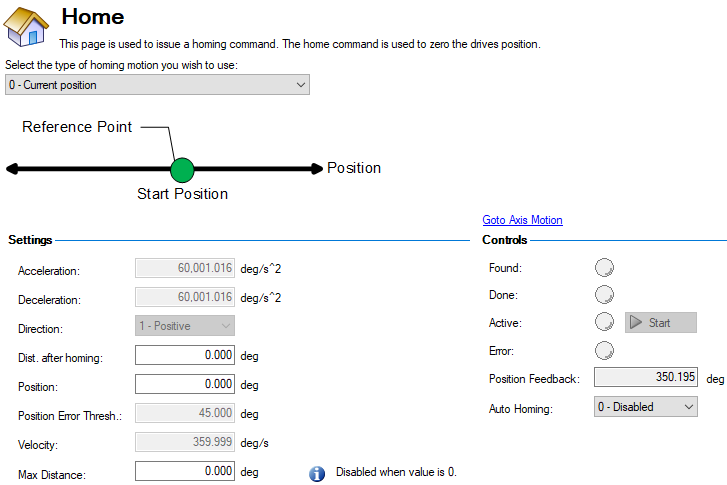
This Sample project assumes an empty motor and therefore will use the Current Position method to Home the axis.
Which method the axis uses to Home the axis is dependent on the:
-
Feedback type used on the motor
-
Homing Type the Axis is configured for
How the Axis is configured is up to the user, but this procedure is intended to establish communications between the PLC and AKD2G drive, get the user familiar with the logic and Sample project, and assumes an unloaded motor with nothing connected to its shaft, so Current Position was selected.
After re-enabling the axis, the CIP_Axis_Home AOI is triggered in the PLC. The AOI essentially performs the same operation from the PLC as selecting the Start button in WorkBench to start the Home move.
-
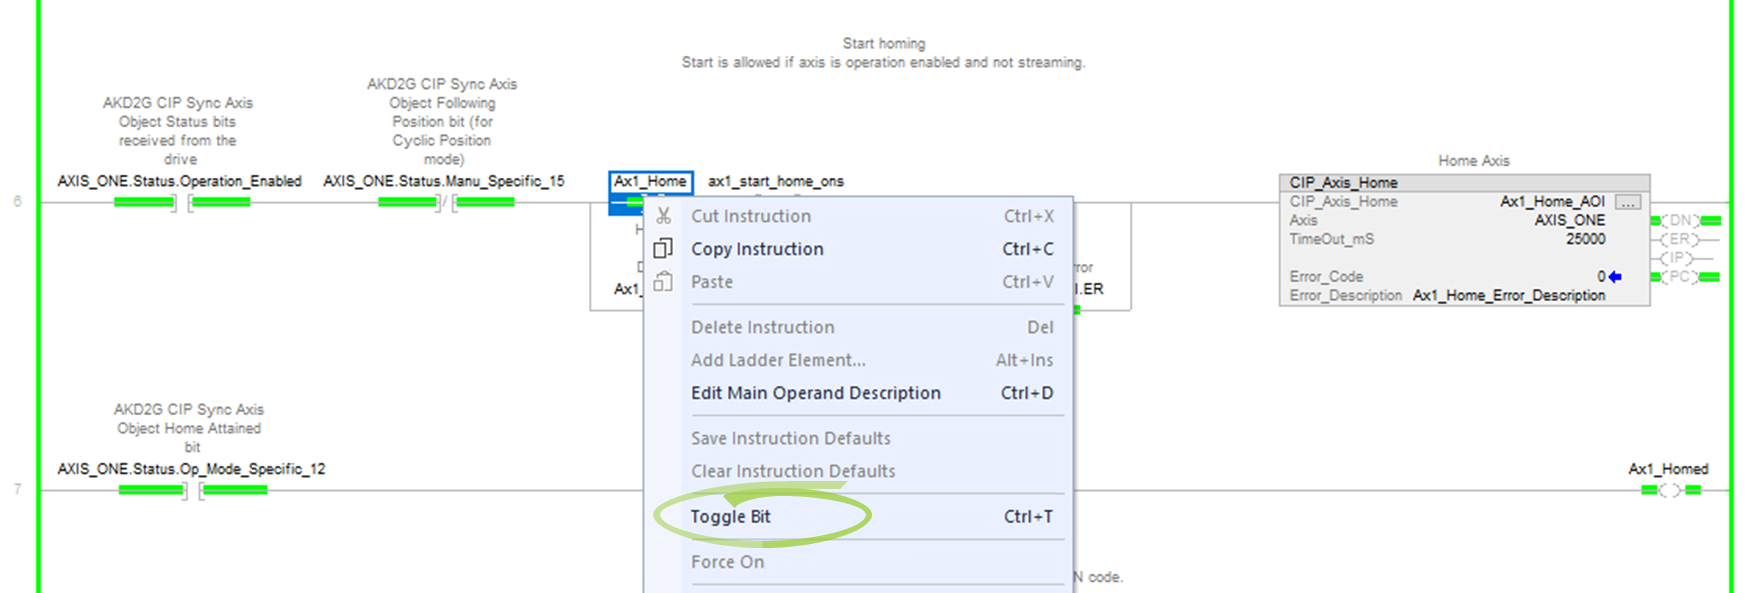
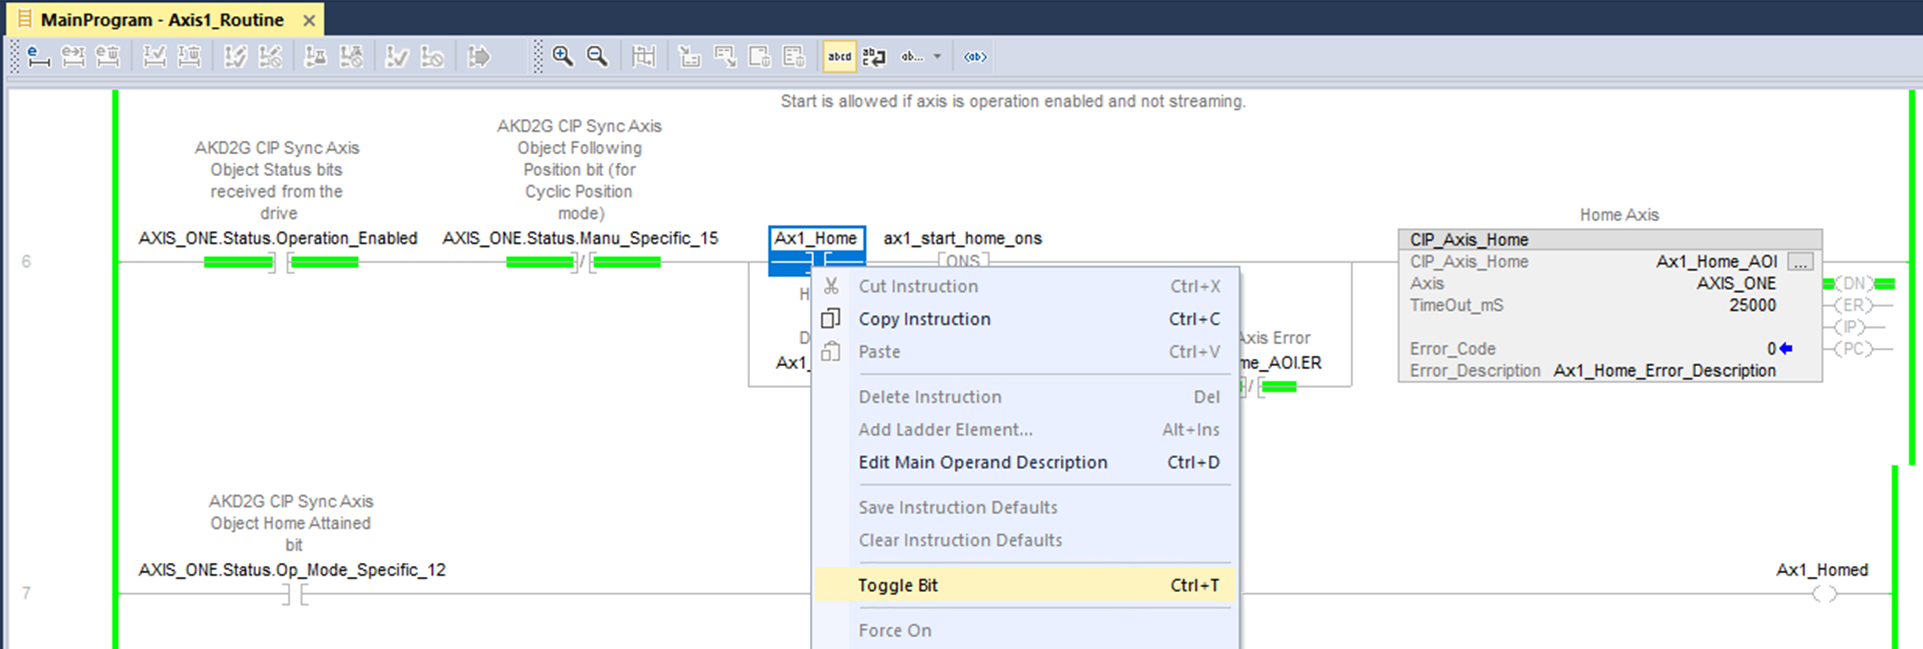
Right-click on the Ax1_Home normally open contact and select Toggle Bit.
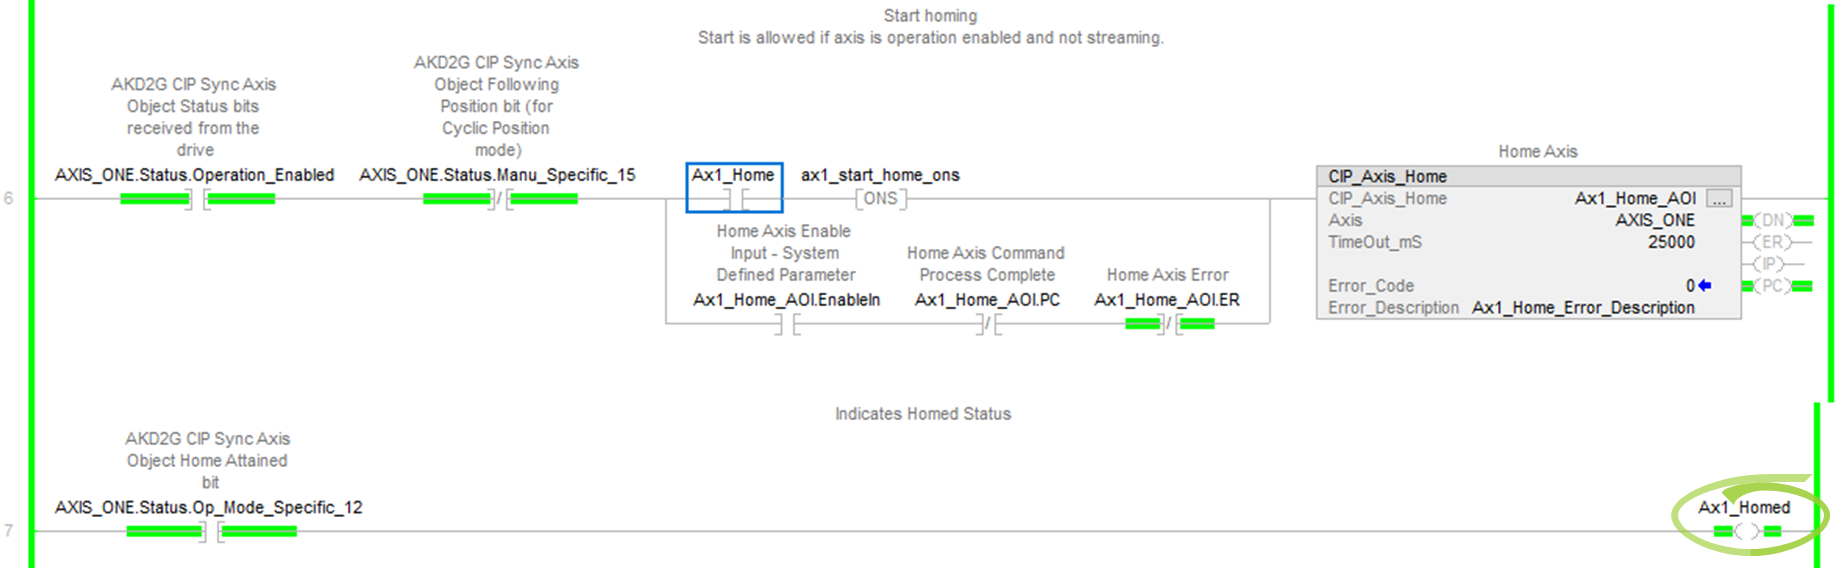
The .DN (Done) and .PC (Process Complete) bits turn ON and the Sample project displays the homed status using a coil named Ax1_Homed in the following rung based on the Home Attained status bit.
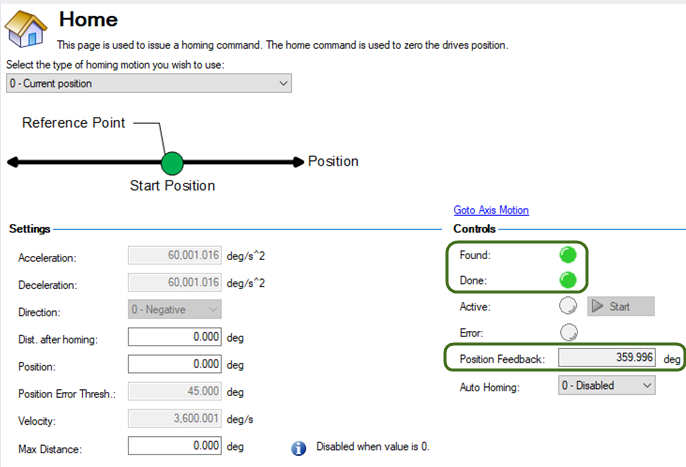
Using WorkBench to Verify the drive is Homed
In the Home view under Settings in the project tree, the Found and Done lamps are illuminated and the Position Feedback indicates 0 or 360 degrees (note Modulo was enabled per the Preliminary Setup with a rollover point at 0,360).
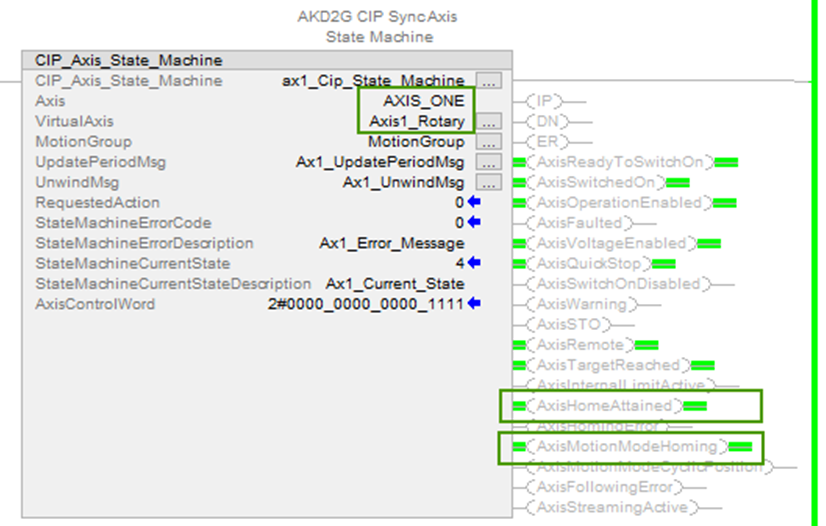
The (AxisHomeAttained / Homed) status can also be viewed in the status output bits of the CIP_Axis_State_Machine AOI for Axis 1.
-
- The CIP_Axis_State_Machine can be viewed under MainProgram → MainRoutine_with_CIP_Axis_State_Machines.
-
The AxisMotionModeHoming status bit turns ON when the command to Home is acknowledged.
-
The AxisHomeAttained axis status bit will be ON when the CIP_Axis_Home AOI completes.
-
Toggle the Ax1_Home contact OFF before proceeding.