Touch Probe Example
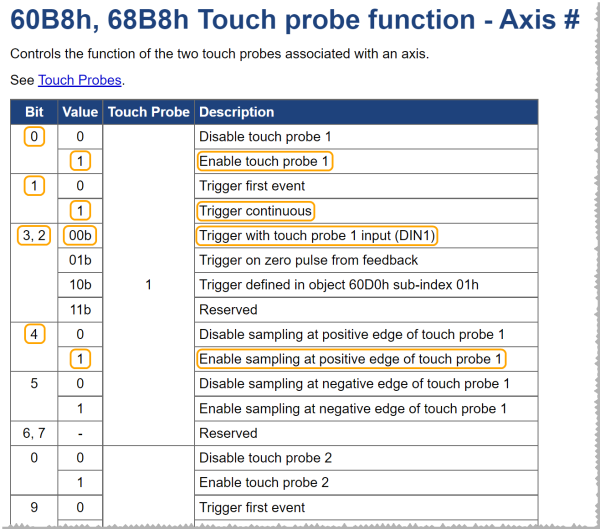
Use Touch Probe 1 - Axis 1 to continuously sample on the positive edge of Digital Input 1.
- Enable Touch Probe 1 by setting object 60B8h bit 0 = 1.
- Configure Touch Probe 1 for continuous trigger by setting object 60B8h bit 1 = 1.
- Configure the source for Touch Probe 1 as digital input 1 by setting object 60B8h bit 2 = 0 and bit 3 = 0. (This can also be configured using object 60D0h sub-index 1.)
- Arm Touch Probe 1 by setting object 60B8h bit 4 = 1.
These control bit settings come to a value of 19 dec (0x0013).
60B0h, 68B0h Position offset - AxisX
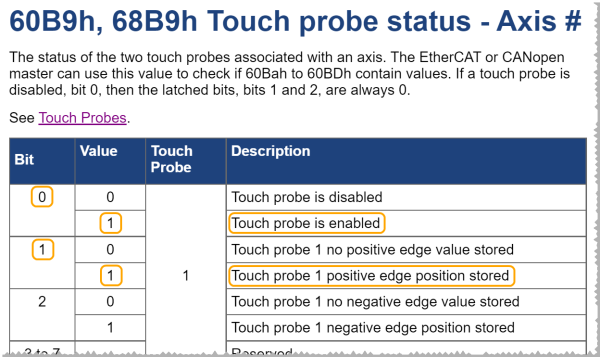
The touch probe status changes to a value of 1 indicating the touch probe is enabled (armed).
-
- When a previous touch probe positive position value is store and touch probe status bit 1 = 0, it means that the touch probe was disabled after the position value was stored. The touch probe can be re-enabled and the status bit 1 will still be zero. The status bit 1 will only change to 1 when a new positive position value is stored.
On the rising edge of DIN1 the status changes from 1 to 3 (status bits 0 and 1) indicating Touch Probe 1 is enabled and a new positive edge position is stored. The new Touch Probe 1 - Axis 1 positive edge value is shown.
60B9h, 68B9h Touch probe status - AxisX


