Migrate from an AKD PDMM / PCMM (PxMM) to a PCMM2G Controller
This procedure is used to:
- Replace replacing an existing PxMM controller with a PCMM2G controller.
- Migrate the associated KAS project.
-
-
- This procedure is intended for users familiar with PxMM controllers.
-
Starting with KAS v5.00, support for PxMM controllers is discontinued.
-
KAS v4.05 is the last officially supported KAS release for these controllers.
-
Migration Overview
These are the basic steps to complete the migration from a PxMM to PCMM2G controller:
Prepare for Migration
Before migration, download the required software and create a backup of your project.
Download the Required Software
- Download and install the latest KAS-IDE.
- See KAS-IDE Distribution.
- Registration and login is required for this site.
- Download the latest PCMM2G firmware.
- Optional: Identify the firmware version running on the existing PxMM controller.
- Install the corresponding KAS-IDE version.
- Installing the matching KAS-IDE version is only required if you plan to transfer retained variables values from the existing PxMM controller to the new PCMM2G controller.
Backup the Project
Before making any changes, create a backup copy of the existing .KAS project.
This backup preserves the original project and provides a recovery point, if needed, during migration.
Optional: Prepare the Existing .KAS Project for Retained Variable Transfer
This procedure prepares the existing PxMM controller so retained variable values can be transferred to the PCMM2G controller during migration.
-
-
- Skip this section if transferring retained variable values is not required.
Procedure
- Start the KAS-IDE version that matches the firmware installed on the existing PxMM controller.
See Start the KAS-IDE. - Open the existing project:
- Select File > Open.
- Browse and open the .KAS project.
- Enable the PLC Variable Remote Access:
- In the Project View panel, right-click Controller and select Properties.
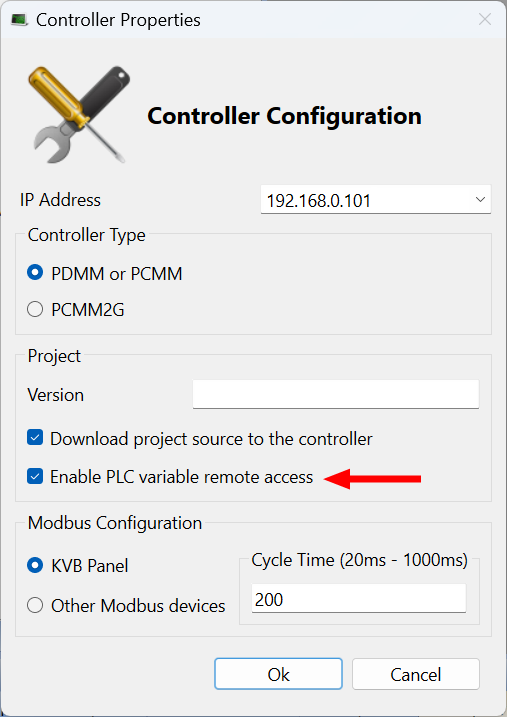
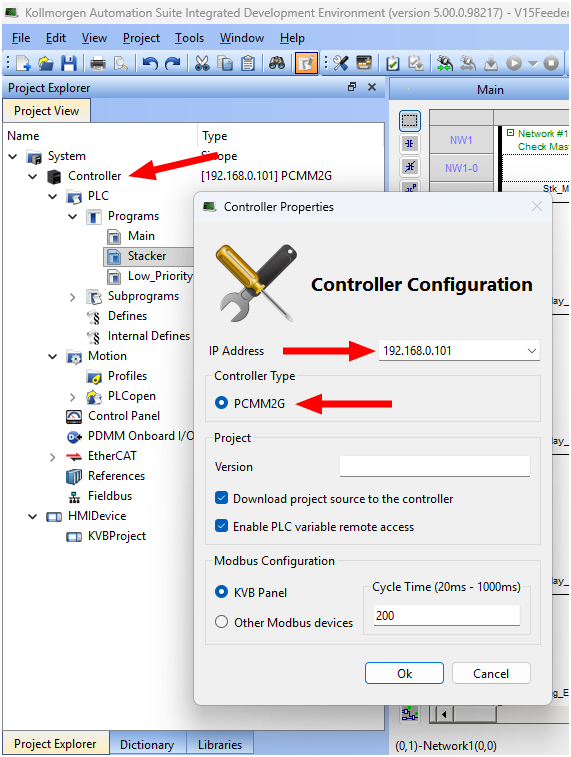
The Controller Properties dialog box opens. - Select the Enable PLC Variable Remote Access check box. (Figure 1)
- Why is this required?
- Enabling PLC Variable Remote Access allows retained variable values to be read from the existing controller and transferred to the PCMM2G during the migration process.
- Why is this required?
- Click OK to save the changes or selections and close the dialog box.
- In the Project View panel, right-click Controller and select Properties.
- On the toolbar, click the Connect button (
 ) to establish connection with the target controller.
 - Compile the project.
- Download the .KAS project to the PxMM controller.
- Run the project and verify it operates as expected.
- Save the verified project.
- Continue with PCMM2G Hardware Preparation.
PCMM2G Hardware Preparation
Use this procedure to physically install and power the PCMM2G controller.
Procedure
 Click to view the PCMM2G Hardware Connections
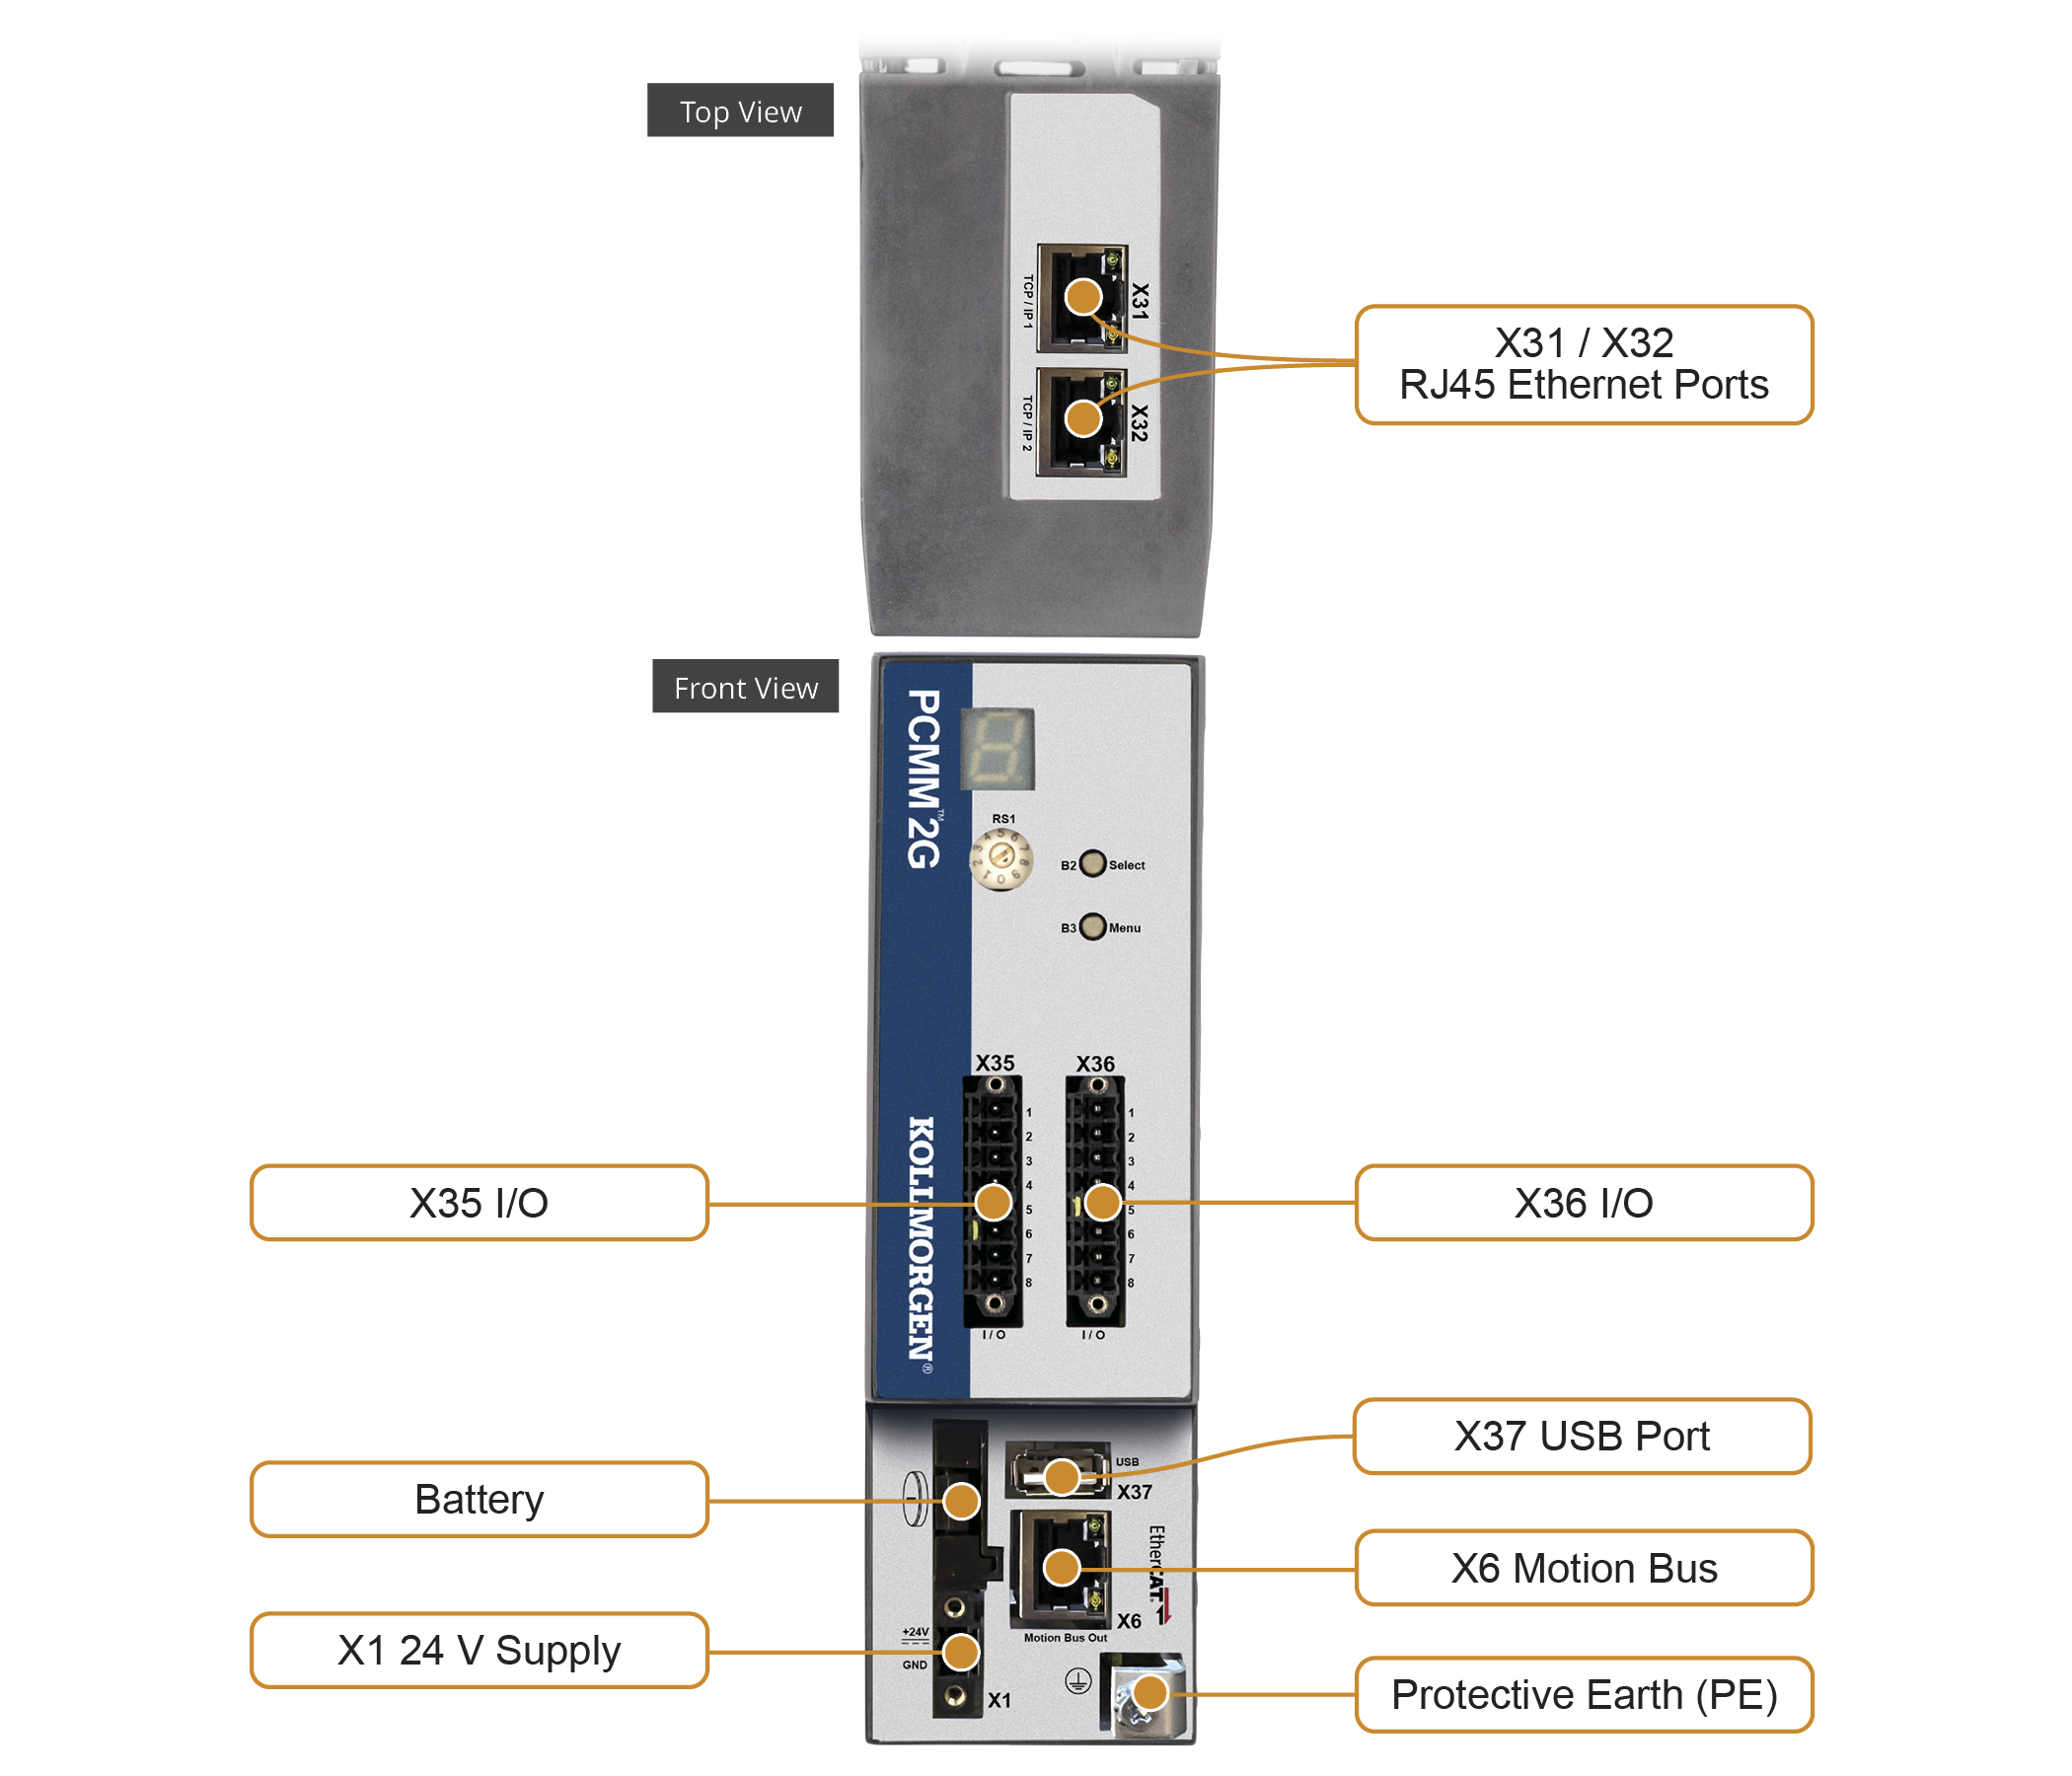
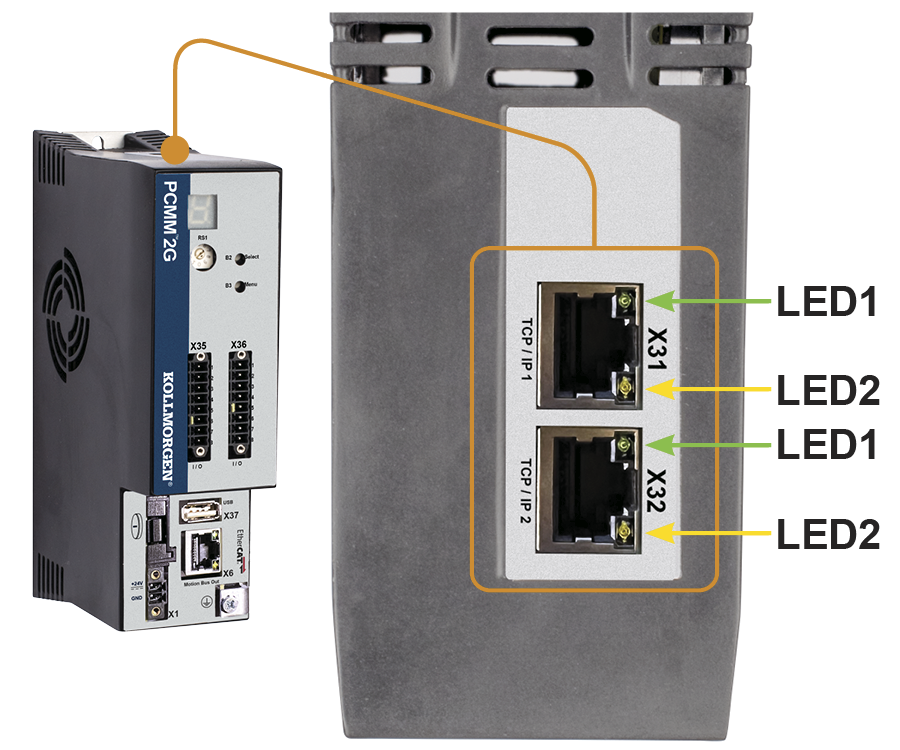
Figure 2: PCMM2G Hardware Connections
- Verify the PCMM2G is turned off.
- PCMM2G-specific settings:
- Connect the service interface (X31 or X32) of the PCMM2G to an Ethernet interface on the PC directly or use a
network hub/switch.
Use standard Cat. 5e / Cat. 6 Ethernet cables for connection. - Insert the USB flash drive into X37.
- Connect the service interface (X31 or X32) of the PCMM2G to an Ethernet interface on the PC directly or use a
network hub/switch.
- Hardware settings are similar to the PxMM:
- Set the Rotary Switch RS1 to the applicable position.
See the PCMM2G Installation Manual for additional setup information. - Move these cables from the PxMM to the PCMM2G:
- X35 and X36 I/O port.
- X6 EtherCAT Motion Bus port.
- Attach a 24 VDC power supply connection to X1 to power on the PCMM2G.
The PCMM2G Boot Sequence starts.
- Set the Rotary Switch RS1 to the applicable position.
- Confirm the X31 or X32 indicator on the PCMM2G are green.
- Continue with PCMM2G Configuration.
PCMM2G Configuration
Use this procedure to configure the controller and update it to the required firmware version.
Procedure
- Download the latest PCMM2G firmware from the KSN page here: KSN Downloads - PCMM2G Firmware.
- Identify the PCMM2G's IP address.
See View the Controller IP Address. - Open a web browser and enter the controller's IP address.
The PCMM2G's Web server opens. - Click the LOGIN link at the top of the window.
- Enter the password to log in.
The factory default password isadministrator.
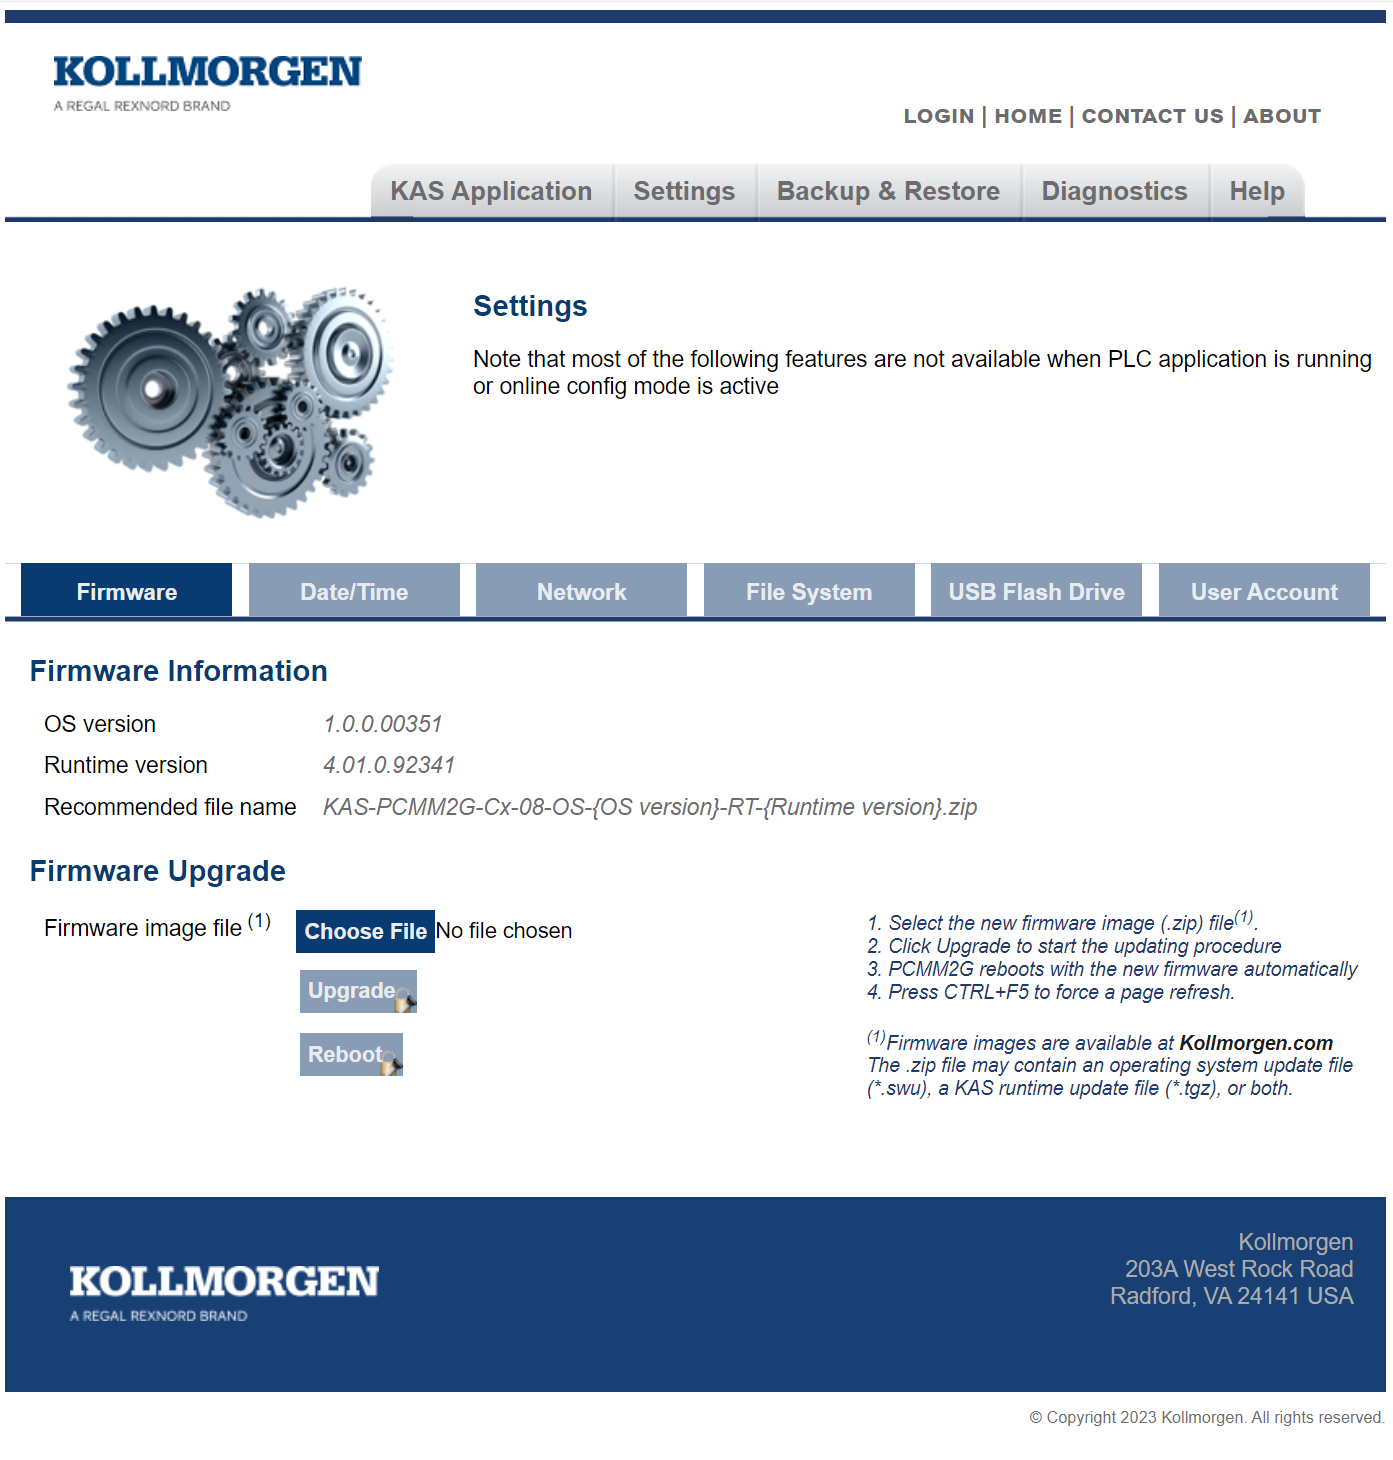
This can be changed after logging in. - Click the Settings tab. (Figure 3)
- On the Firmware tab, complete the Upgrade the Controller's Firmware procedure.
- On the Date/Time tab, edit the date, time, and time zone.
- By default, the controller uses an NTP server for time synchronization.
- The Date/Time can be manually changed using the Update Date/Time procedure.
- A Time Zone must be assigned to the PCMM2G.
- If the PCMM2G Rotary Switch RS1 is set to 1, use the Network tab to manually define the IP address.
- Continue with Migrate the .KAS Project.
Notes about the Date/Time tab
Migrate the .KAS Project
Use this procedure to convert and run the PxMM project on the PCMM2G.
Procedure
- Start the KAS-IDE version that matches the firmware installed on the PCMM2G controller.
- In the KAS-IDE, click File > Open to search for and open the .KAS project saved in the Prepare for Migration procedure.
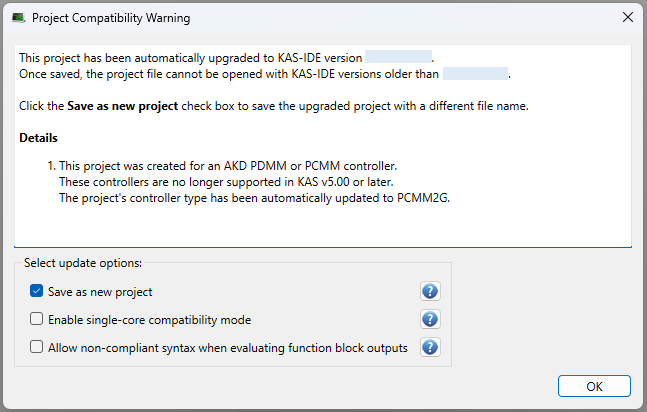
The Project Compatibility Warning dialog box opens. (Figure 4) - In the dialog box, configure the applicable update options.
- Optional (but recommended): Accept the default selection of the Select Save as new project check box to make a copy of the newly converted project.
- This preserves the original project file.
- If this check box is selected, the Project Save-As dialog box opens.
- You are prompted to specify the file location and name for the updated project.
- Select the Enable Single-Core Compatibility Mode check box if:
- The application does not follow multi-core controller programming guidelines.
- Reduced performance on the PCMM2G is acceptable for the application.
The limitations listed in Single-Core Compatibility Mode are acceptable.
- Select the Allow non-compliant syntax to evaluate function block outputs check box if:
- The application was developed using a version of KAS earlier than v4.00.
- You prefer not to update the KAS project to use compliant syntax for the corresponding function blocks.
- Click OK to save the changes or selections and close the dialog box.
- Optional (but recommended): Accept the default selection of the Select Save as new project check box to make a copy of the newly converted project.
- Optional: Transfer the retained variables values from the existing PxMM controller:
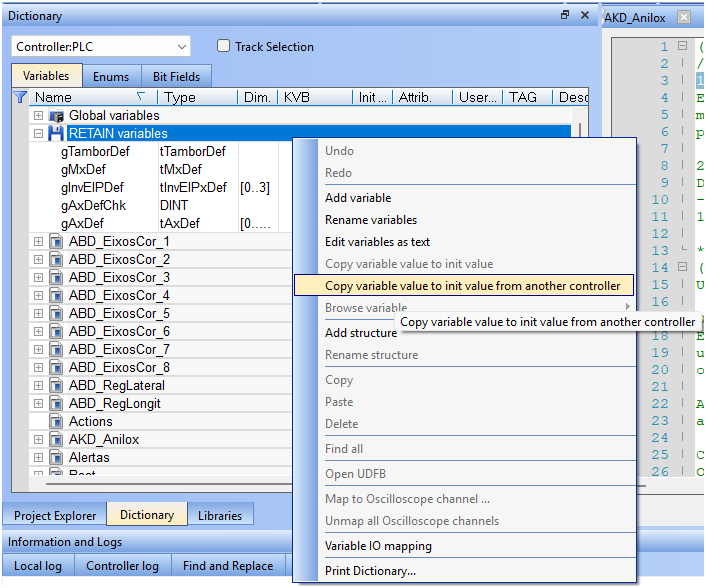
- Open the Dictionary view and select the Variables tab.
- Right-click RETAIN variables and select Copy variable value to init values from another controller. (Figure 5)
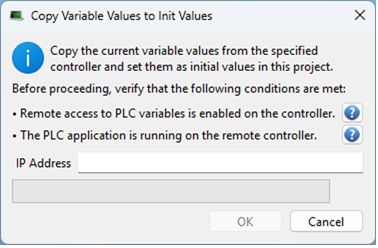
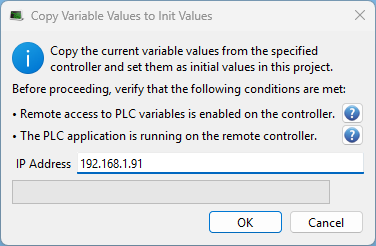
- In the dialog box, enter the IP address of the existing PxMM controller. (Figure 7)
- The source PxMM controller must be online and PLC Variable Remote Access must be enabled.
- Click OK to save the changes or selections and close the dialog box.
The transfer starts.
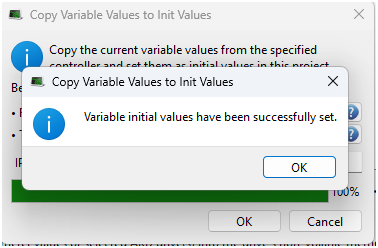
A confirmation message appears. (Figure 8) - Click OK to close the confirmation message and dialog box.
The Copy Variable Values to Init Values dialog box opens. (Figure 6)
When the operation completes successfully, the retrieved retained variables values are stored as initial values in the project.
- Update the Project Controller settings:
- In the Project View panel, right-click Controller and click Properties.
The Controller Properties dialog box opens. (Figure 1) - In the IP address drop-down, enter the PCMM2G IP address.
- Click OK to save the changes or selections and close the dialog box.
- In the Project View panel, right-click Controller and click Properties.
- Connect to the PCMM2G:
- On the toolbar, click the Connect button () to establish connection with the target controller.
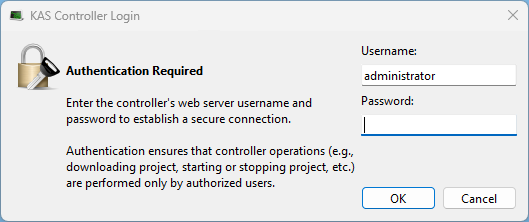
An KAS Controller Login dialog box opens. (Figure 10) - Enter the PCMM2G Web server Username and Password to authenticate the connection.
The default password isadministrator. - Click OK to save the changes or selections and close the dialog box.
The KAS-IDE connects to the controller.
- On the toolbar, click the Connect button (
- Build and validate the application:
- Compile the project.
- Download the .KAS project to the PxMM controller.
- Run the project and verify it operates as expected.
- If retained variable values were copied from the existing PxMM controller, perform a Cold Start to initialize the application using the transferred values.
- To perform a Cold Start:
- Click the Start button drop-down.
- Select Cold Start – Use Initial values for retain variables. (Figure 11)
- Save the migrated .KAS project.
- Create a backup: After successful validation, use the Web server to complete the PCMM2G Controller and EtherCAT Devices Backup procedure.

Migration Tips
- Always keep a working PxMM backup.
- Start with the Single-Core Mode when migrating legacy applications.
- After validation, optimize the application for multi-core execution (if applicable).
- Verify the operation at each stage before continuing to the next step.
Migration Validation Checklist
Before considering migration complete, verify these are completed:
o The migrated project compiles without errors.
o The project downloads successfully to the PCMM2G controller.
o Retained variable values transferred correctly (if applicable).
o EtherCAT devices reach Operational state.
o I/O functions correctly.
o Motion functions operate as expected.
o Date, time, and network settings are configured.
o Controller and EtherCAT backups have been created.
o The application has completed a full operational test cycle successfully.


