Install the SSL Server Certificate (Self-Signed)
-
-
This procedure is only for PCMM2G controllers.
The Secure Sockets Layer (SSL) certificate is a file stored on the PCMM2G that enables encrypted connections (HTTPS).
- The SSL certificate is only applicable to PCMM2G.
- By default, the PCMM2G contains a certificate generated by Kollmorgen.
- The web browser shows a warning message when the connection is not secure.
- To prevent this warning, the default certificate should be replaced by creating a new certificate in the Security tab.
- This certificate must be downloaded and installed onto the PC connected to the PCMM2G.
- This user-created certificate is assigned to the PCMM2G's IP address.
- The certificate becomes invalid if this IP address is modified.
Certificate Expiration Period
- The certificate expiration period is set by the user.
- Kollmorgen recommends 365 days.
- When the expiration period is over, the certificate becomes invalid.
- The user must create and install a new certificate to prevent security warnings.
Installation Procedure
Assumptions
The PCMM2G is connected to the router or laptop.
See the PCMM2G Installation Manual.
-
- The images in this procedure are from the Microsoft® Edge browser.
Other browsers have different options.
It's recommended to have only one instance of the web browser open for this procedure.
-
-
- The self-signed SSL Certificate generated from this procedure can be used by the OPC UA Server to enable encrypted and authenticated data exchange between OPC UA clients and the PCMM2G controller.
- See OPC UA - Create New Driver Configuration for setup instructions.
Procedure
- Open a web browser.
- Enter the controller's IP address for the URL.
The default IP address for the PCMM2G is 192.168.0.101.
A connection message appears. - Click the Advanced button.
Additional information about the connection appears. - Click the Continue to (IP address) (unsafe) link.
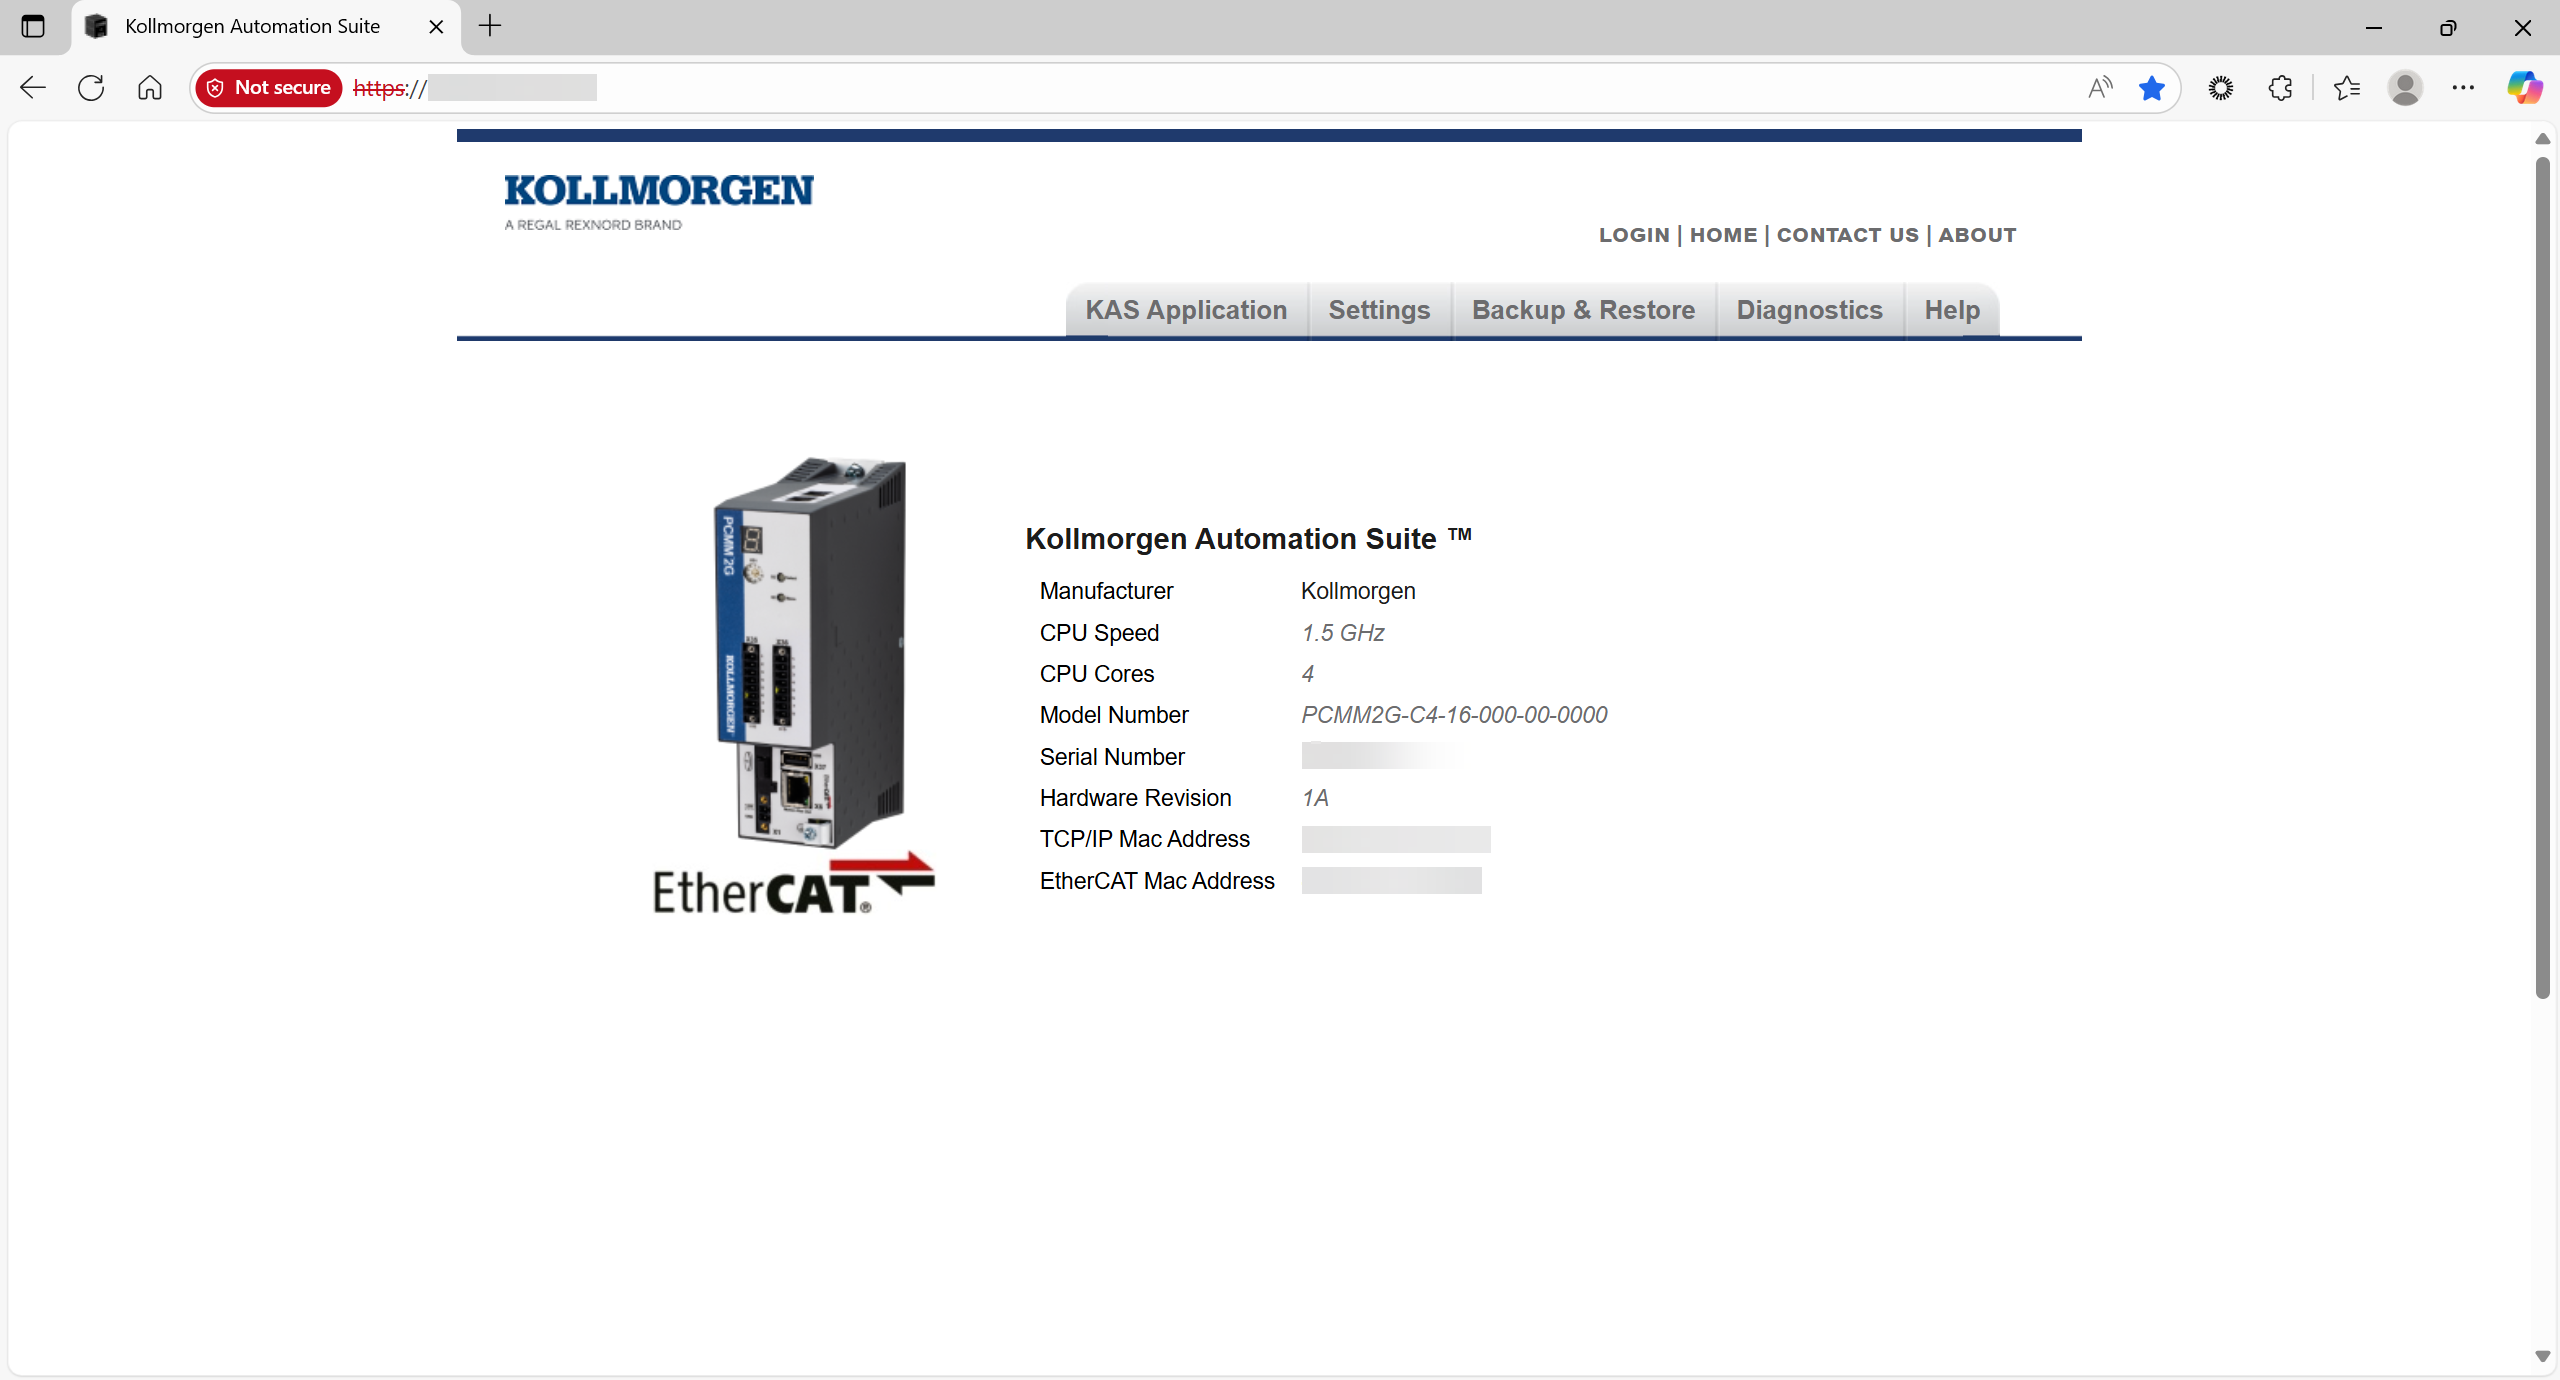
The Web server opens for the PCMM2G. - Login to the PCMM2G.
See User Authentication. - Click the Settings tab.
- Click the Certificates tab.
- In the Create SSL Server Certificate (Self-Signed) area:
- Click OK to continue.
The SSL certificate successfully created message appears. - Click OK to reboot the controller.
A rebooting message appears. - Wait for the Disconnected message to appear.
- Refresh the browser.
The connection message reappears. - Click the Advanced button again.
Additional information about the connection reappears. - Click the Continue to (IP address) (unsafe) link.
The Web server opens for the PCMM2G.
The PCMM2G shows it is Not secure. - Click the Not secure button and click the Your connection to this site isn't secure option.
- In the message header, click the Show certificate button.
- Click the Details tab.
- Click the Export button.
The Save As dialog opens. - Select a folder to save the .crt file.
This example procedure uses the Downloads folder. - Click the Save button.
The Save As dialog closes and the Details tab returns. - Use Windows® Explorer to locate and select the .crt file.
- The .crt file name is the PCMM2G's IP address.
Example: 192.168.0.101.crt.
- The .crt file name is the PCMM2G's IP address.
- Right-click the file and click the Install Certificate option.
- Accept the default on the Welcome page and click Next.
The Certificate Store page opens. - Select the Place all certificates in the following store option.
- Click the Browse... button.
The Select Certificate Store dialog opens. - Select the Trusted Root Certification Authorities certificate store.
- Click OK to save the changes or selections and close the dialog box.
The Certificate Store page returns and shows the selected Certificate store. - Click Next.
The Completing the Certificate Import Wizard page opens. - Click Finish.
A Security Warning dialog opens. - Click Yes to install this certificate.
The Certificate Import Wizard - The import was successful message appears. - Click OK to continue.
The Certificate Import Wizard - Details tab returns. - Close the wizard.
The connected PCMM2G Web server page returns. - Close the web browser.
- Verify ALL web browser windows are closed.
- Open a new web browser instance and use the URL to connect to the Web server.
The PCMM2G shows it is secure. - Click the Secure button.
- Click the Connection is secure option.
- Click the Settings tab.
- Click the Certificates tab.
The SSL Server Certificate Details area shows the Status and expiration date.

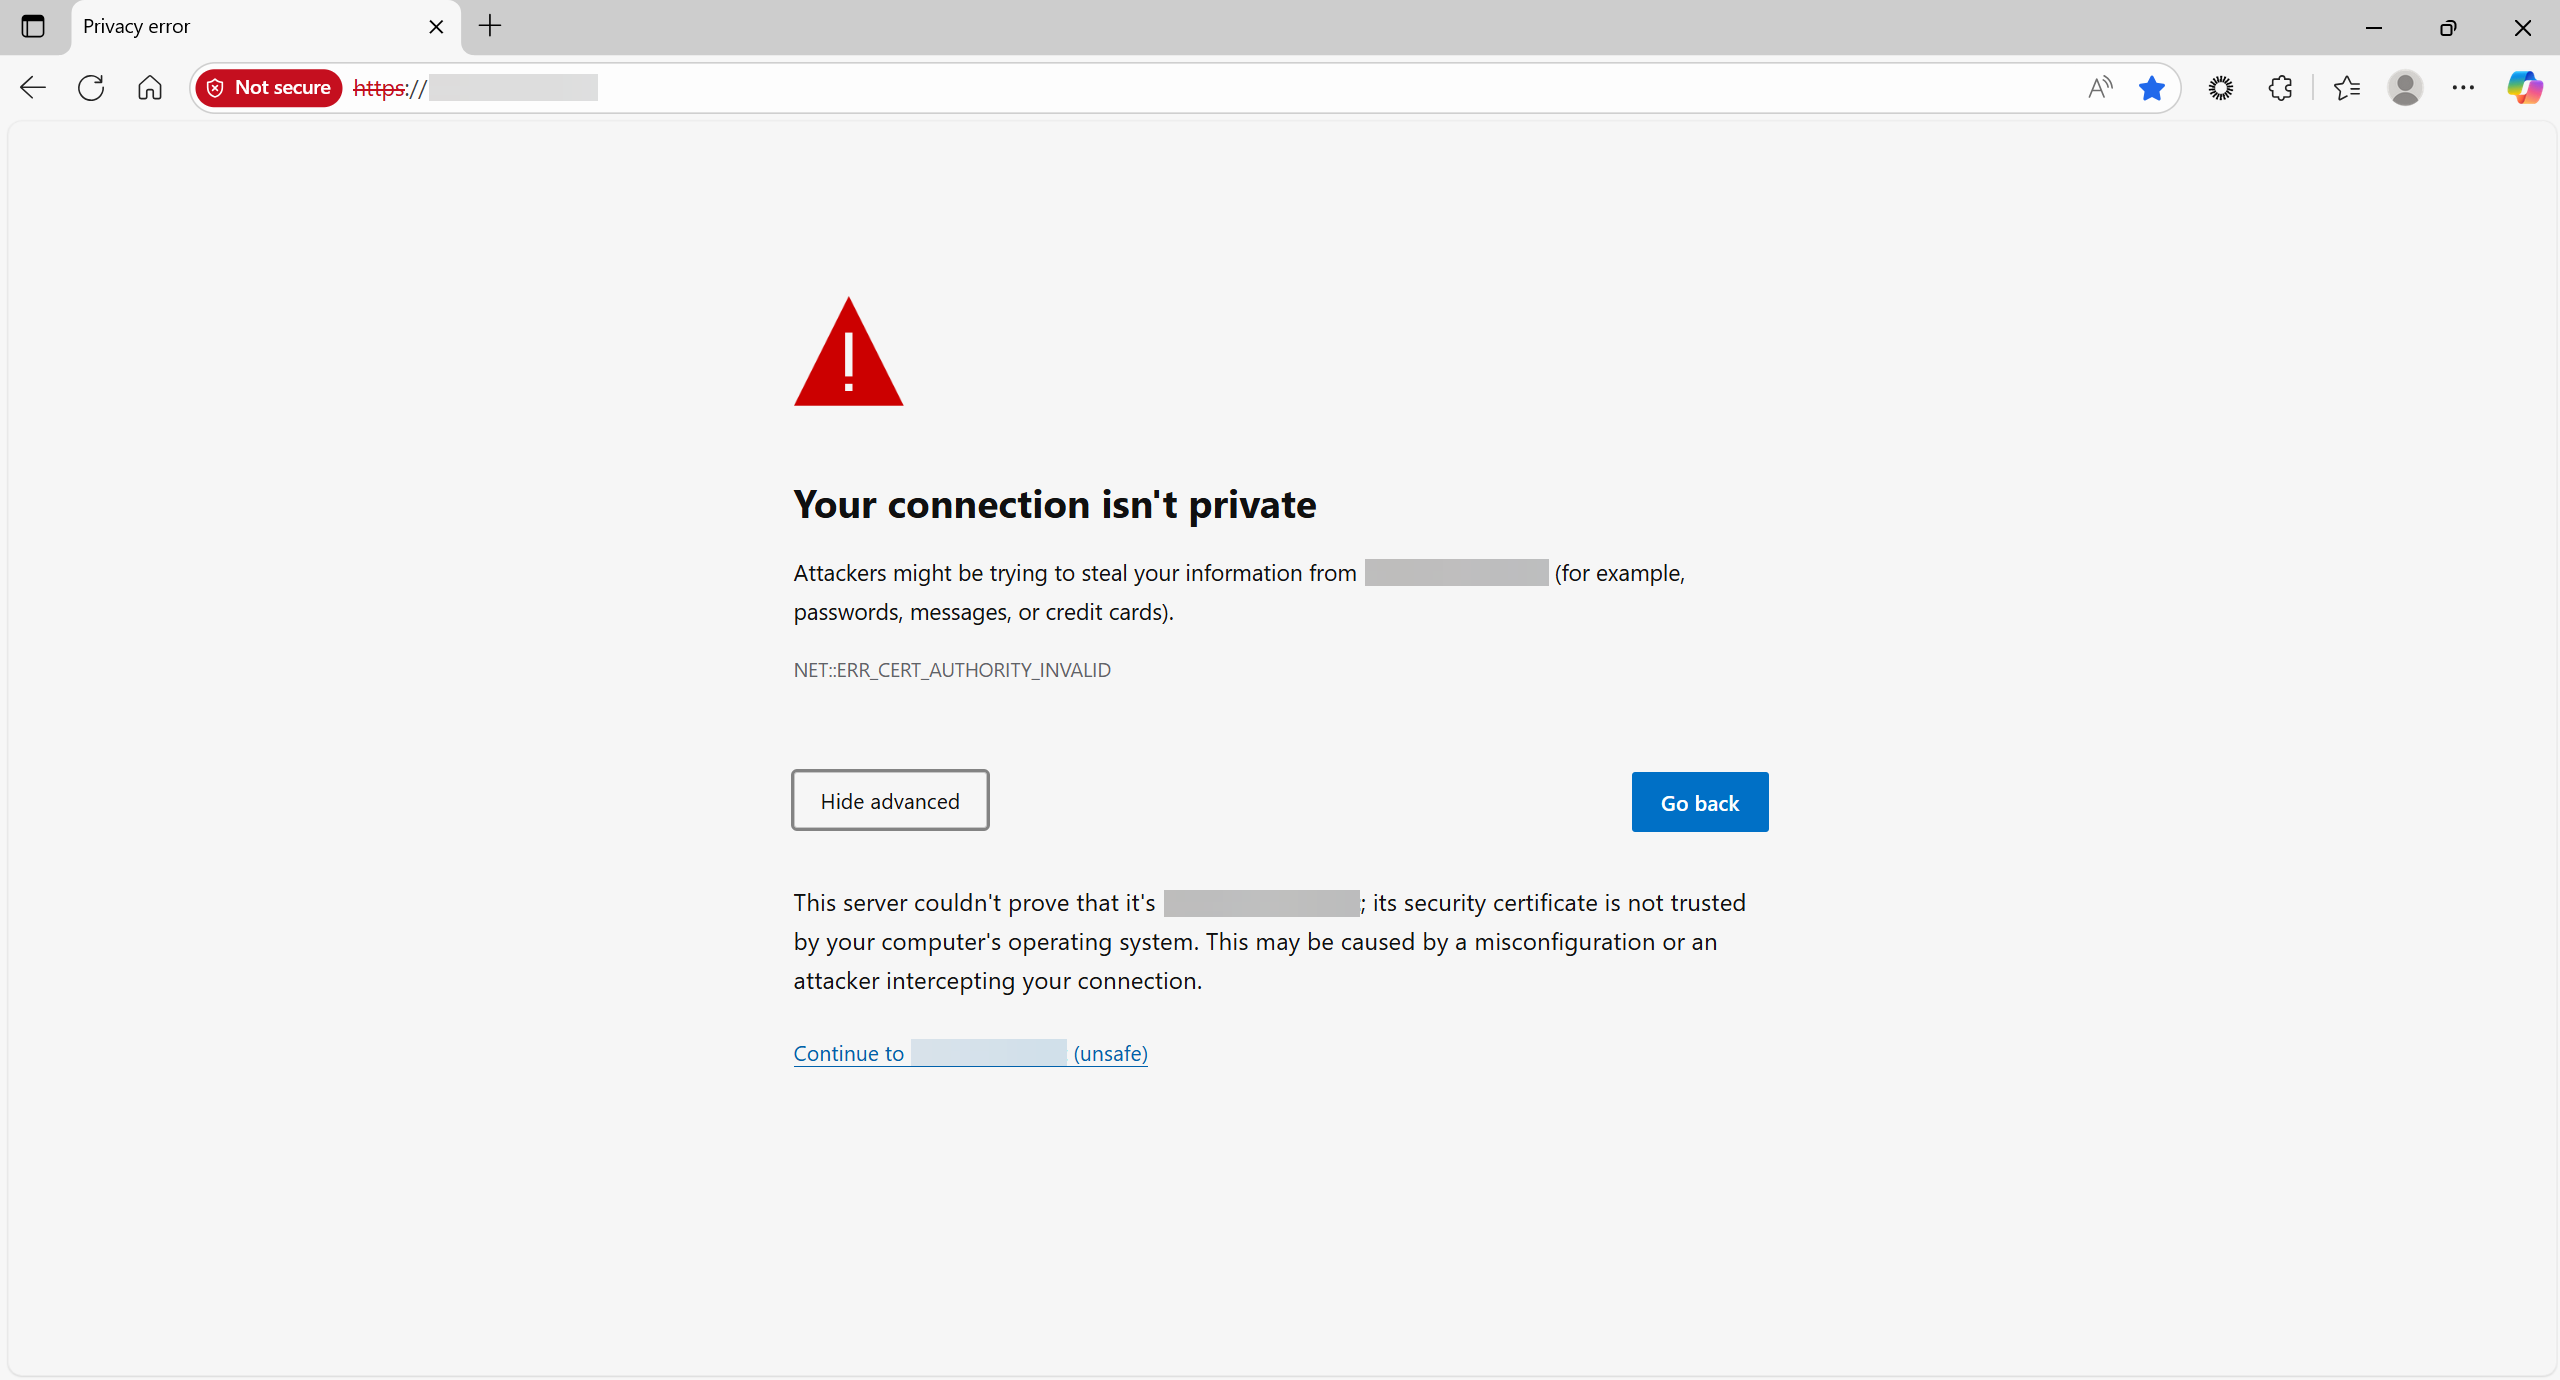
Figure 2: Connection message - Advanced information
![]()
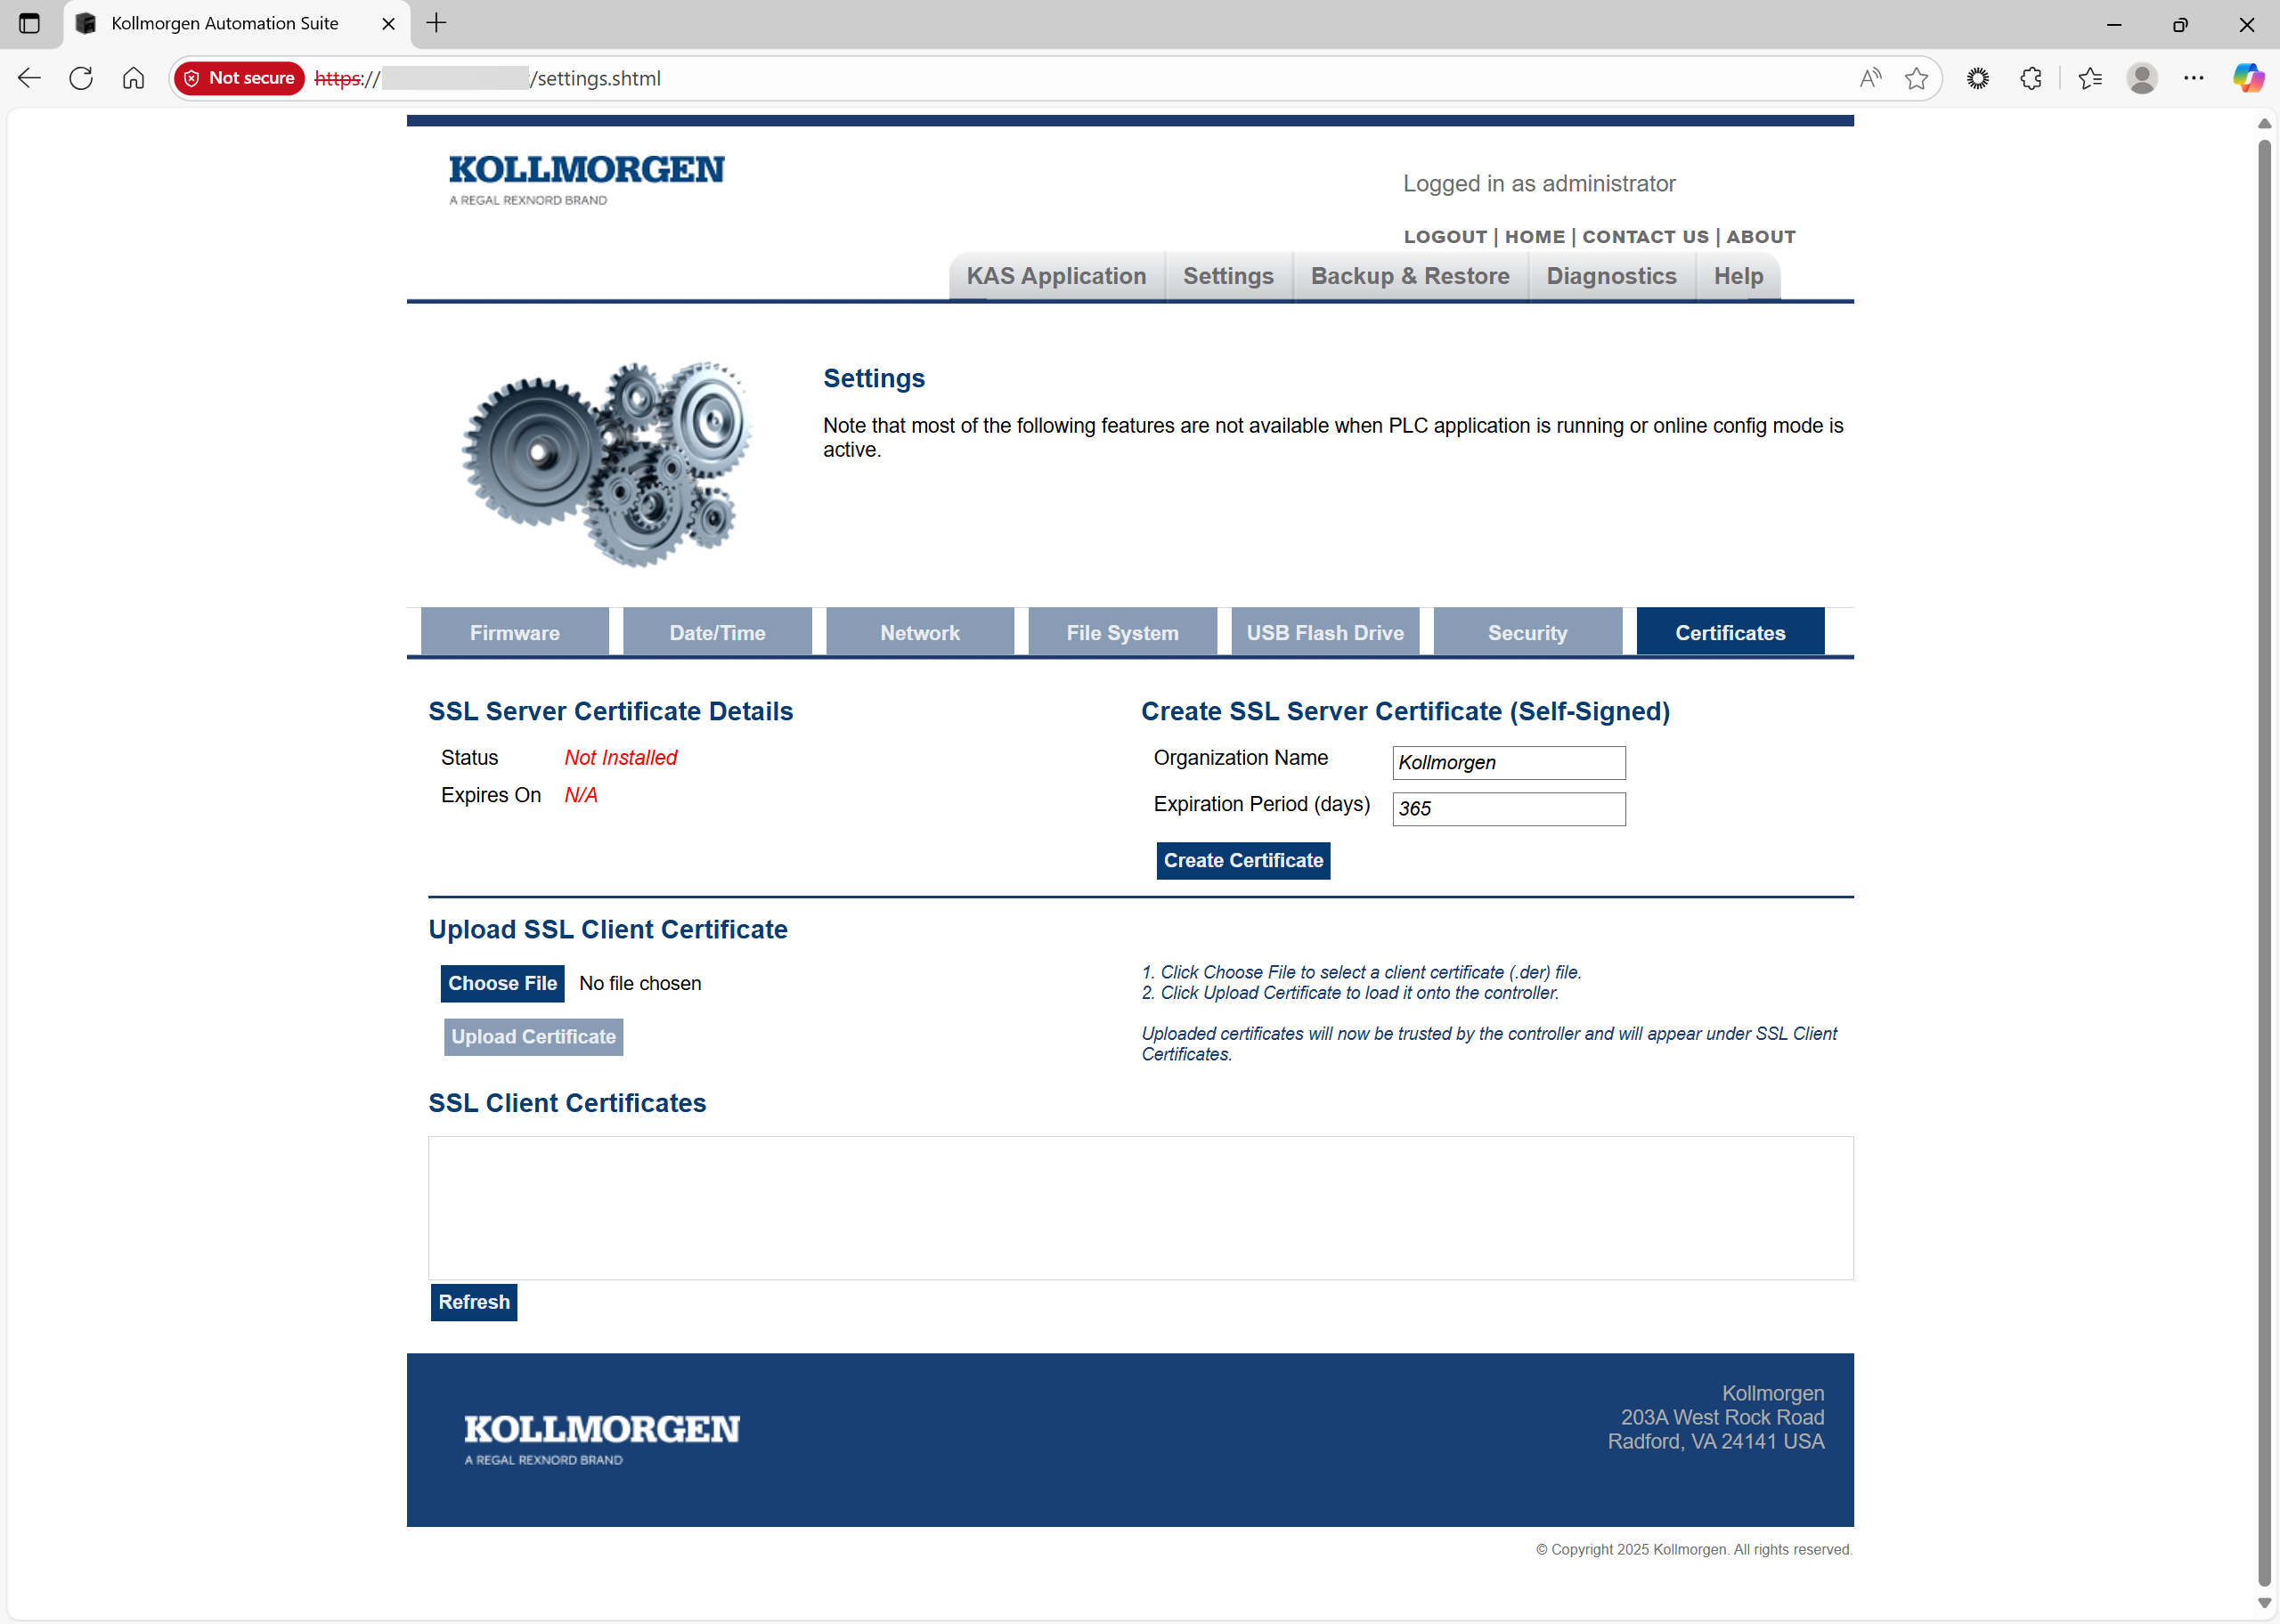
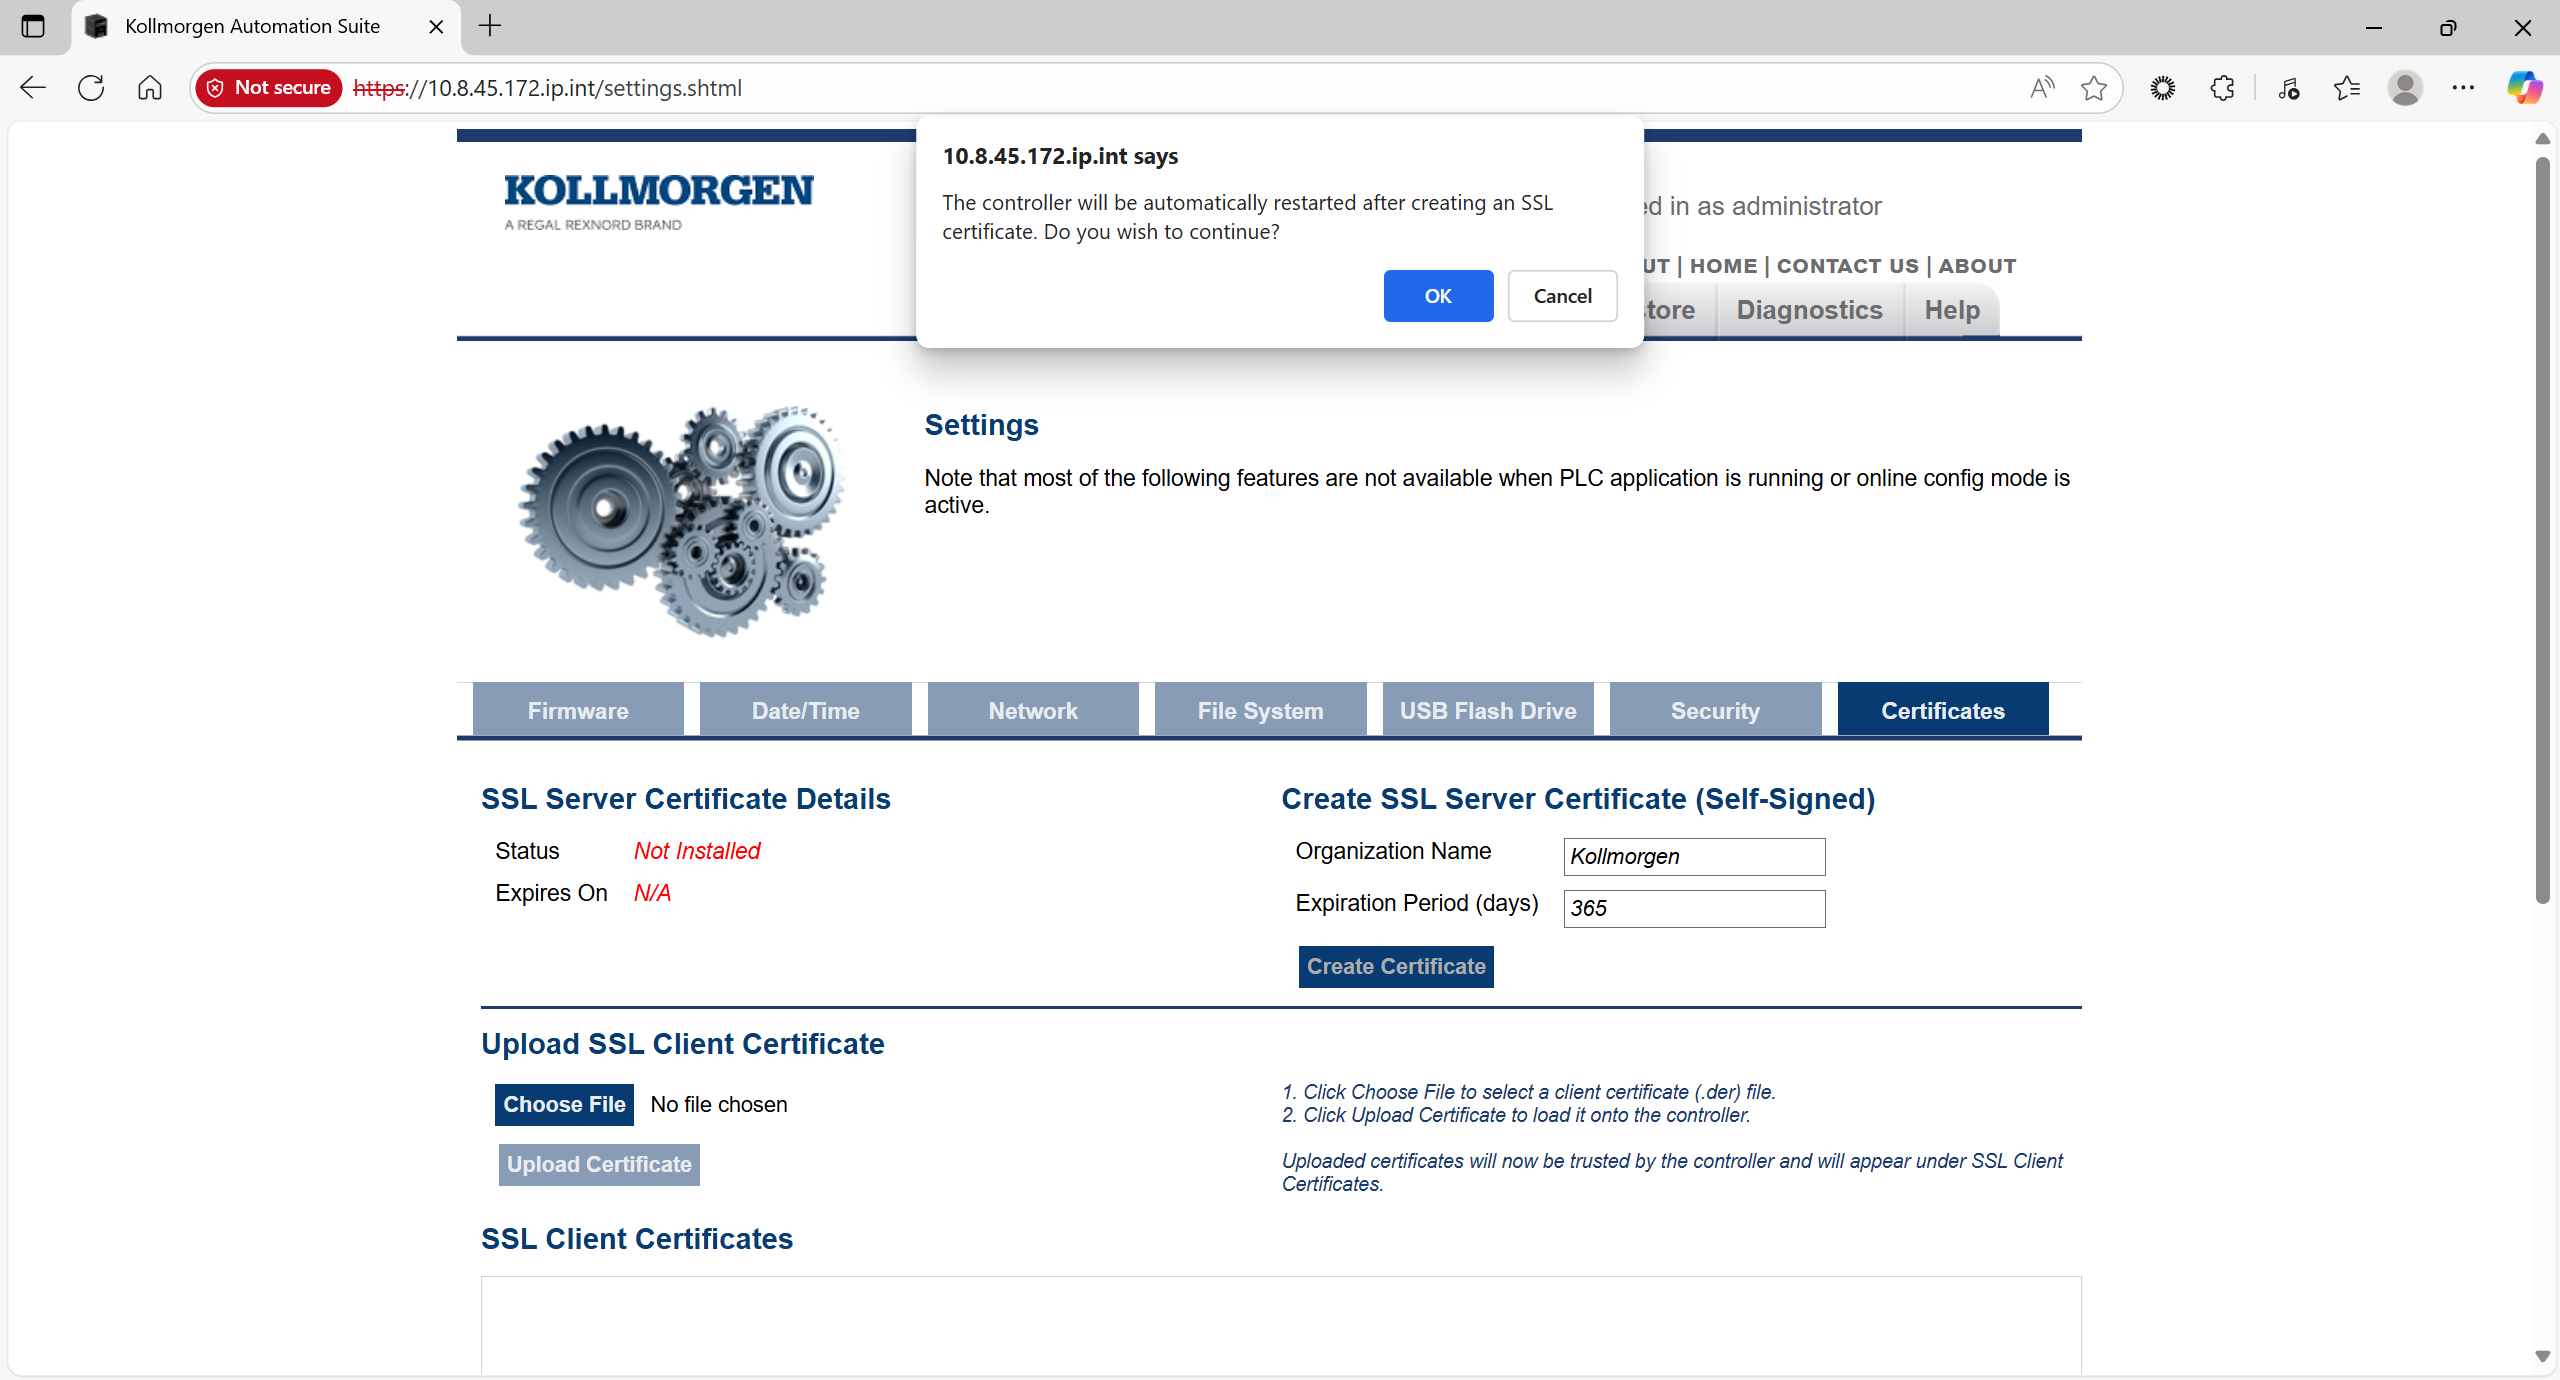
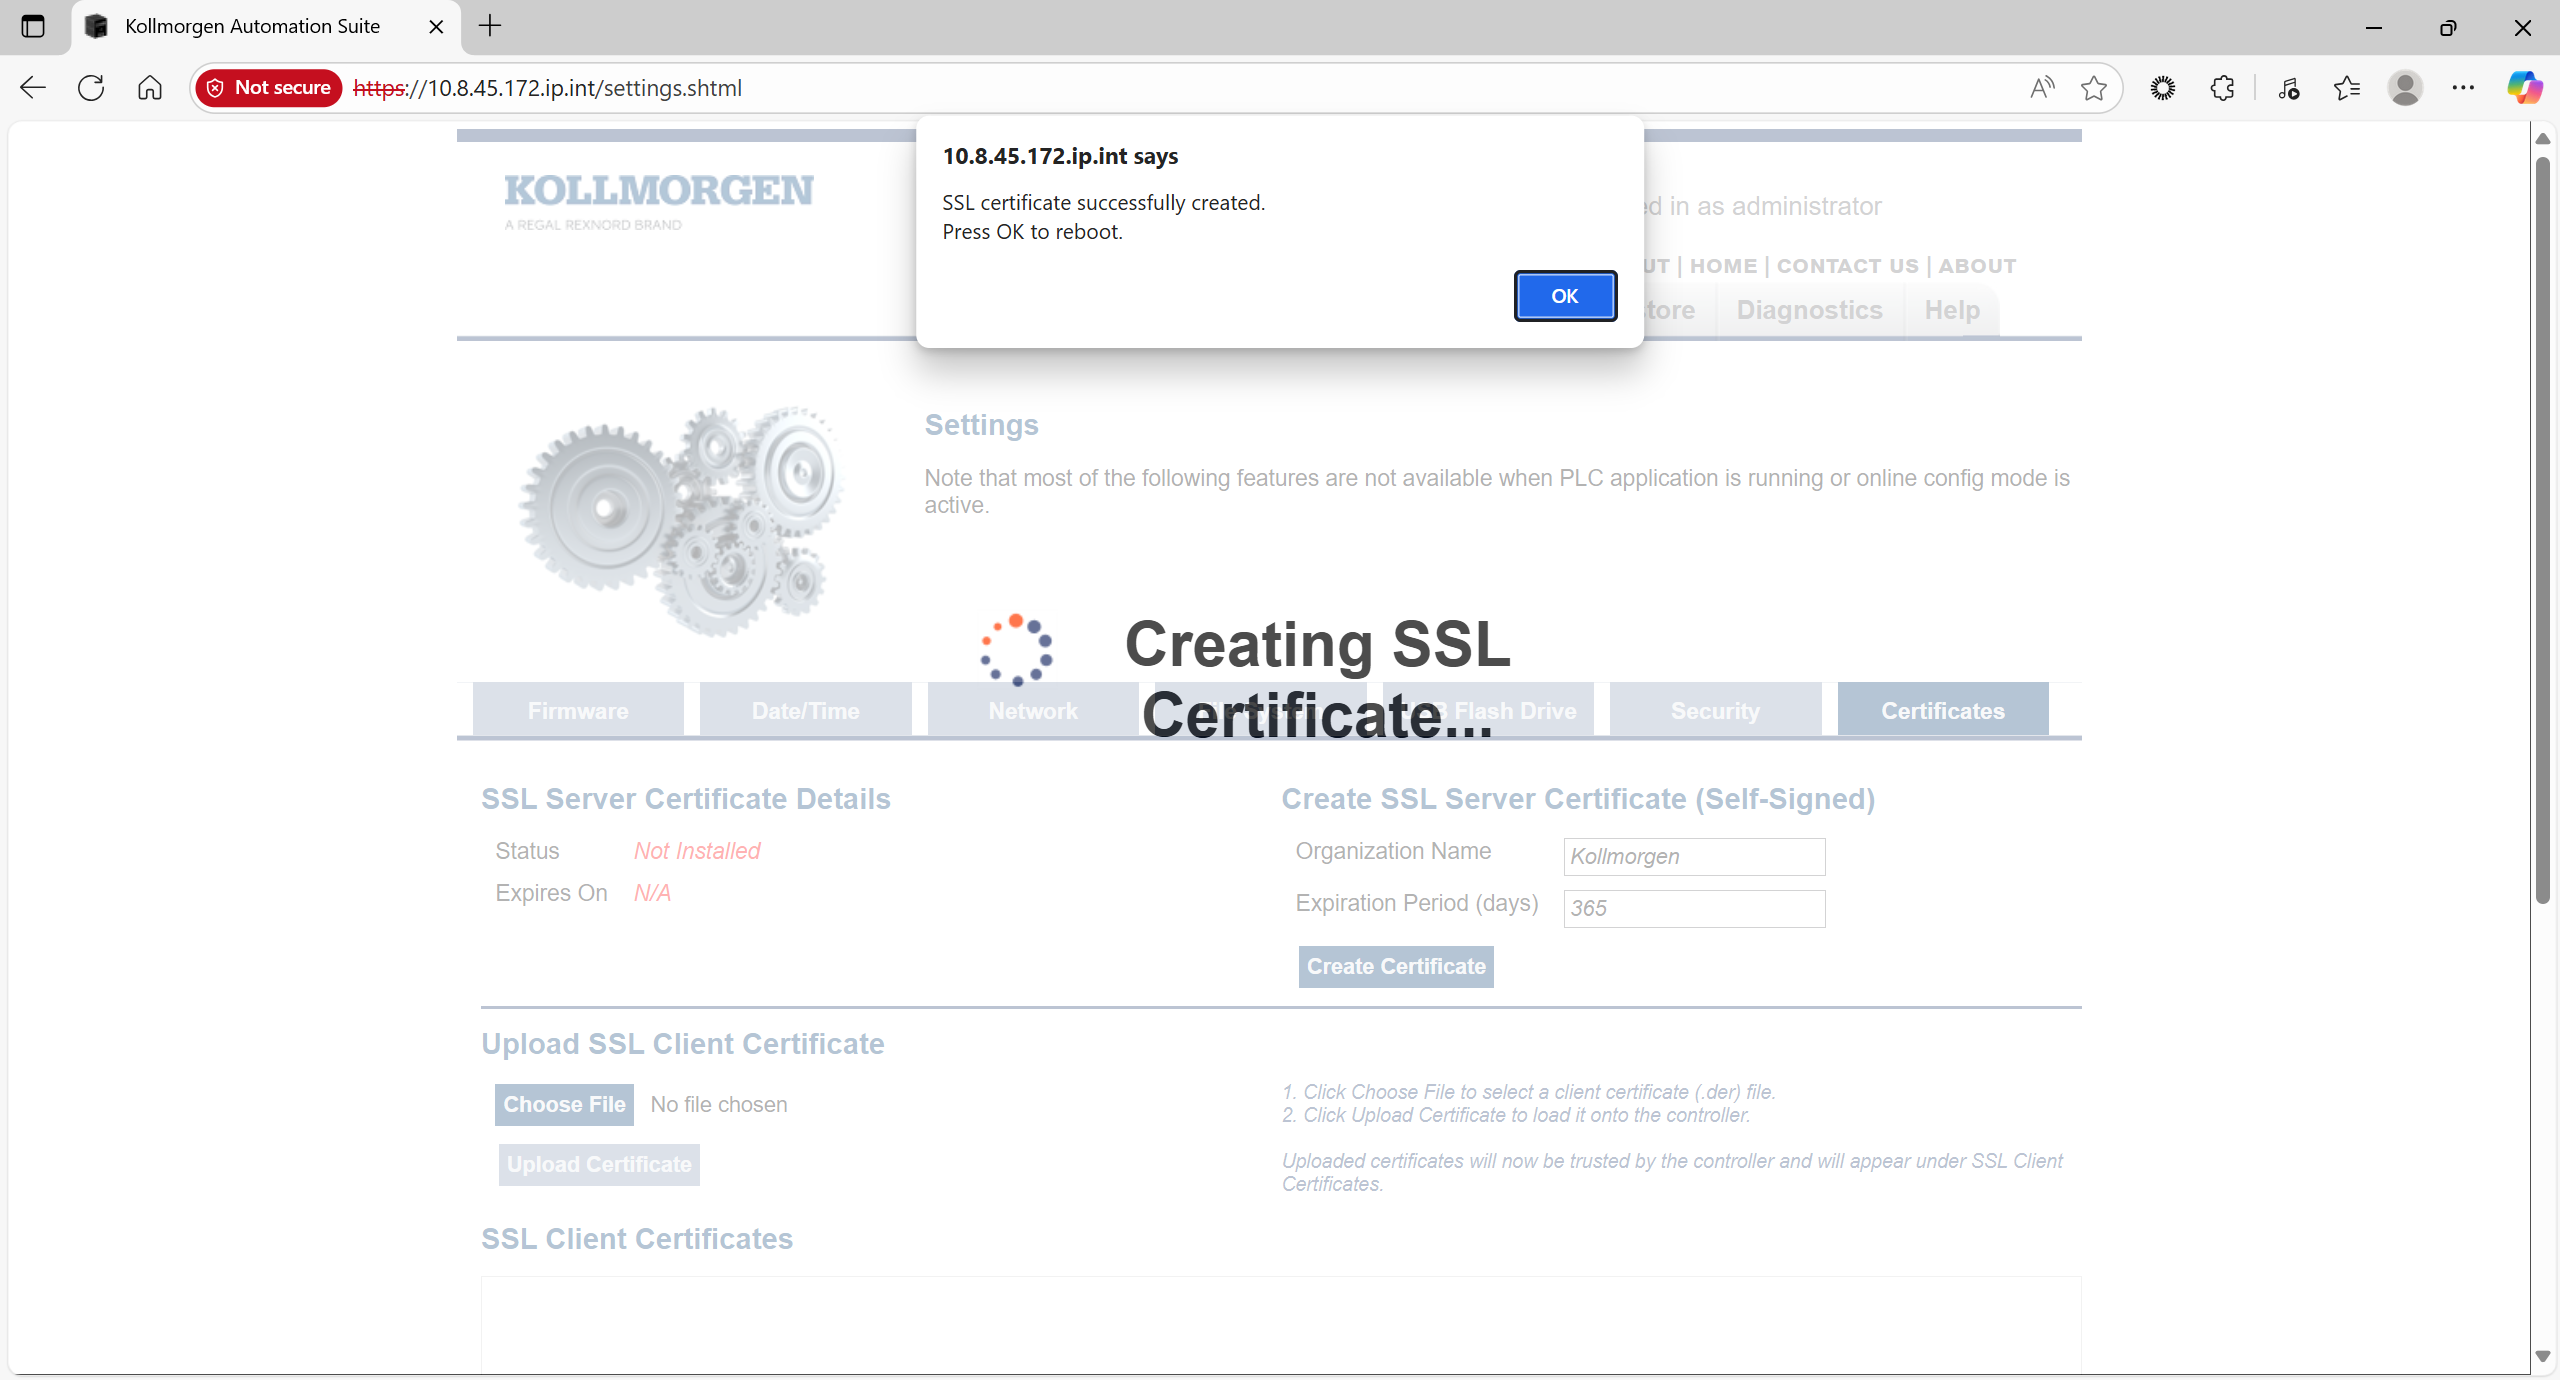
Figure 7: SSL certificate successfully created message
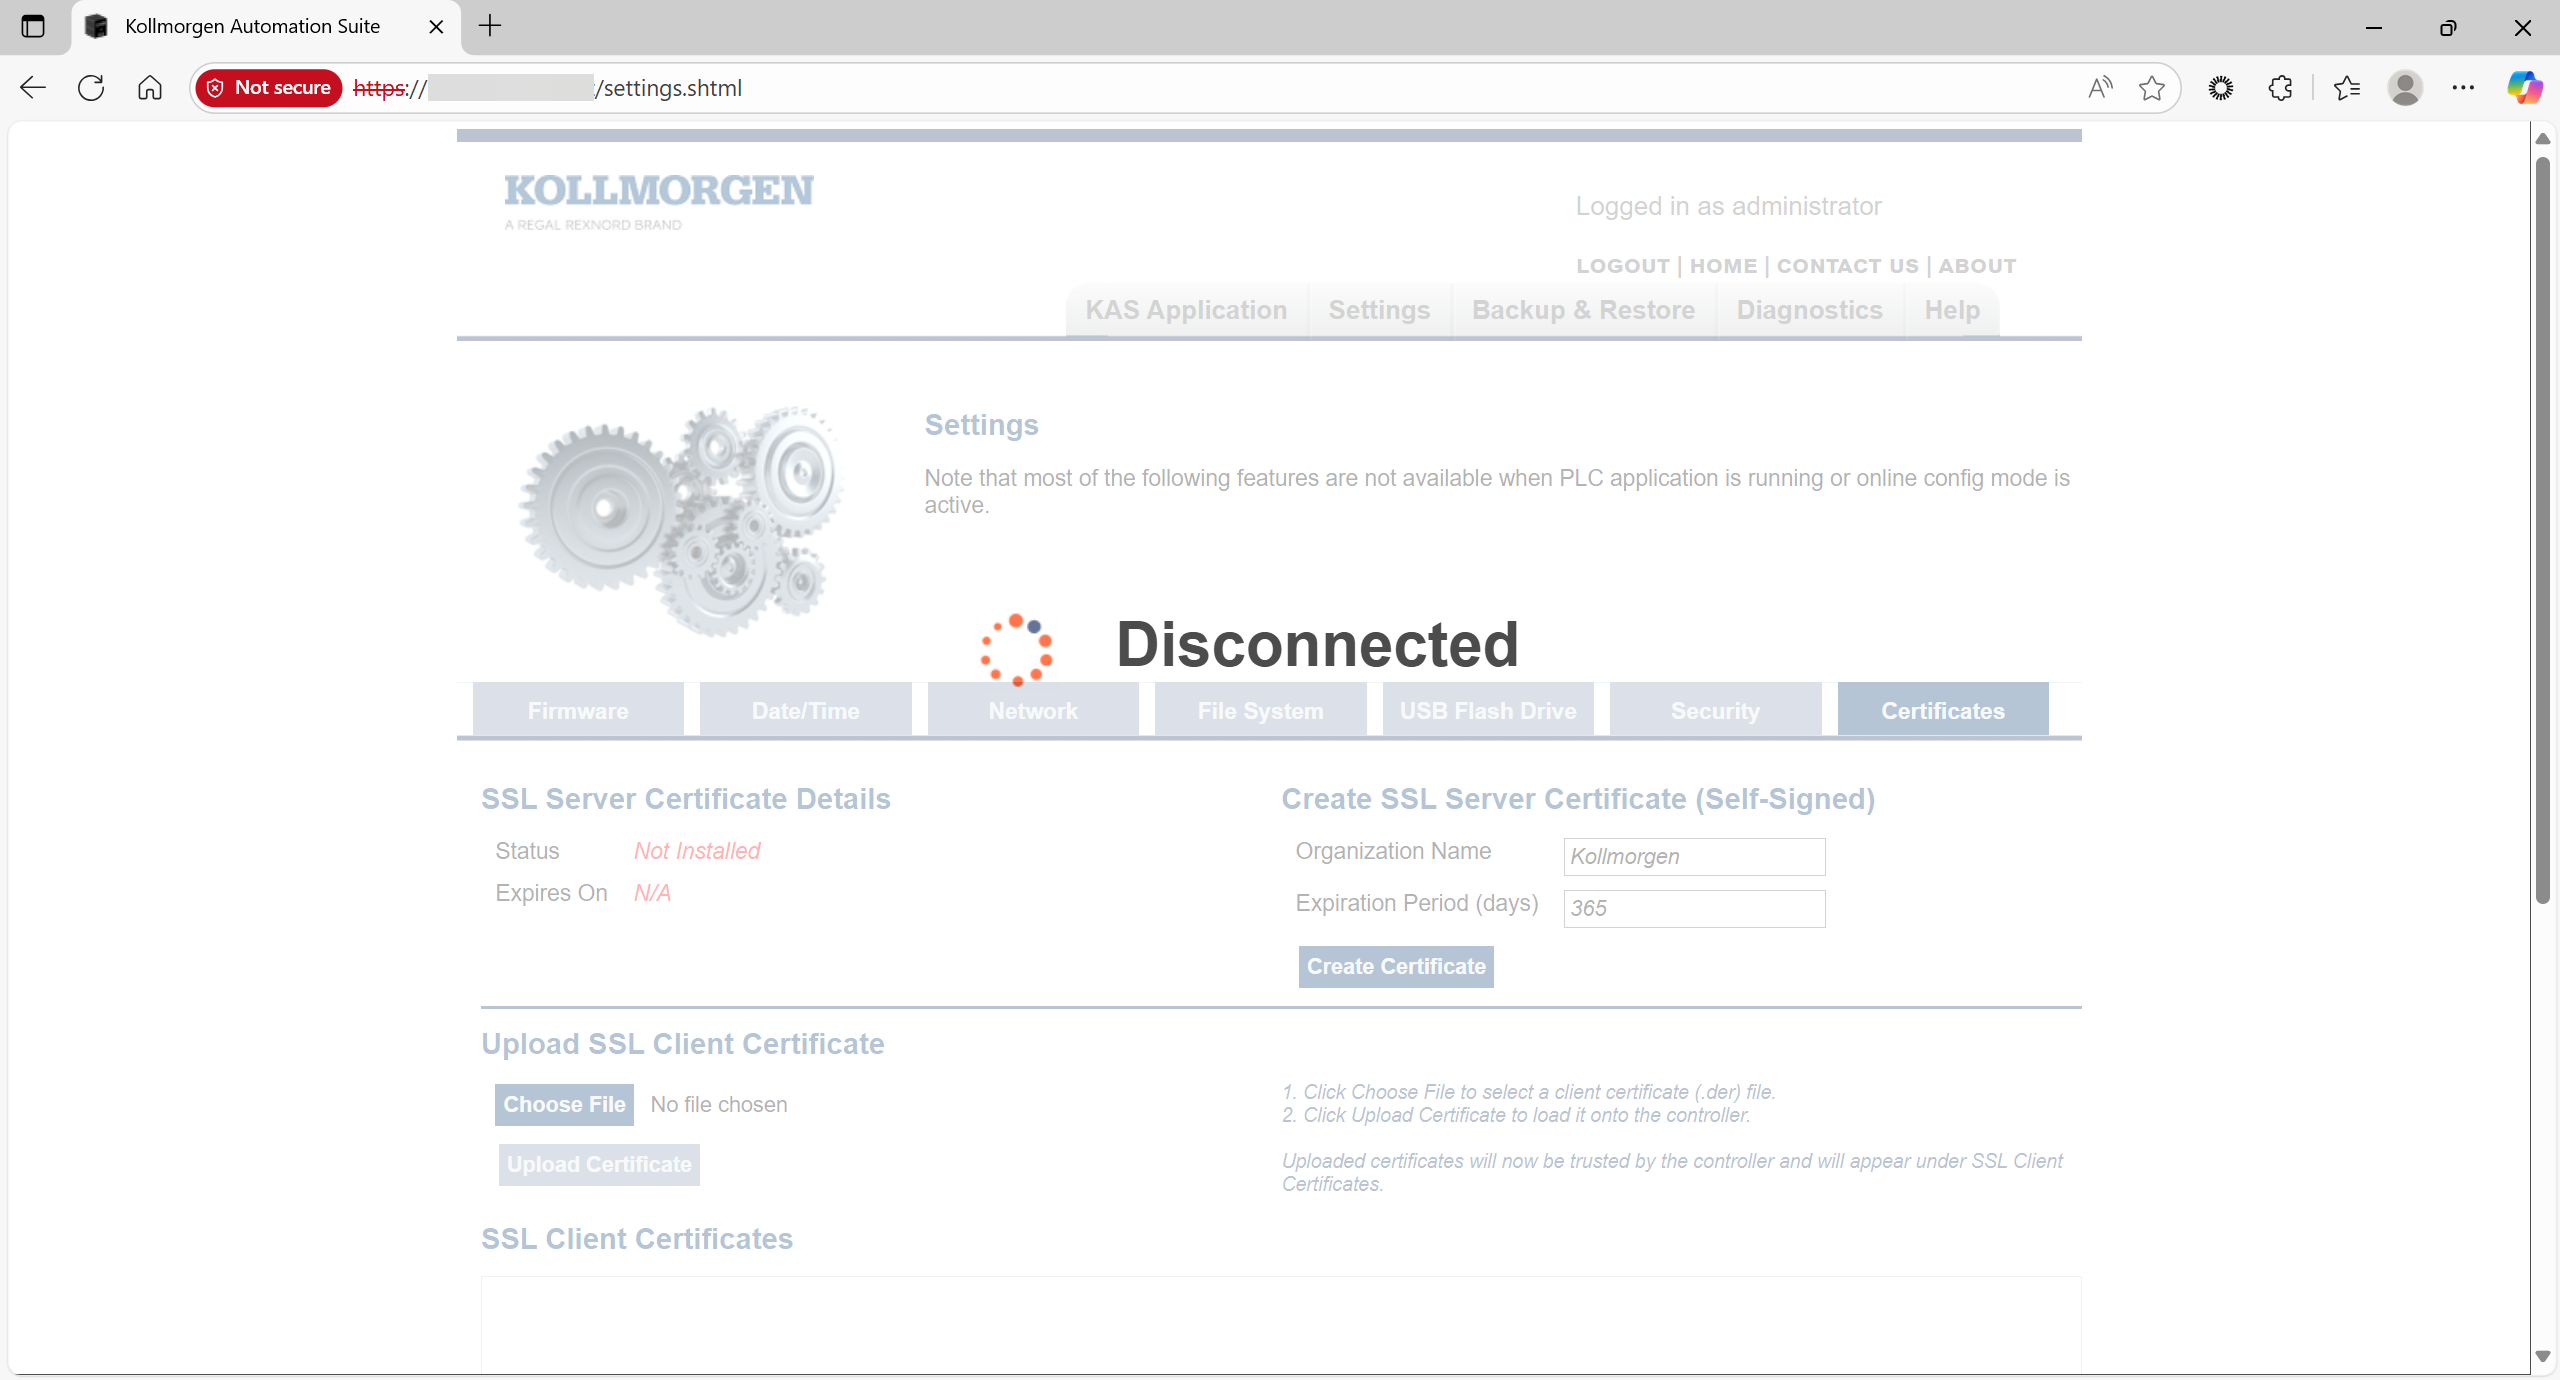
Figure 8: Disconnected message
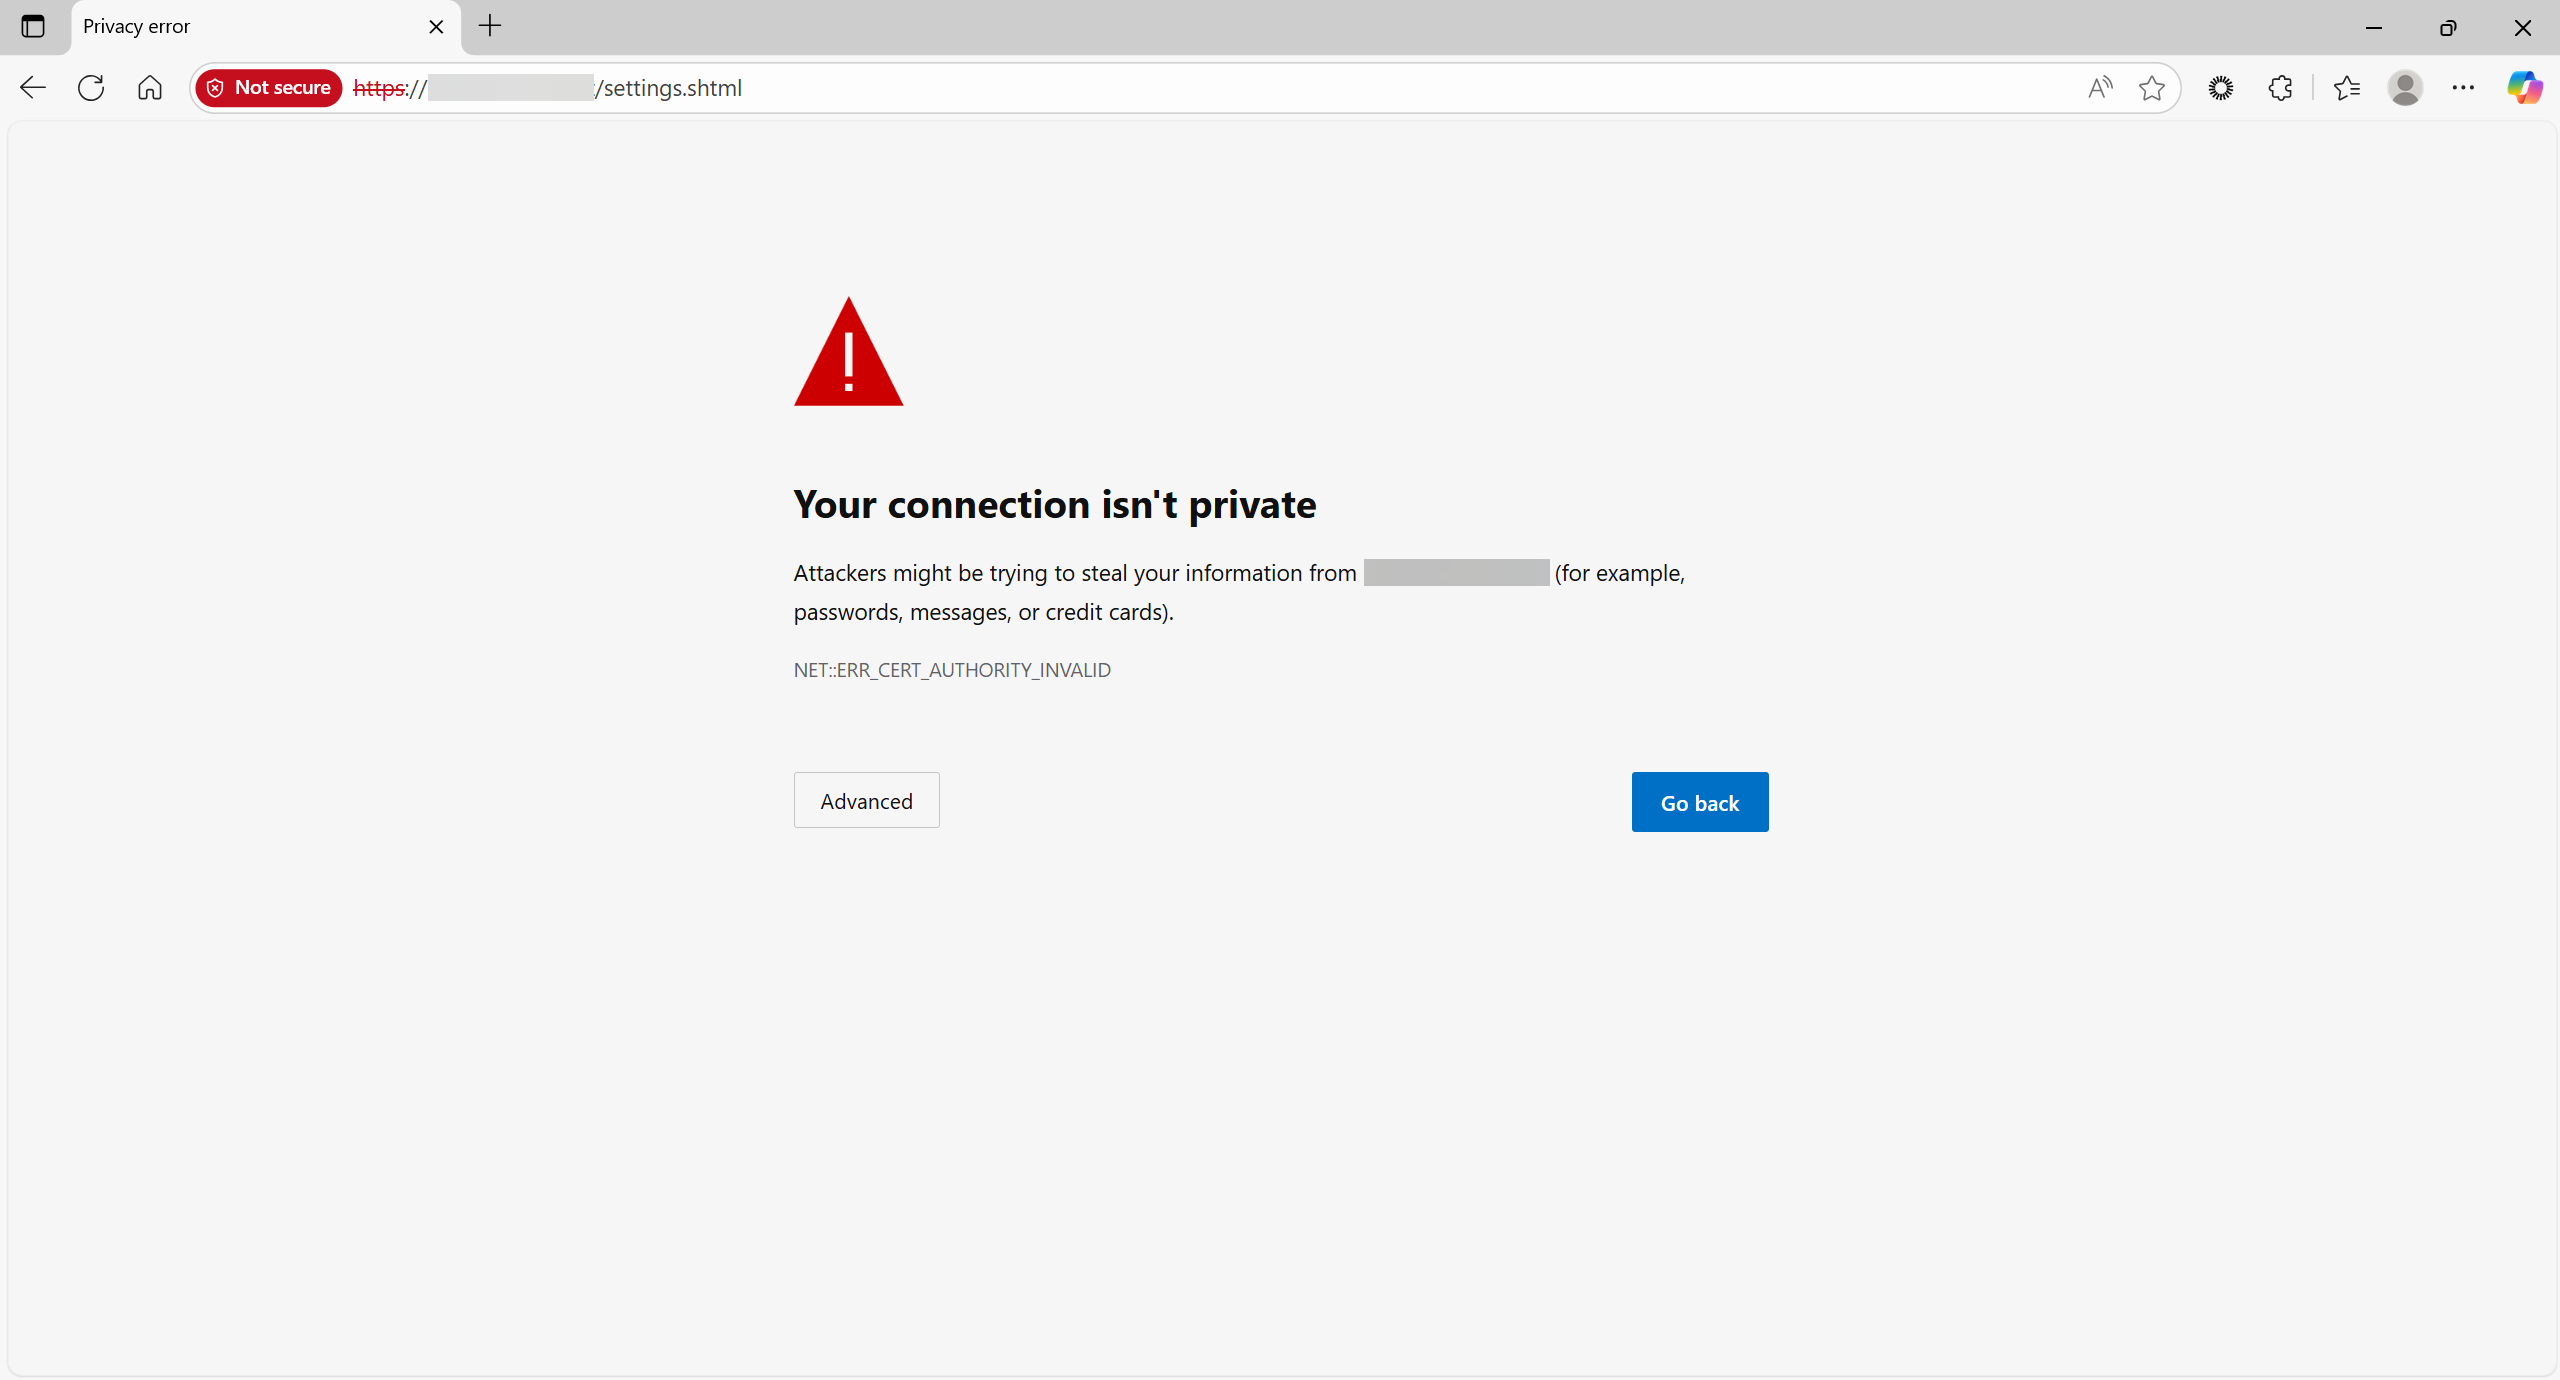
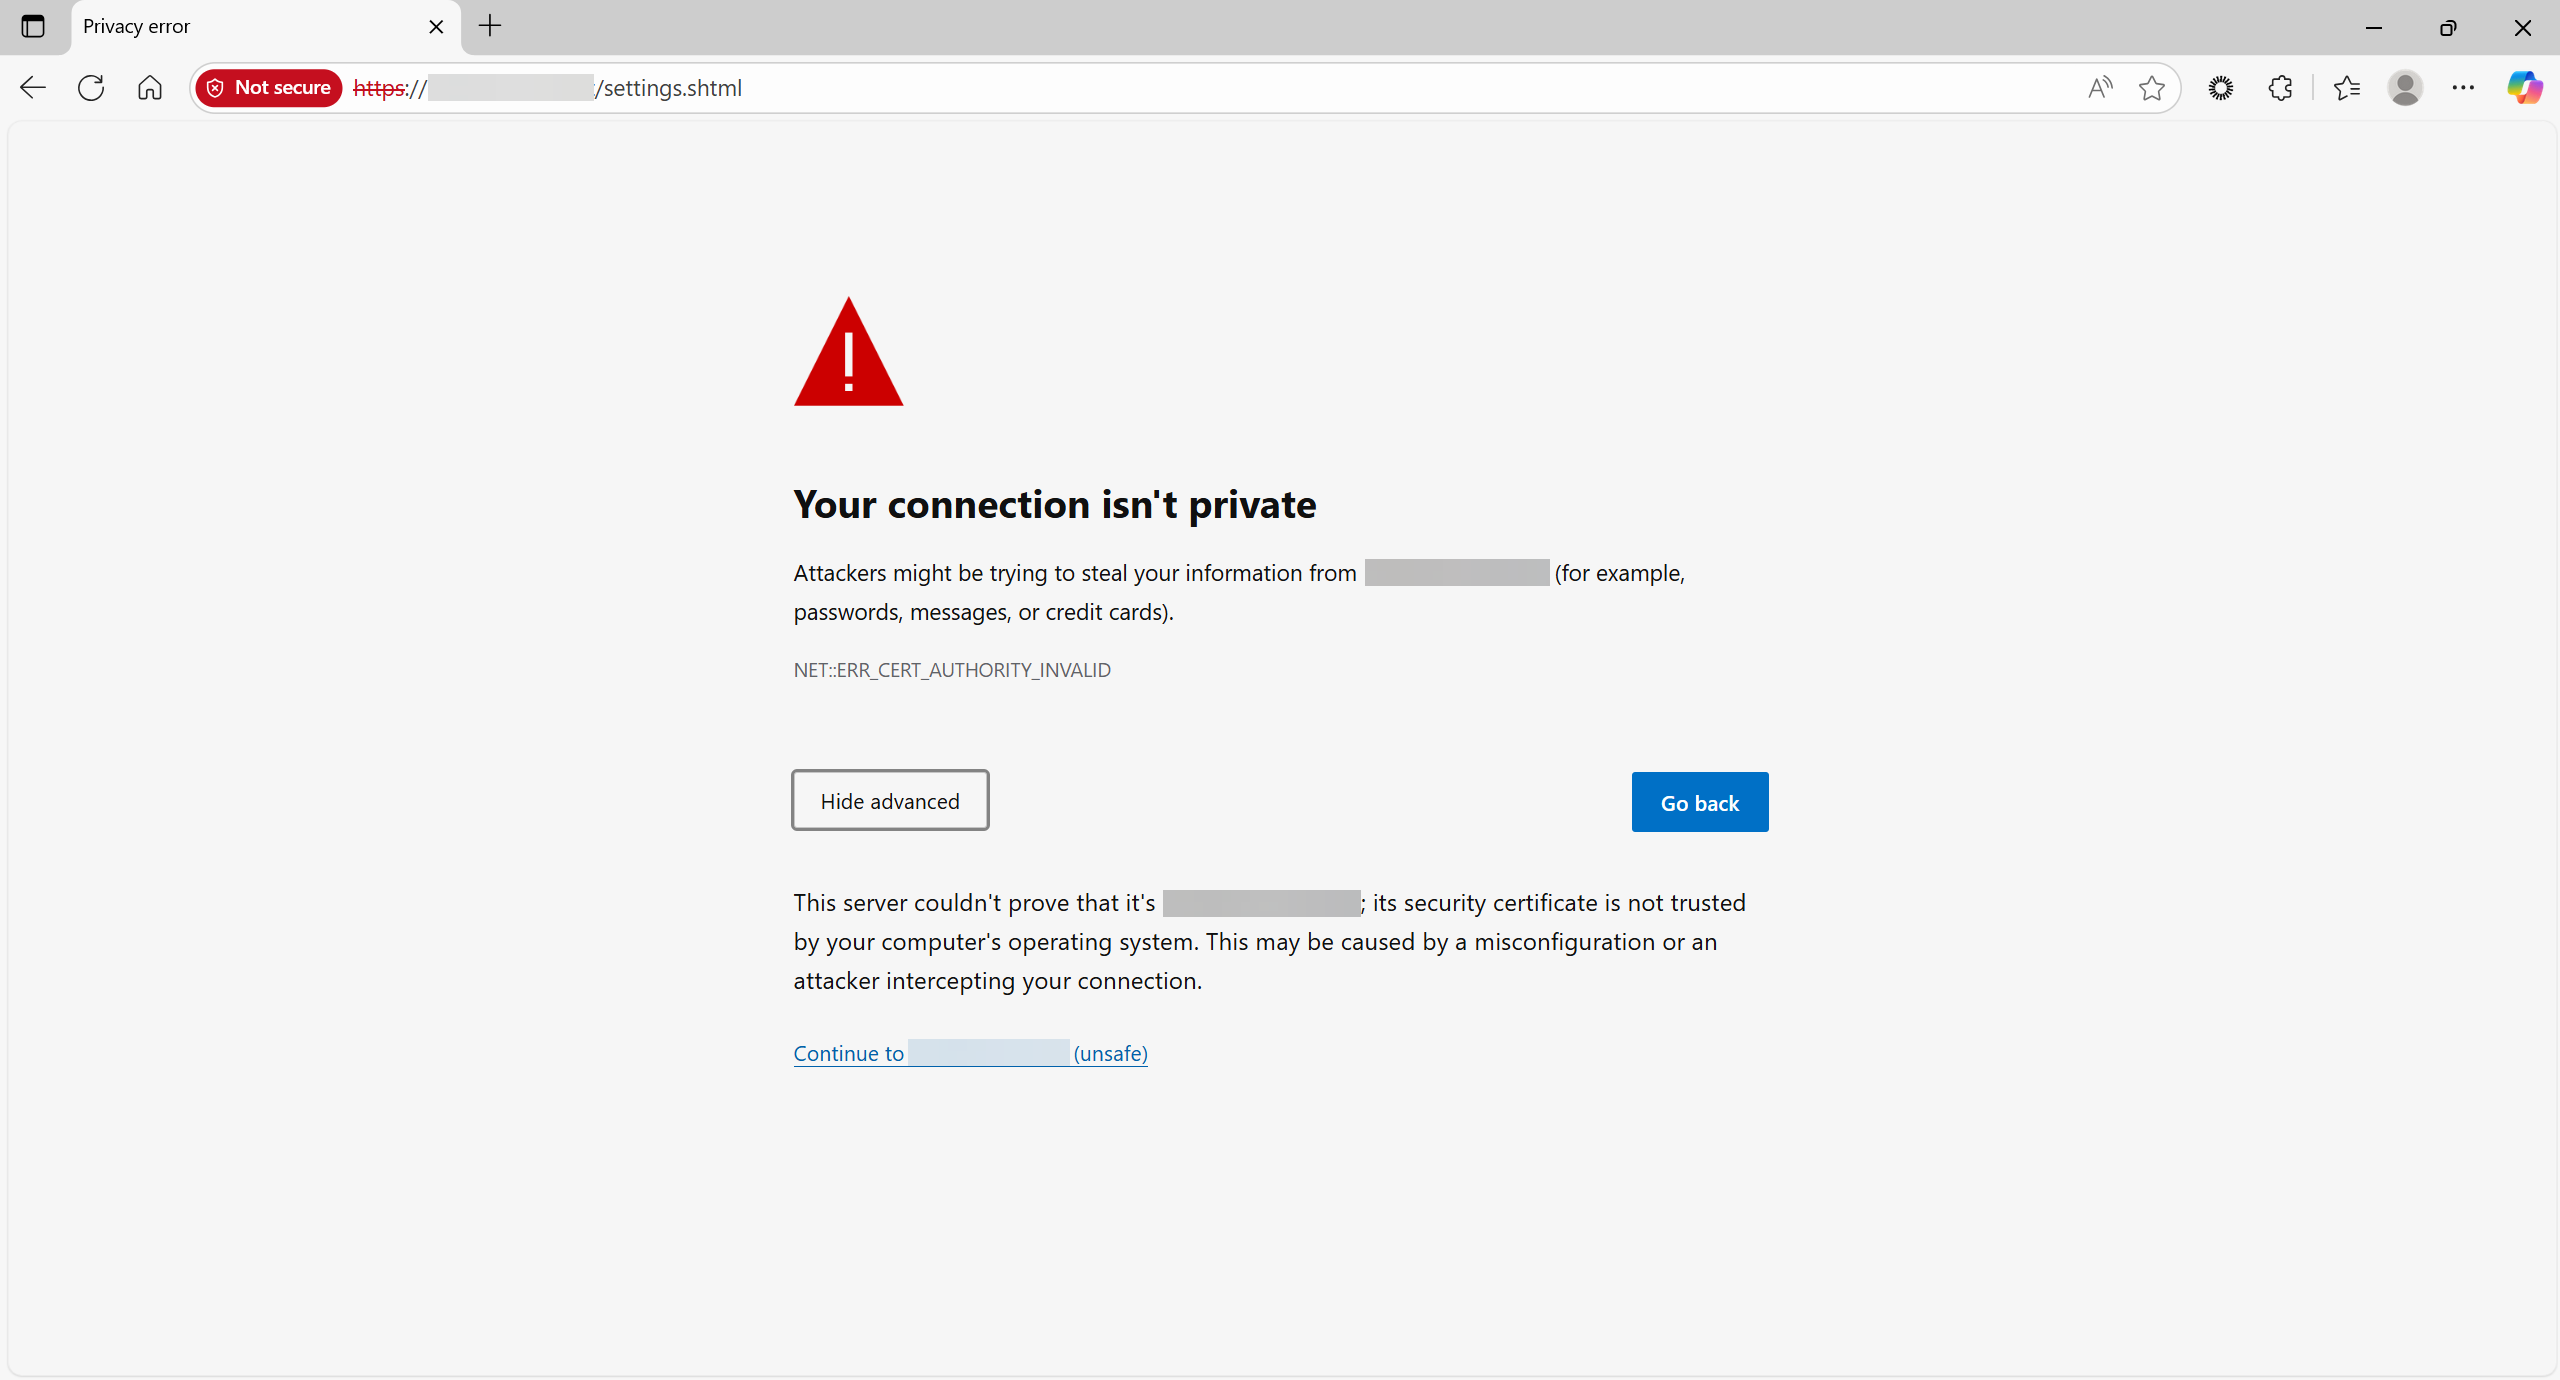
Figure 10: Connection message - Advanced information
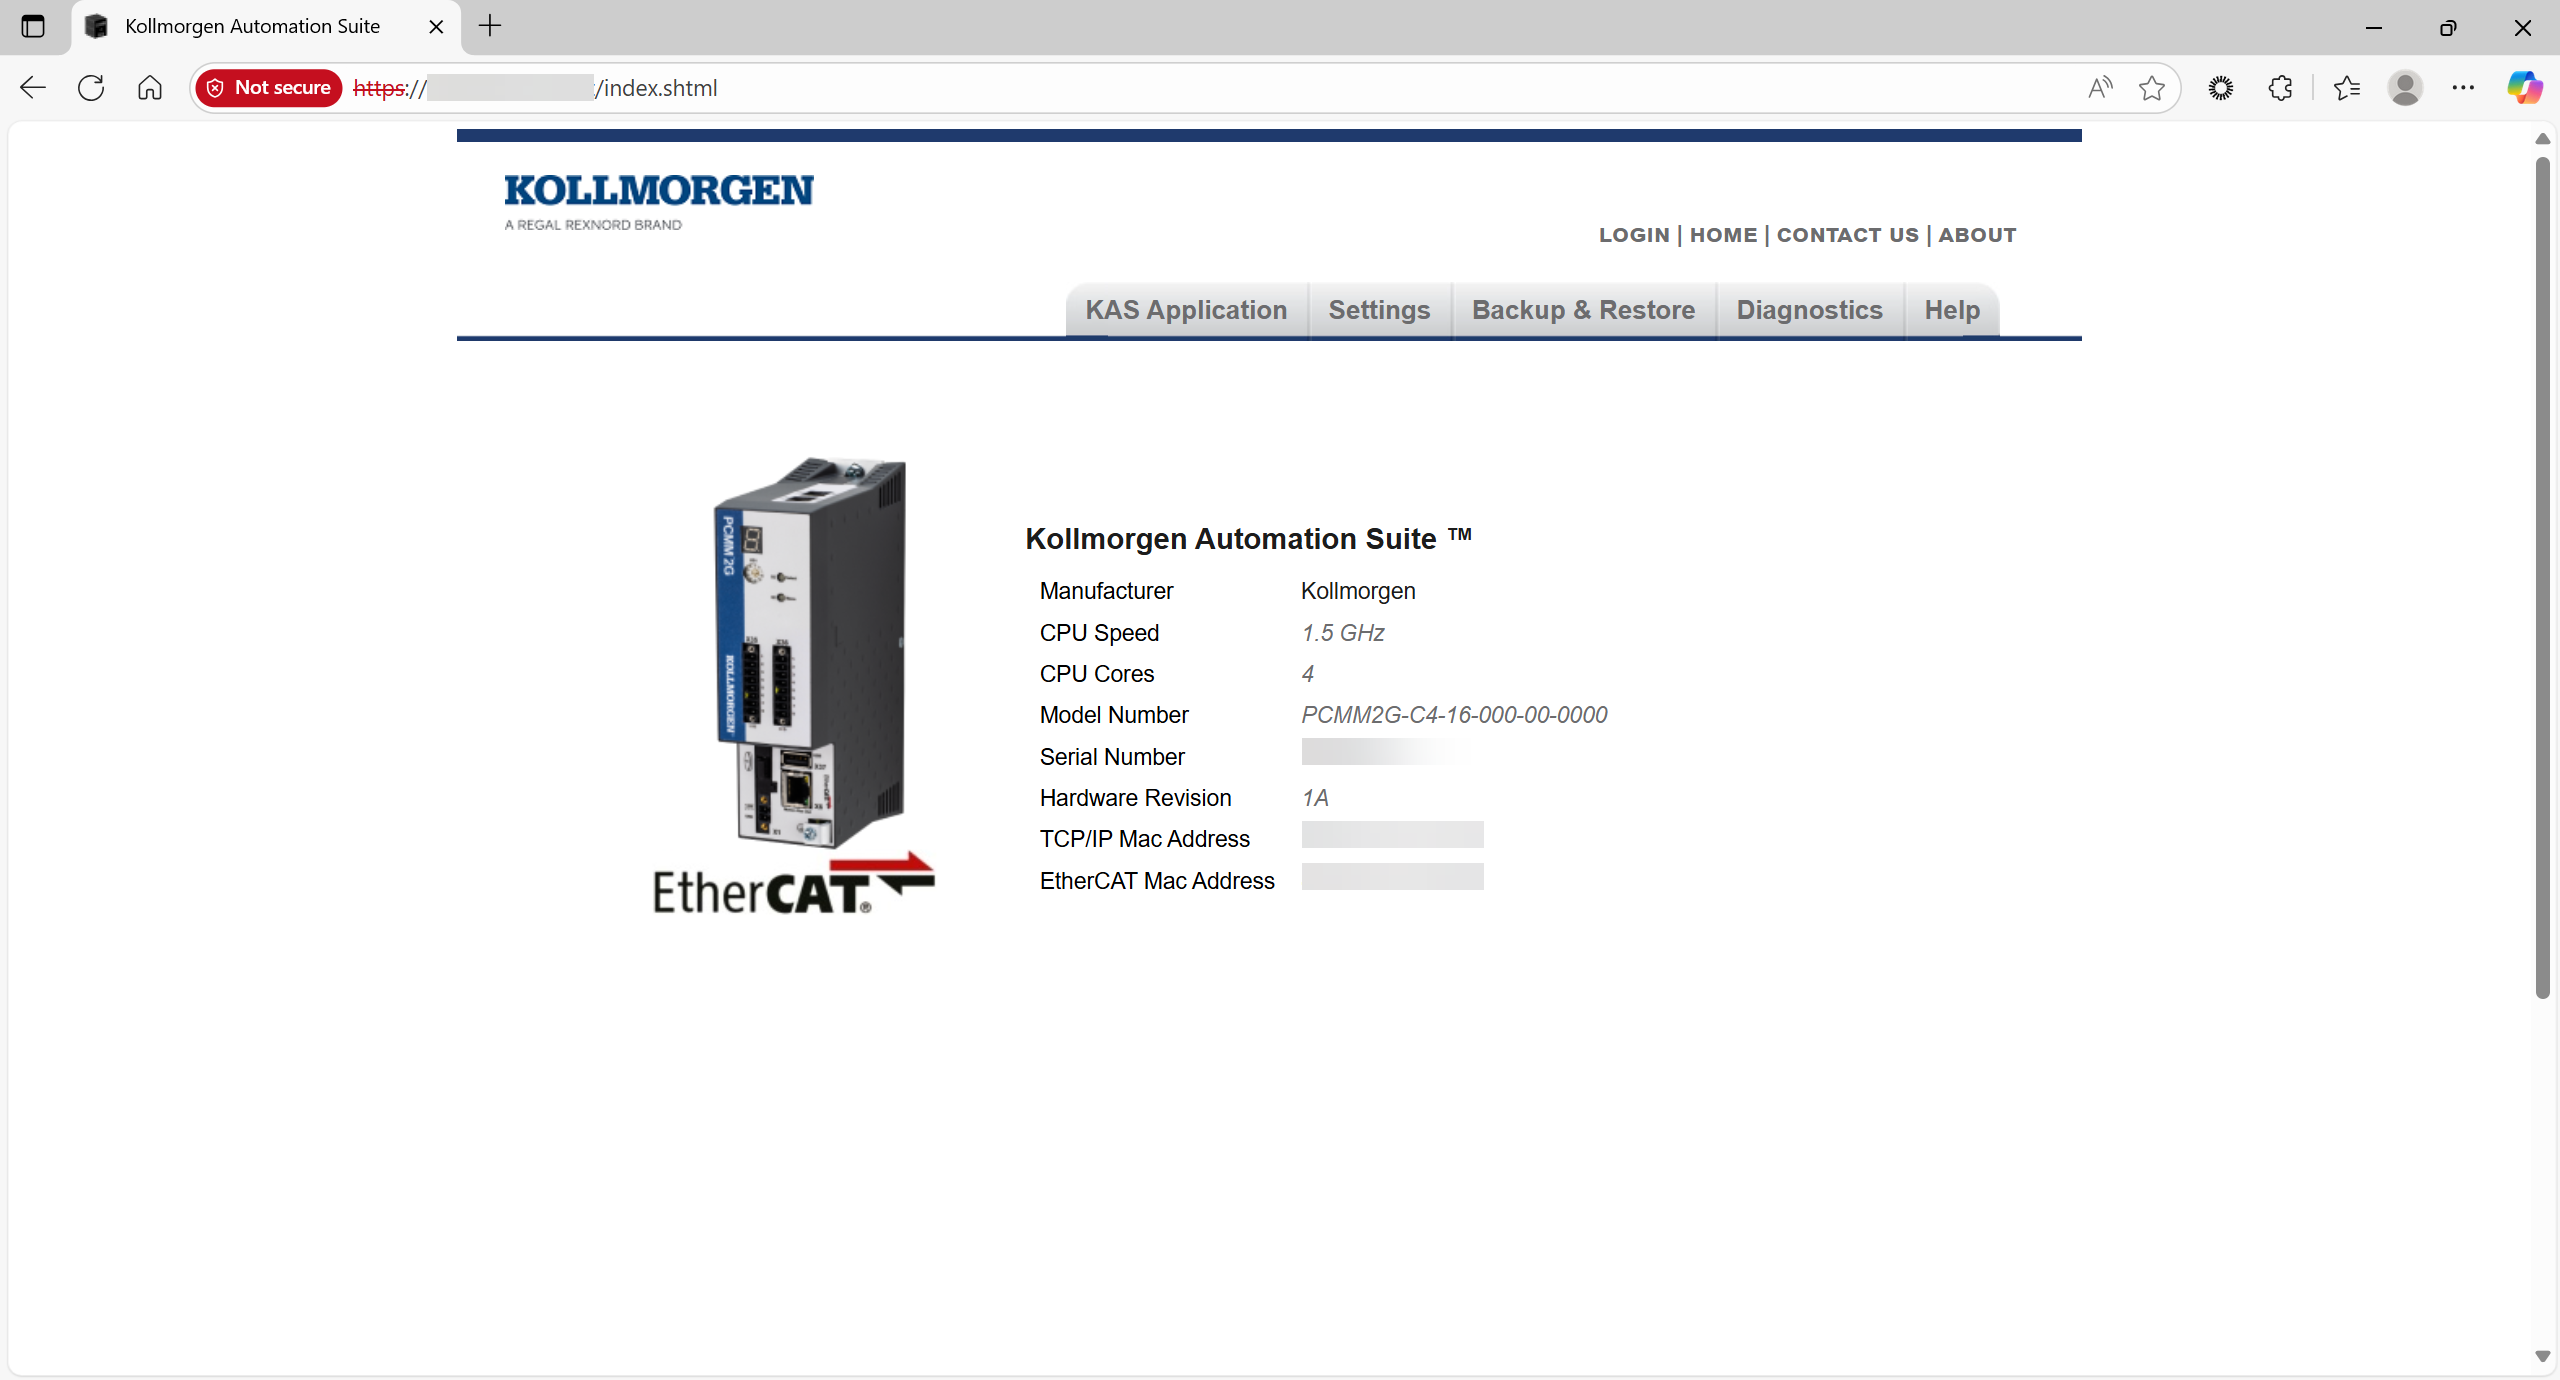
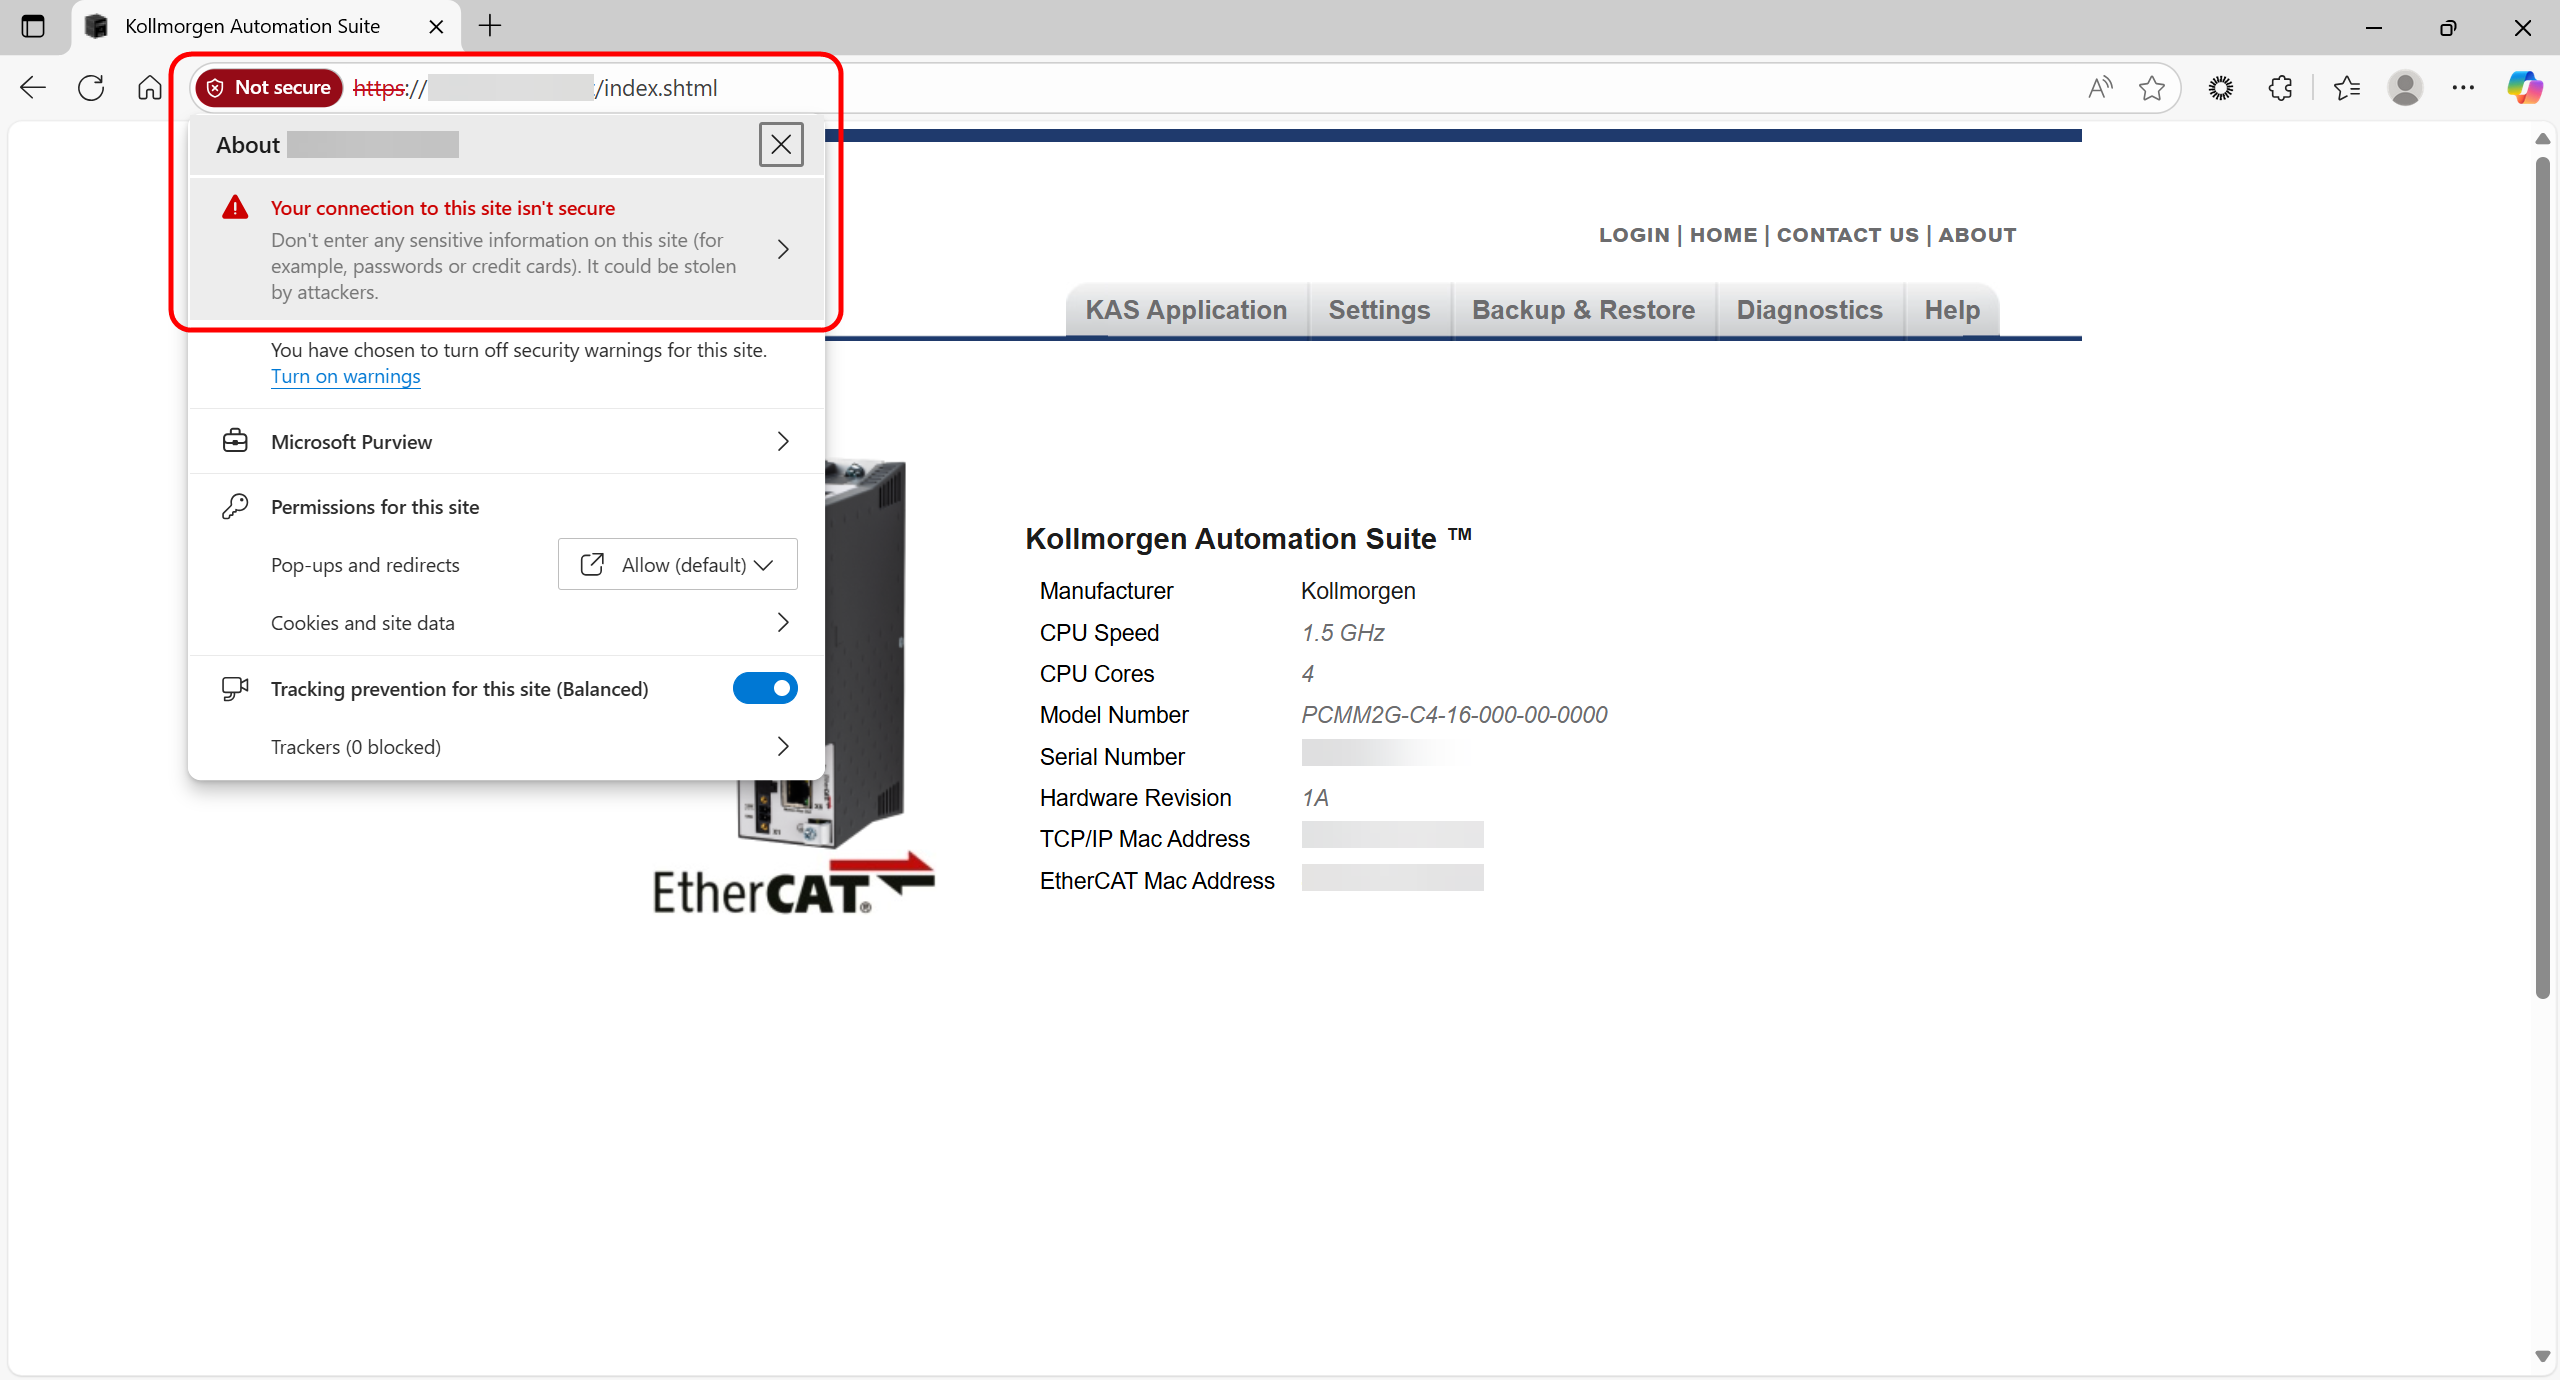
Figure 12: Your connection to this site isn't secure option
The certificate for this site is not valid message appears.
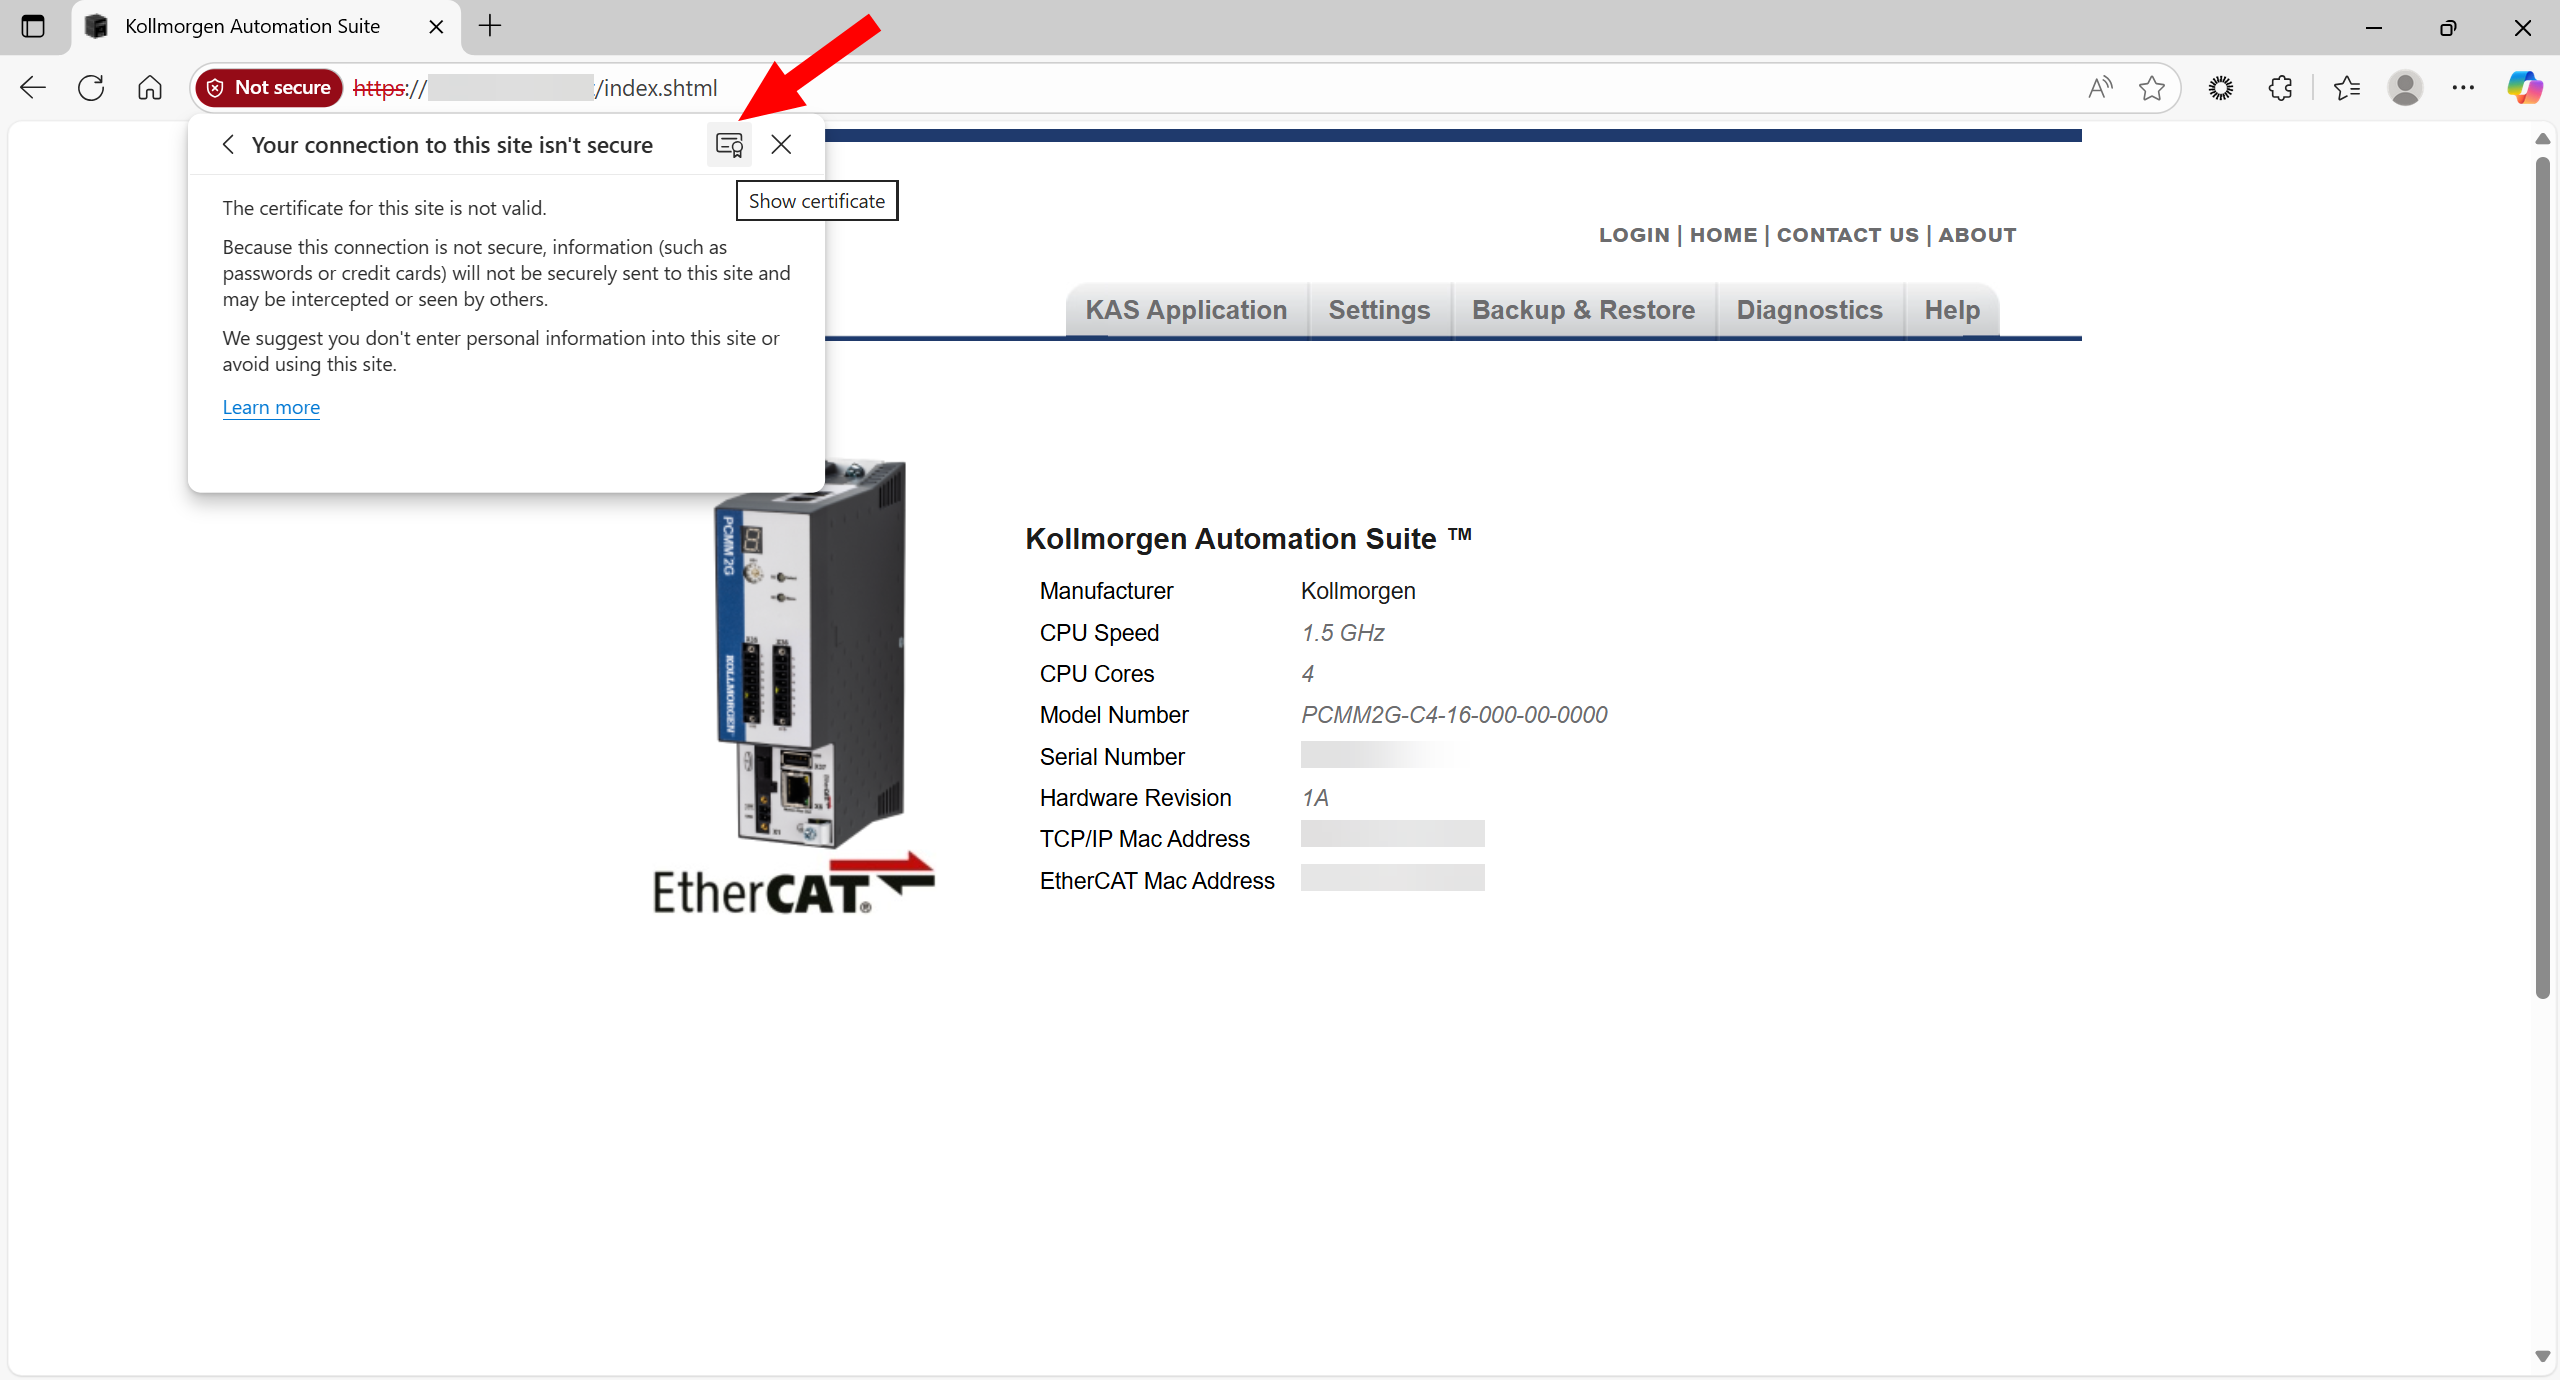
Figure 13: Show certificate button
The Certificate Viewer dialog opens.
The General tab is active.
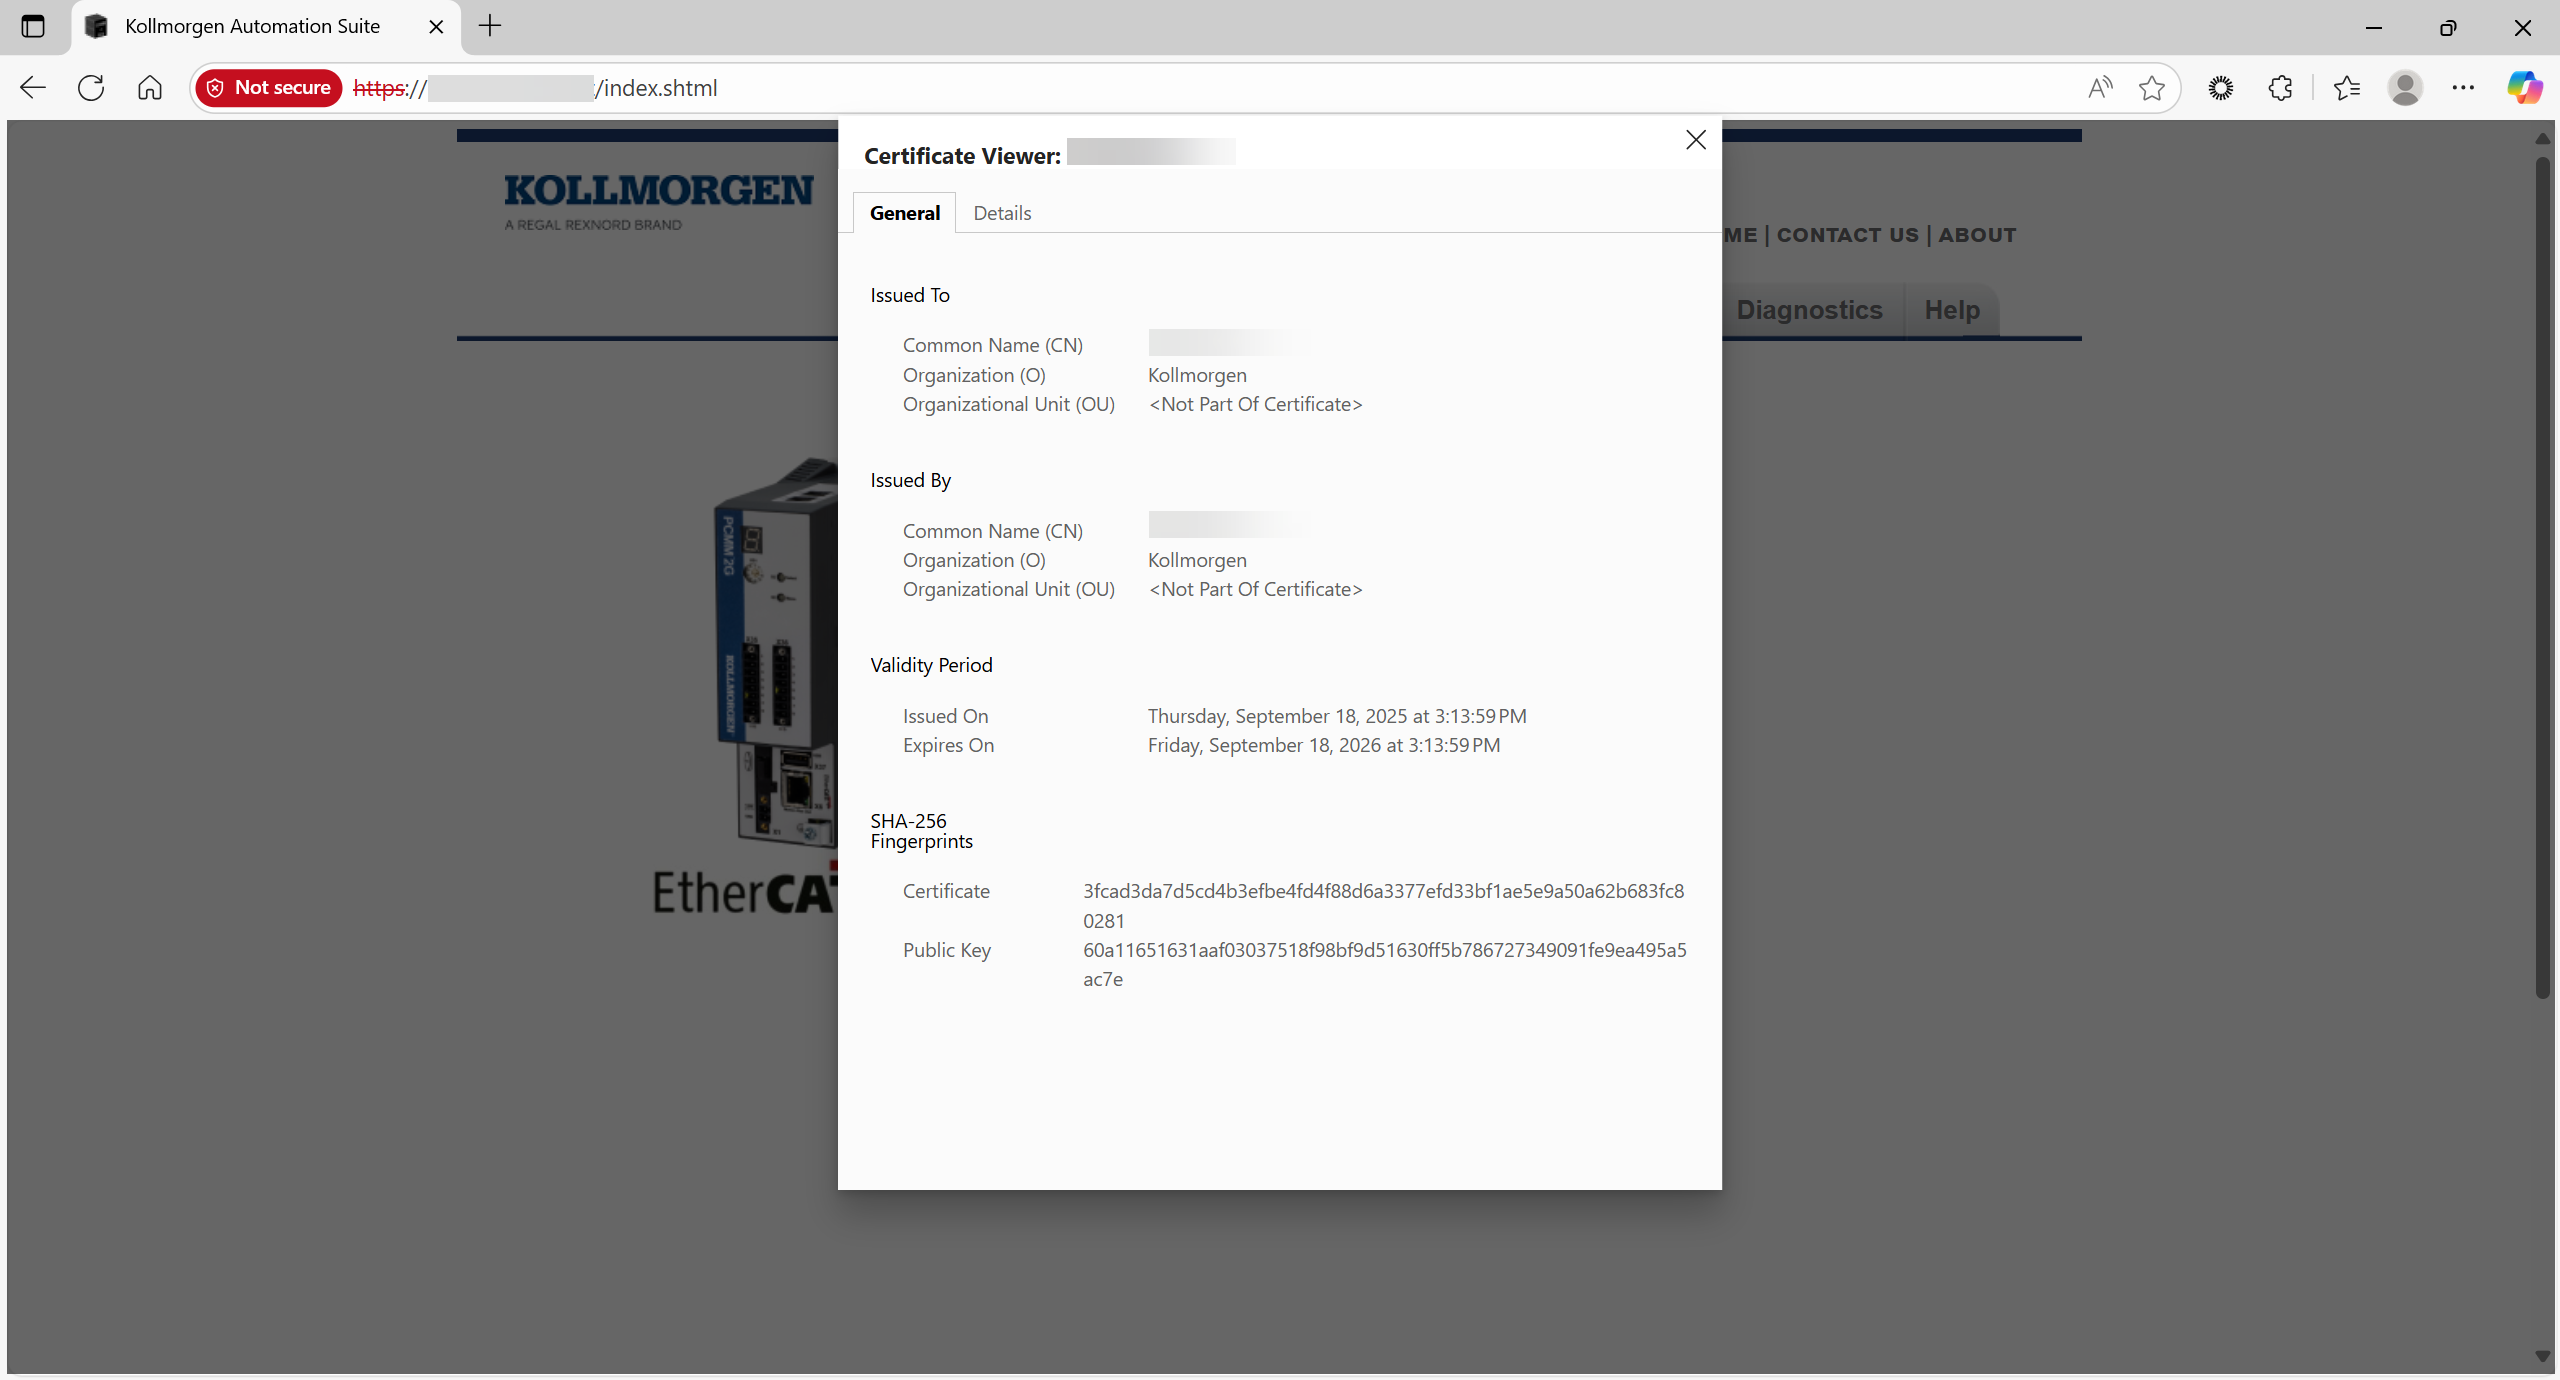
Figure 14: Certificate Viewer dialog - General tab
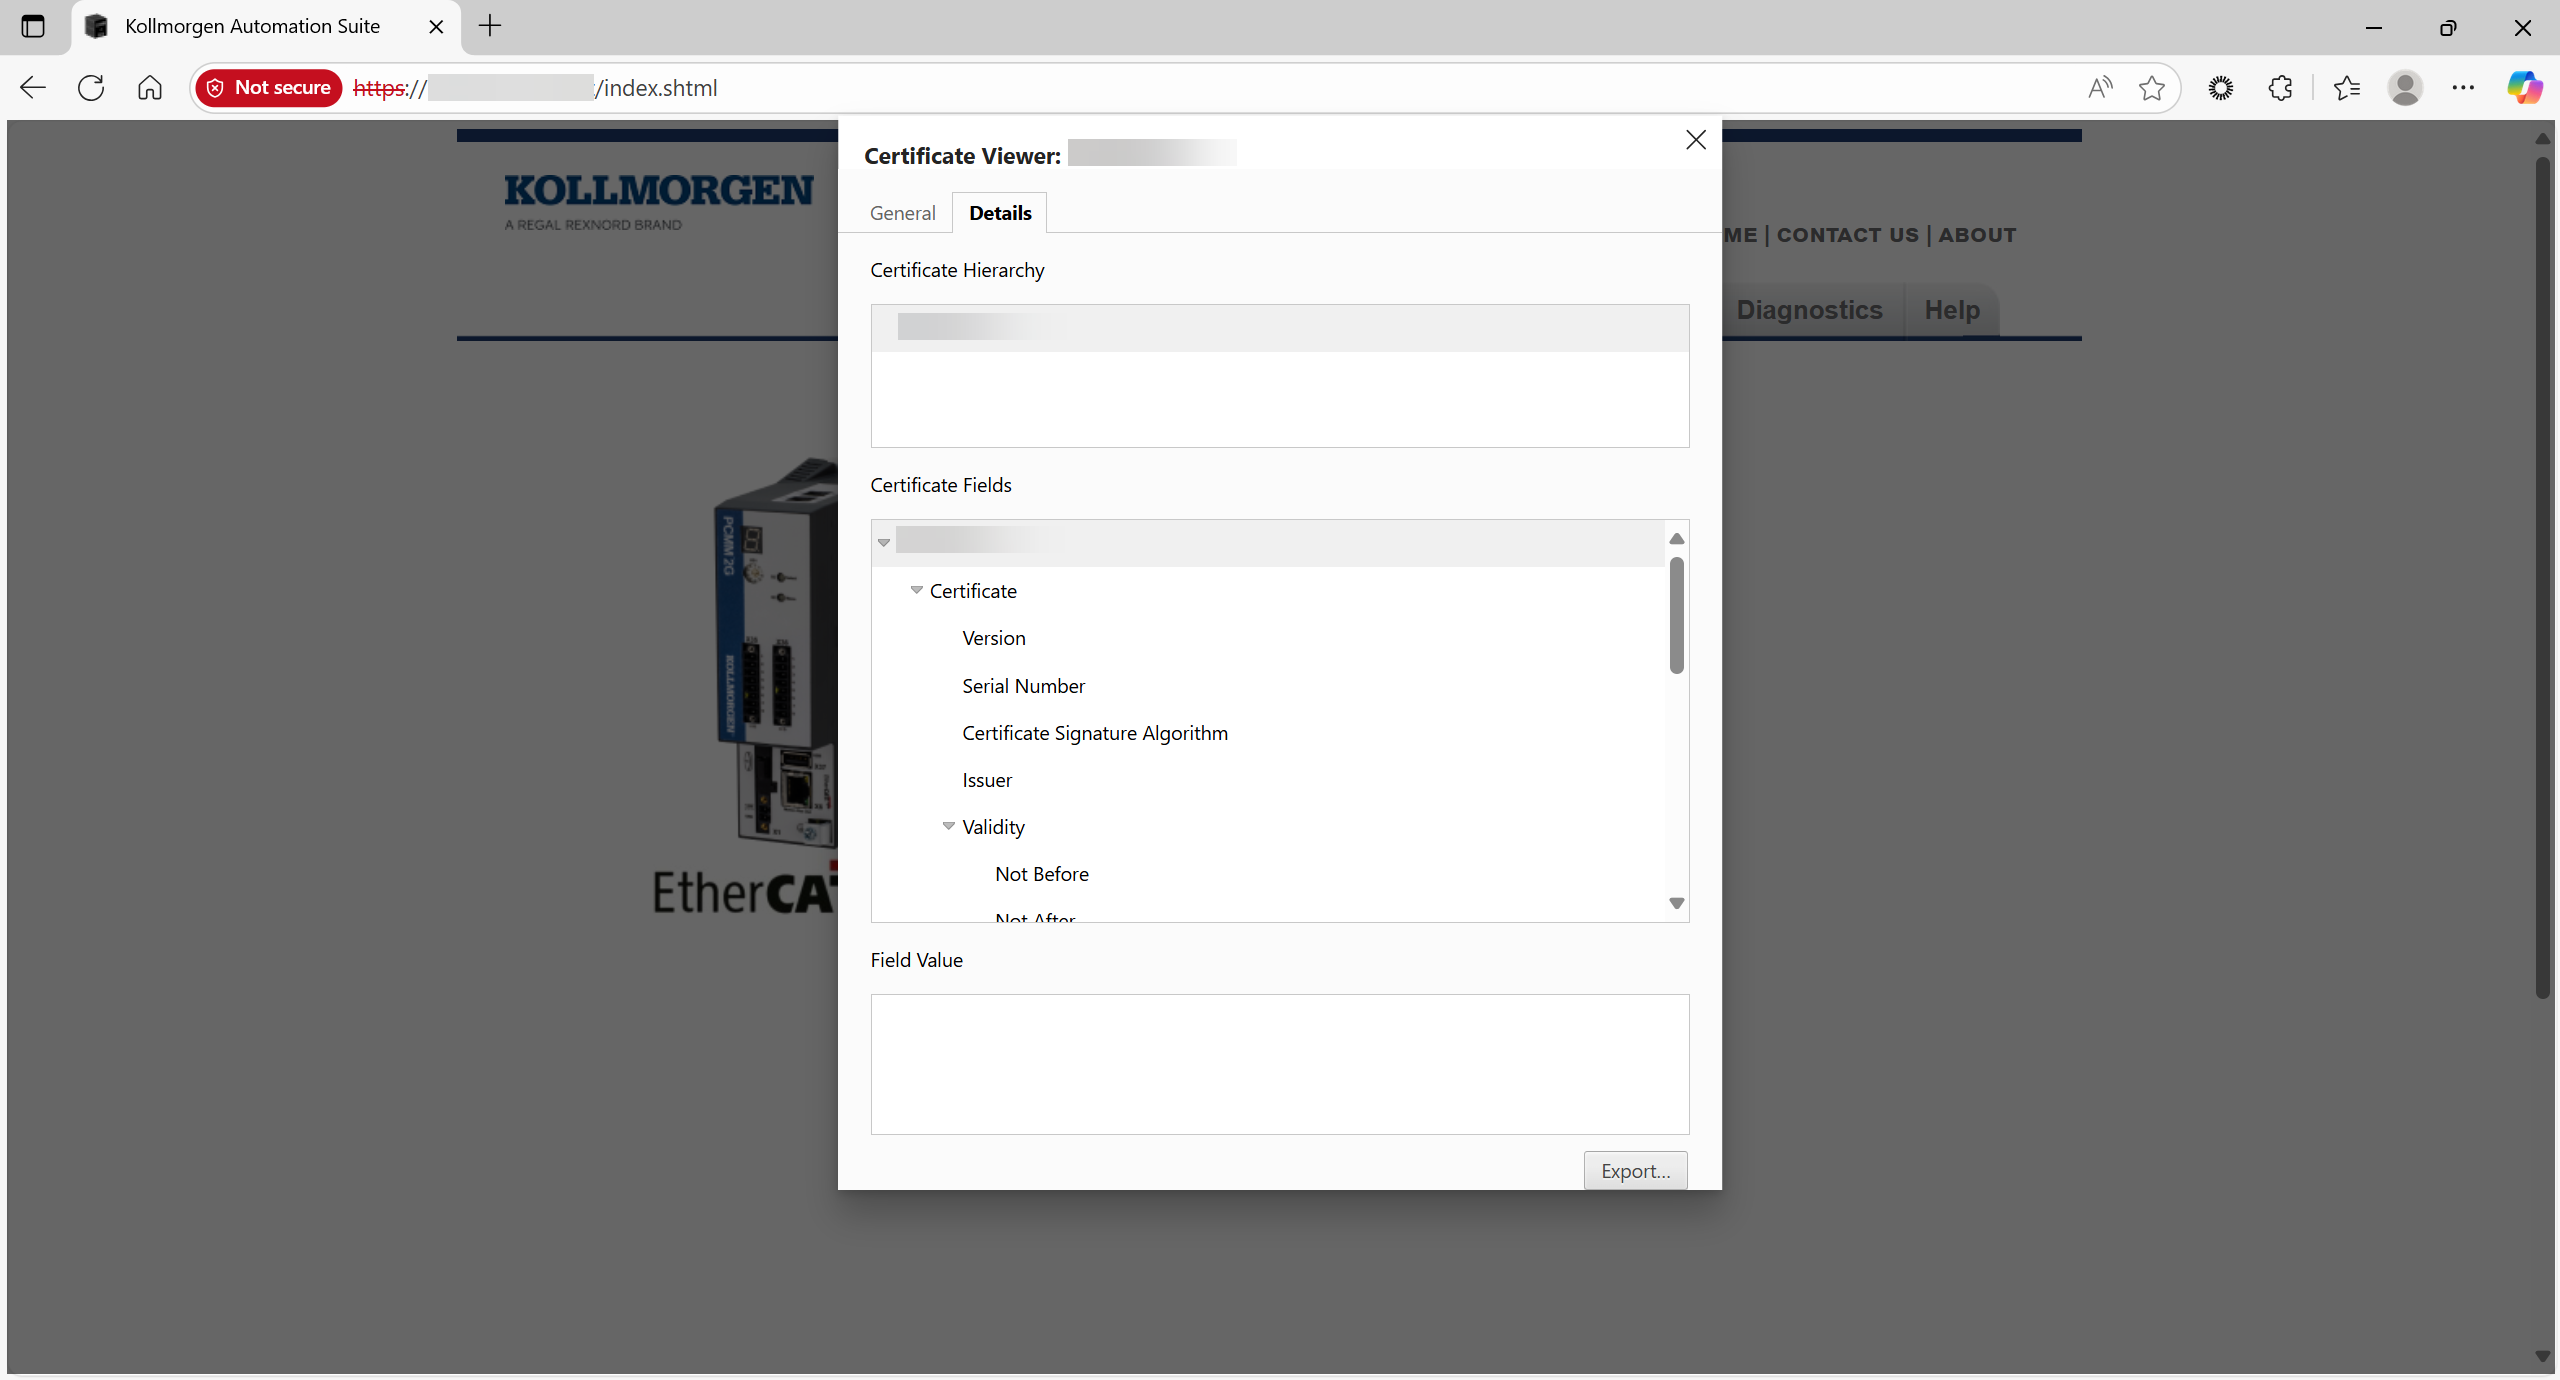
Figure 15: Details tab with Export button.
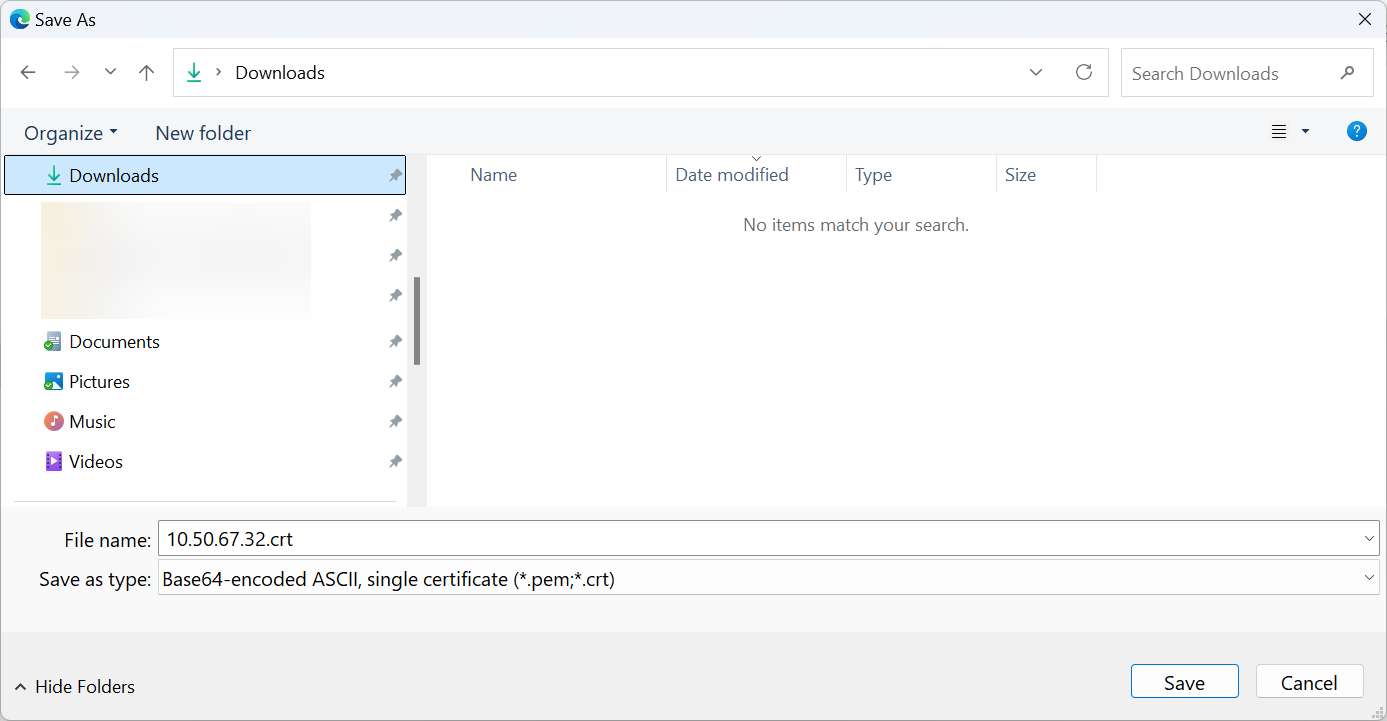
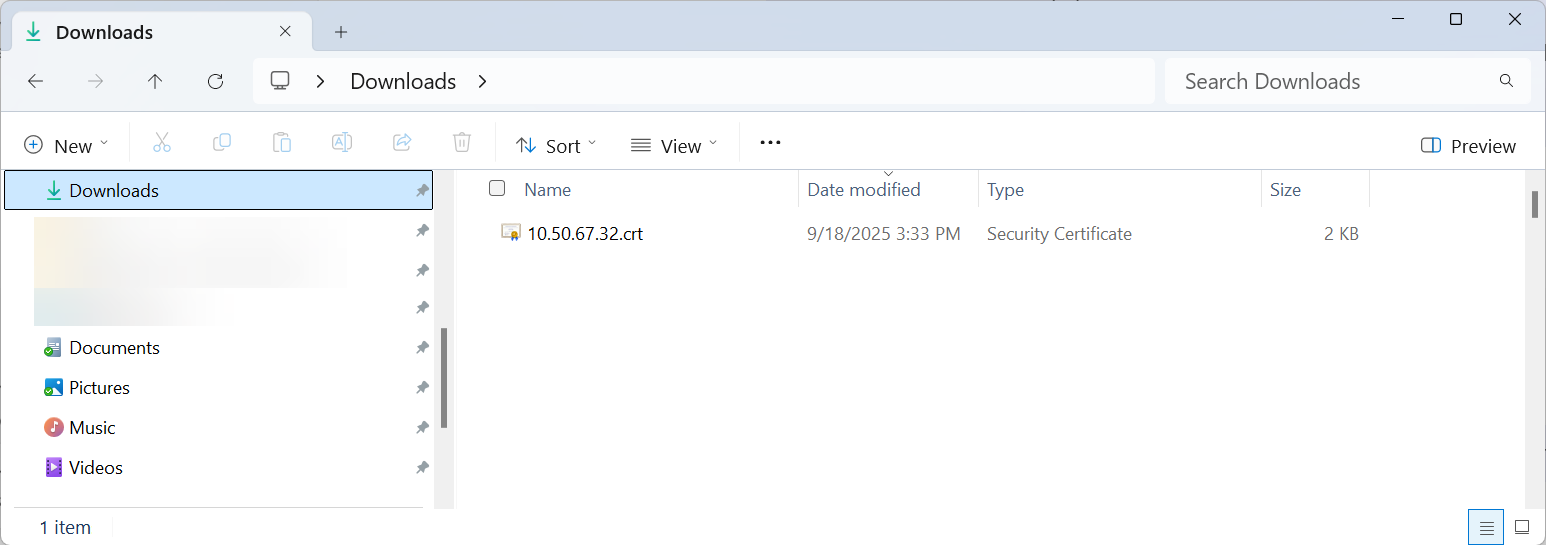
Figure 17: Save As dialog with saved .crt file
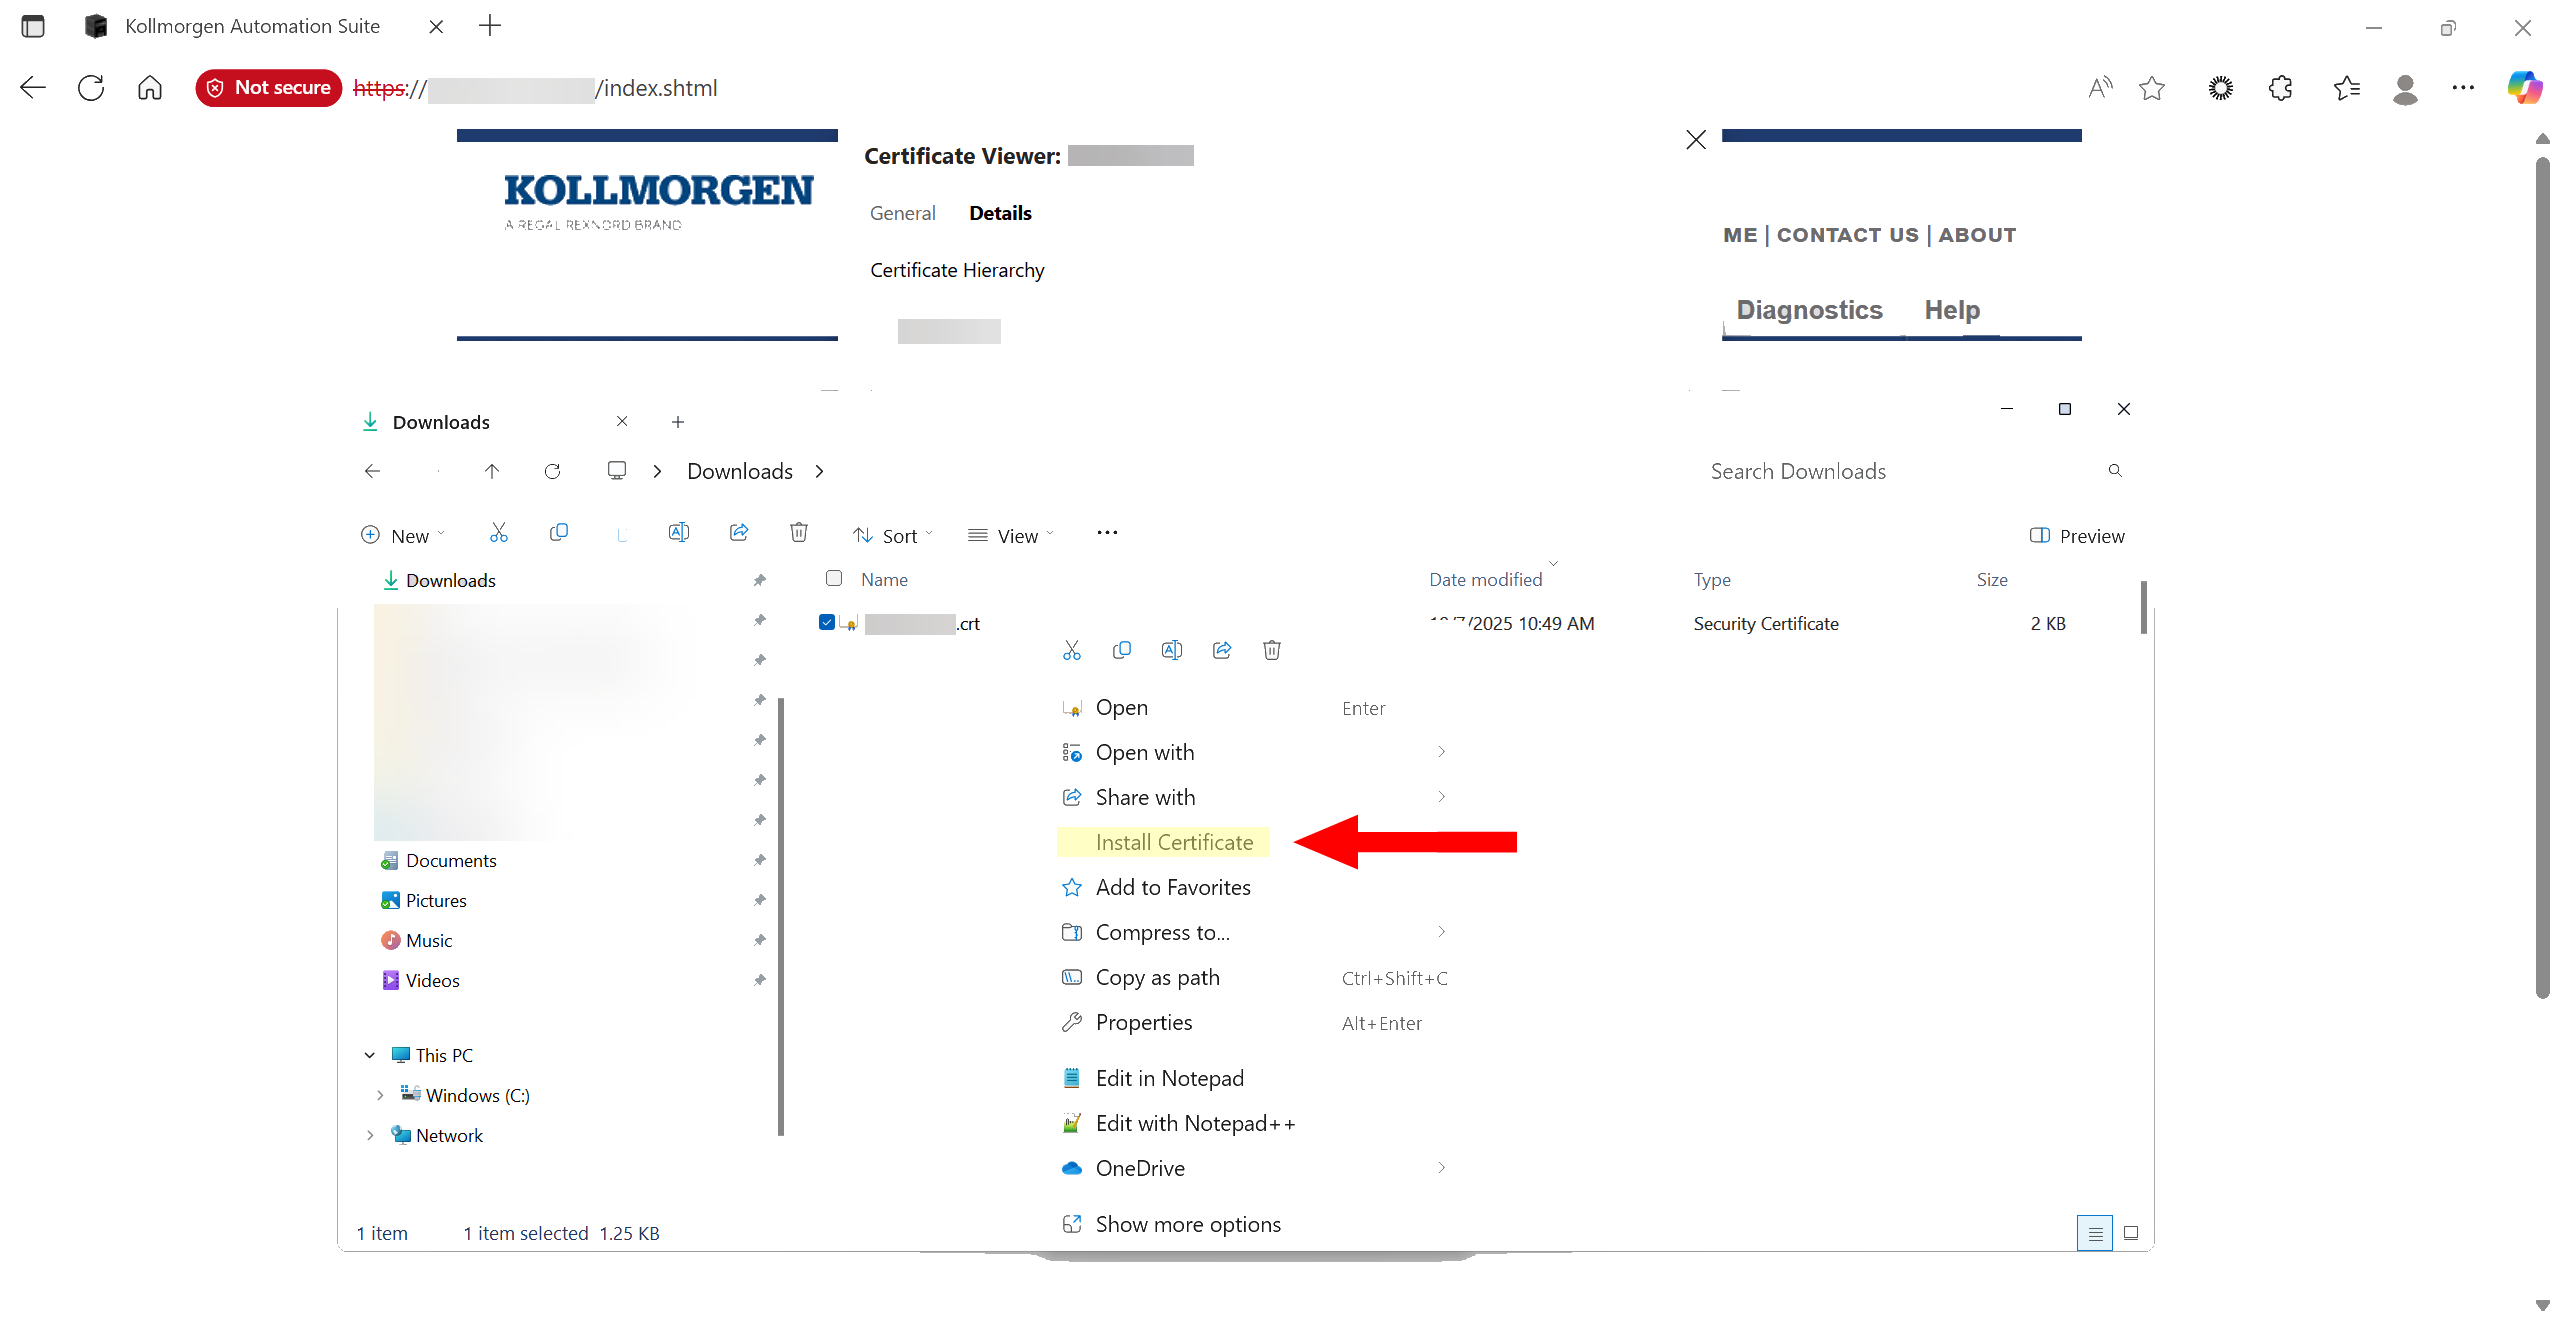
Figure 18: Selected .crt file and the Install Certificate option
The Certificate Import Wizard opens.
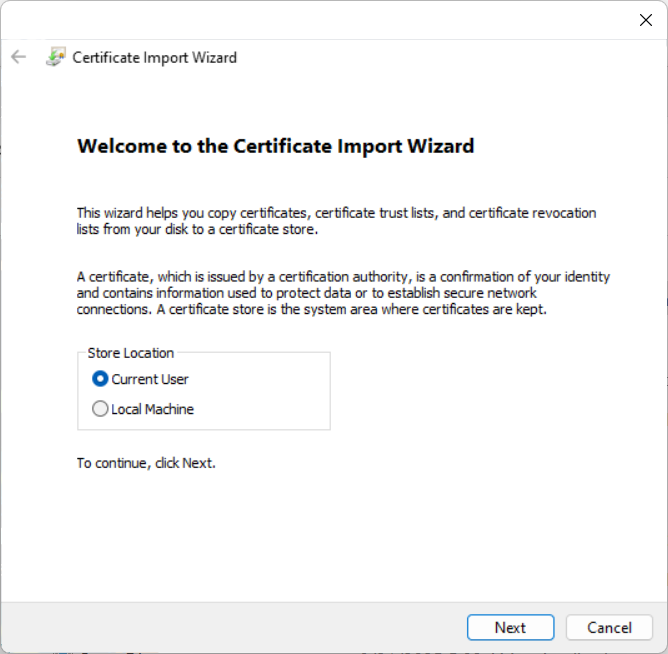
Figure 19: Certificate Import Wizard - Welcome page
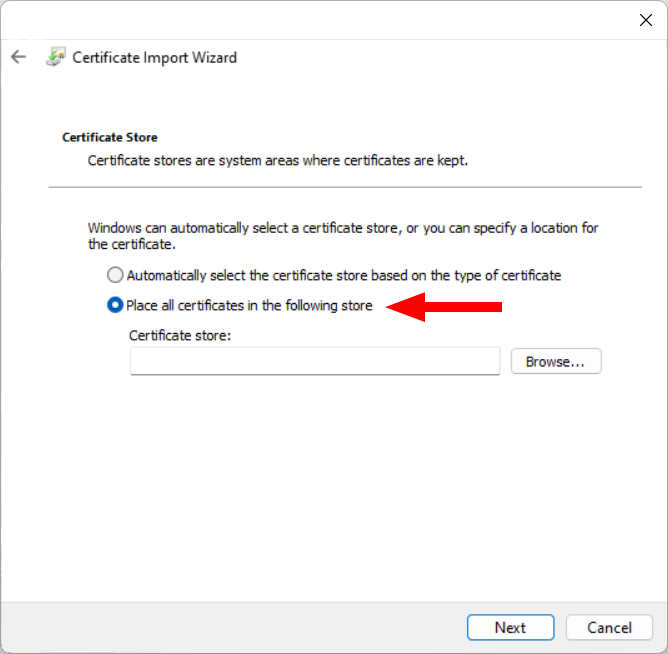
Figure 20: Certificate Import Wizard - Certificate Store page with selection
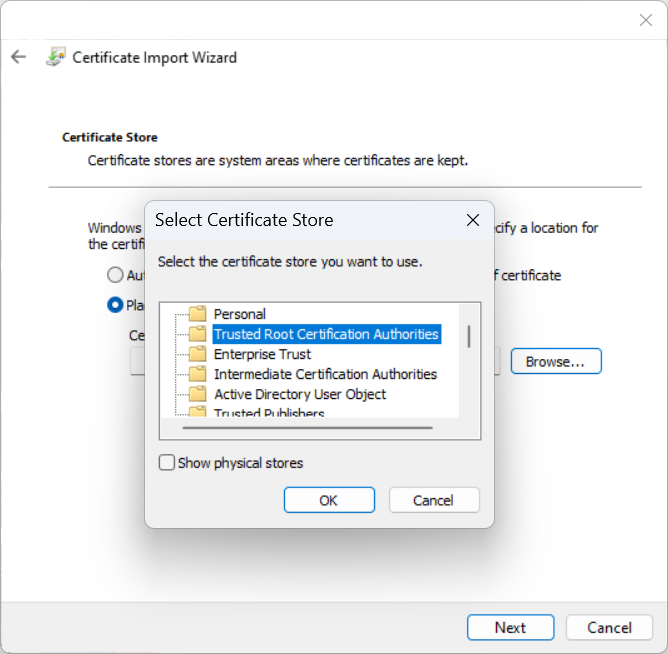
Figure 21: Selected Certificate Store dialog - Trusted Root Certification Authorities
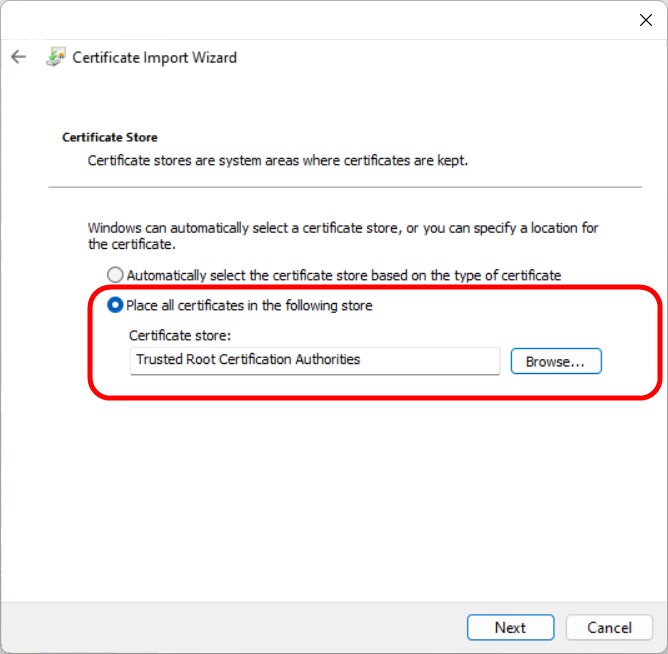
Figure 22: Certificate Import Wizard - Certificate Store page with selected Certificate store
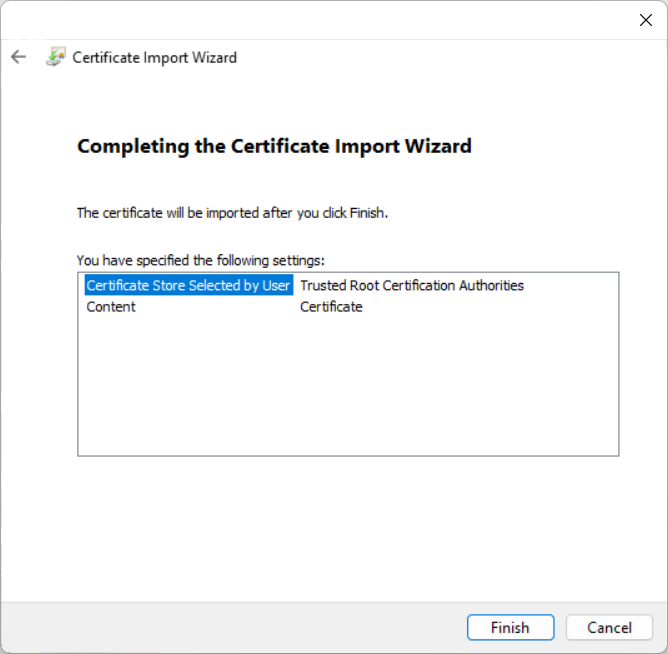
Figure 23: Certificate Import Wizard - Completing the Certificate Import Wizard page
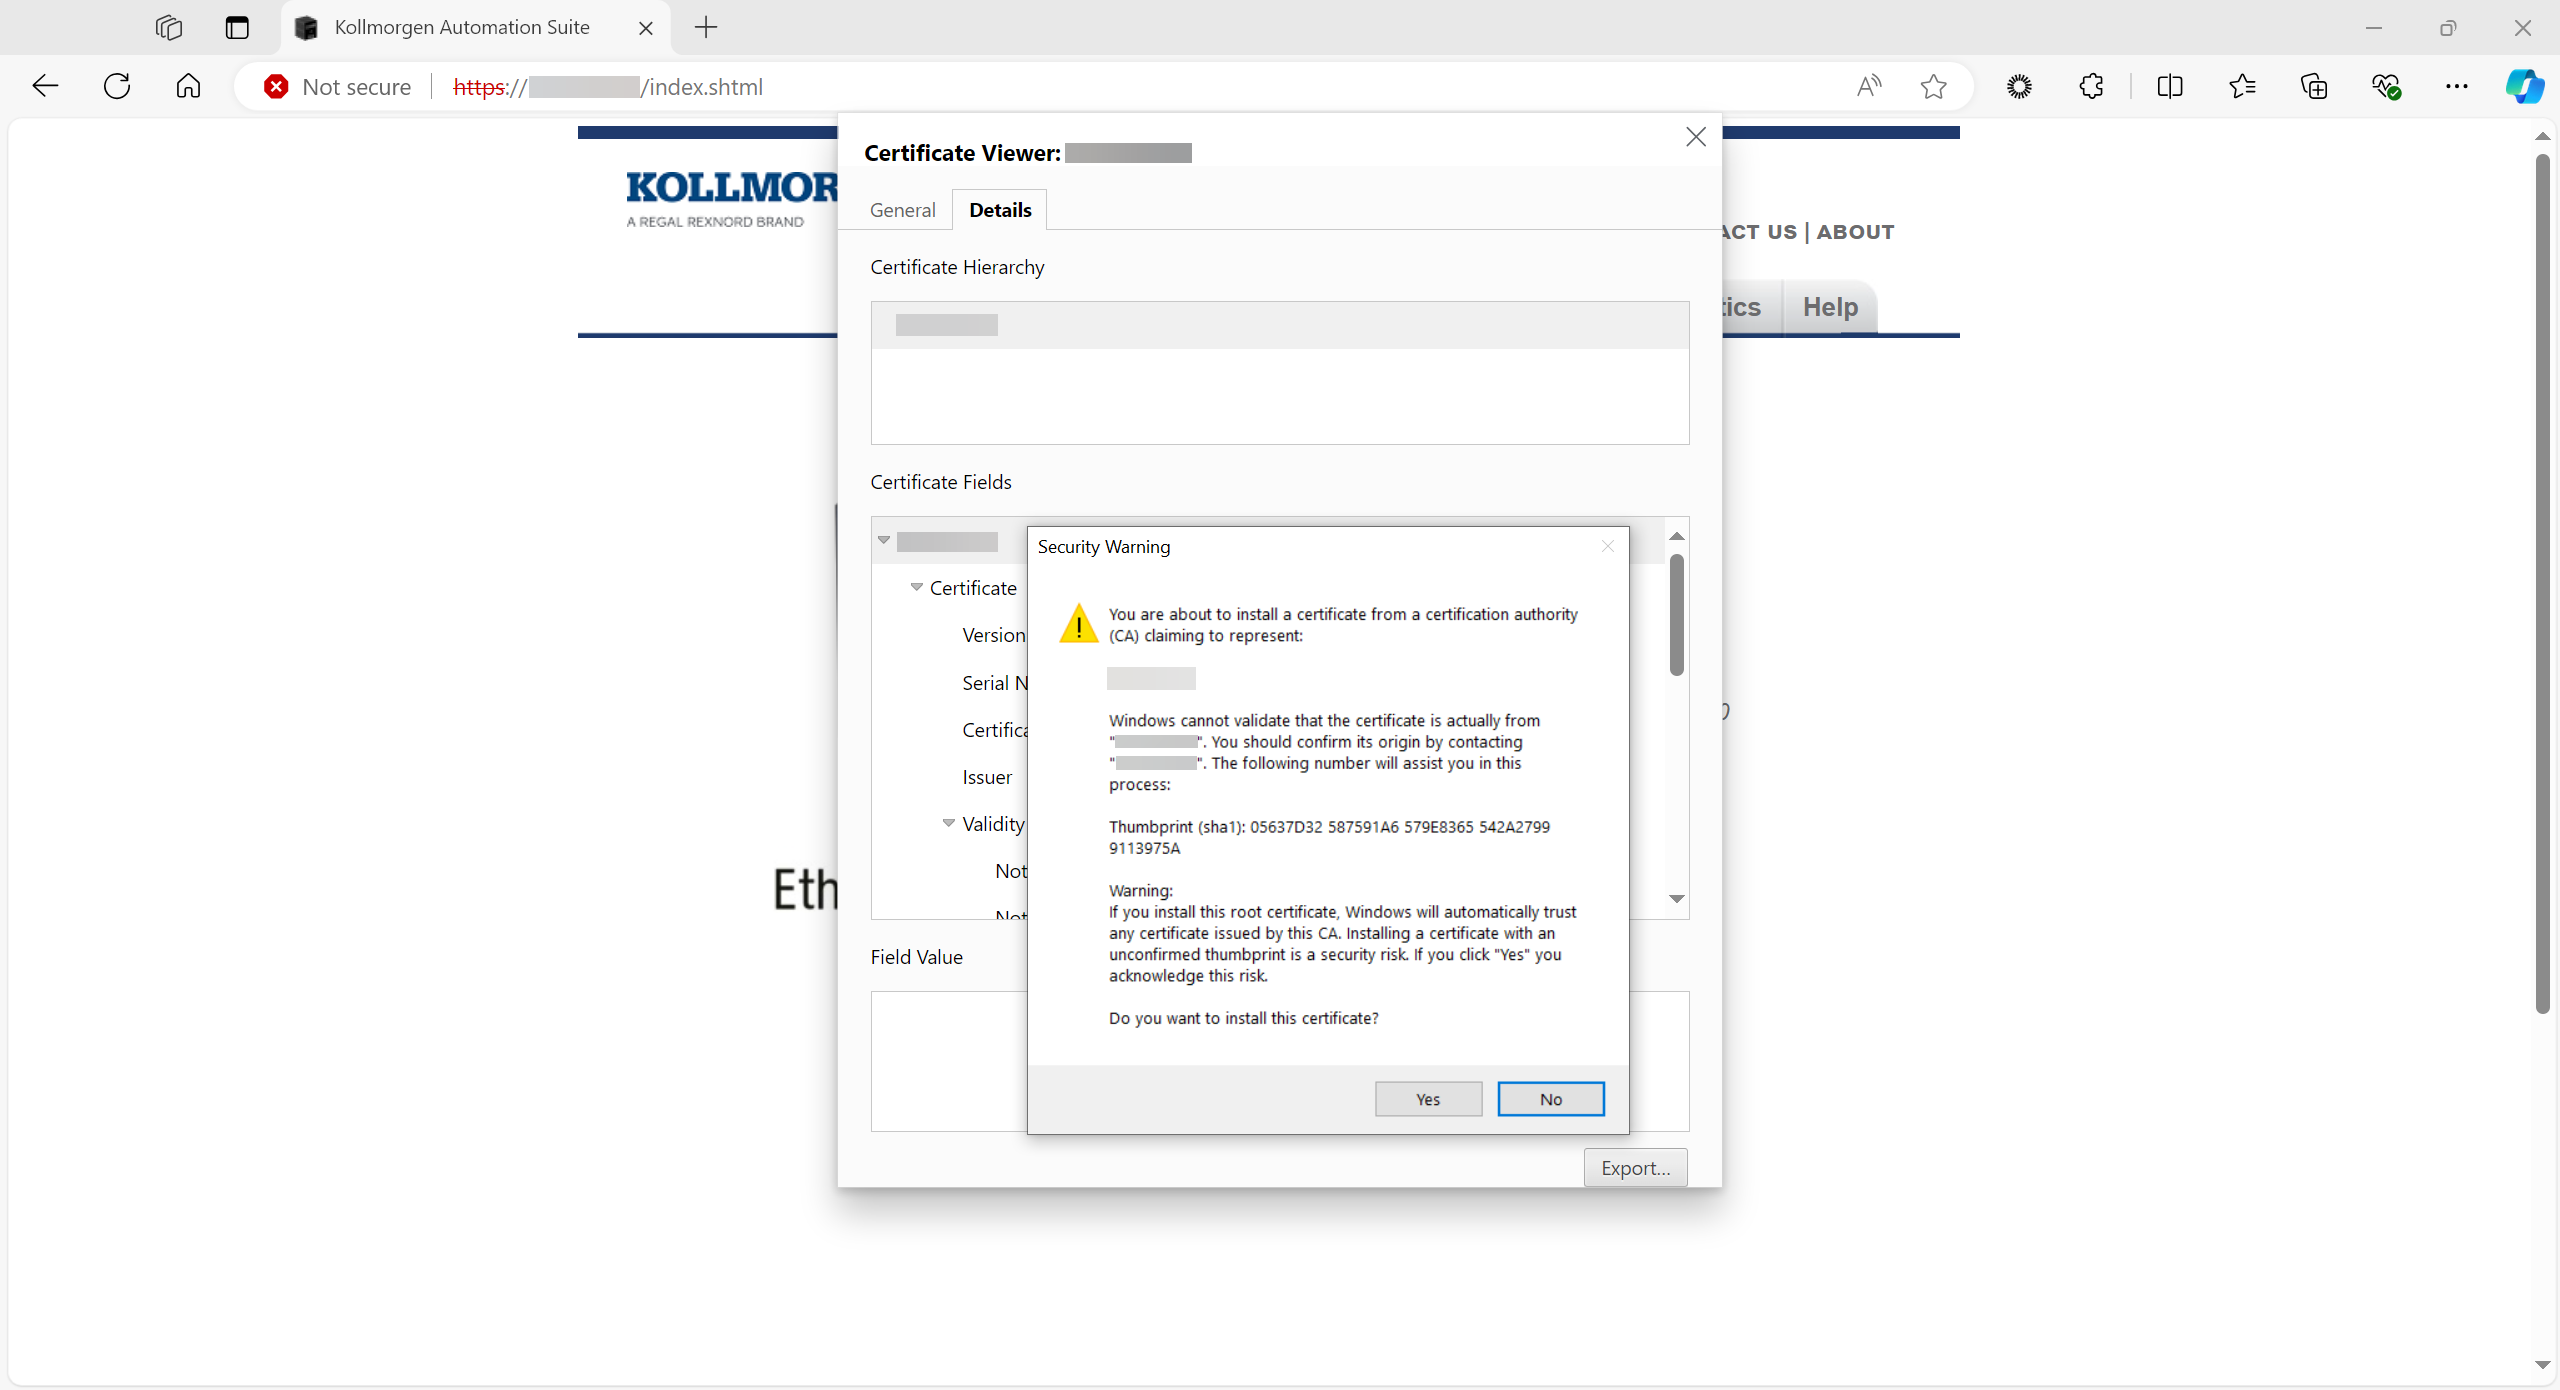
Figure 24: Security Warning dialog
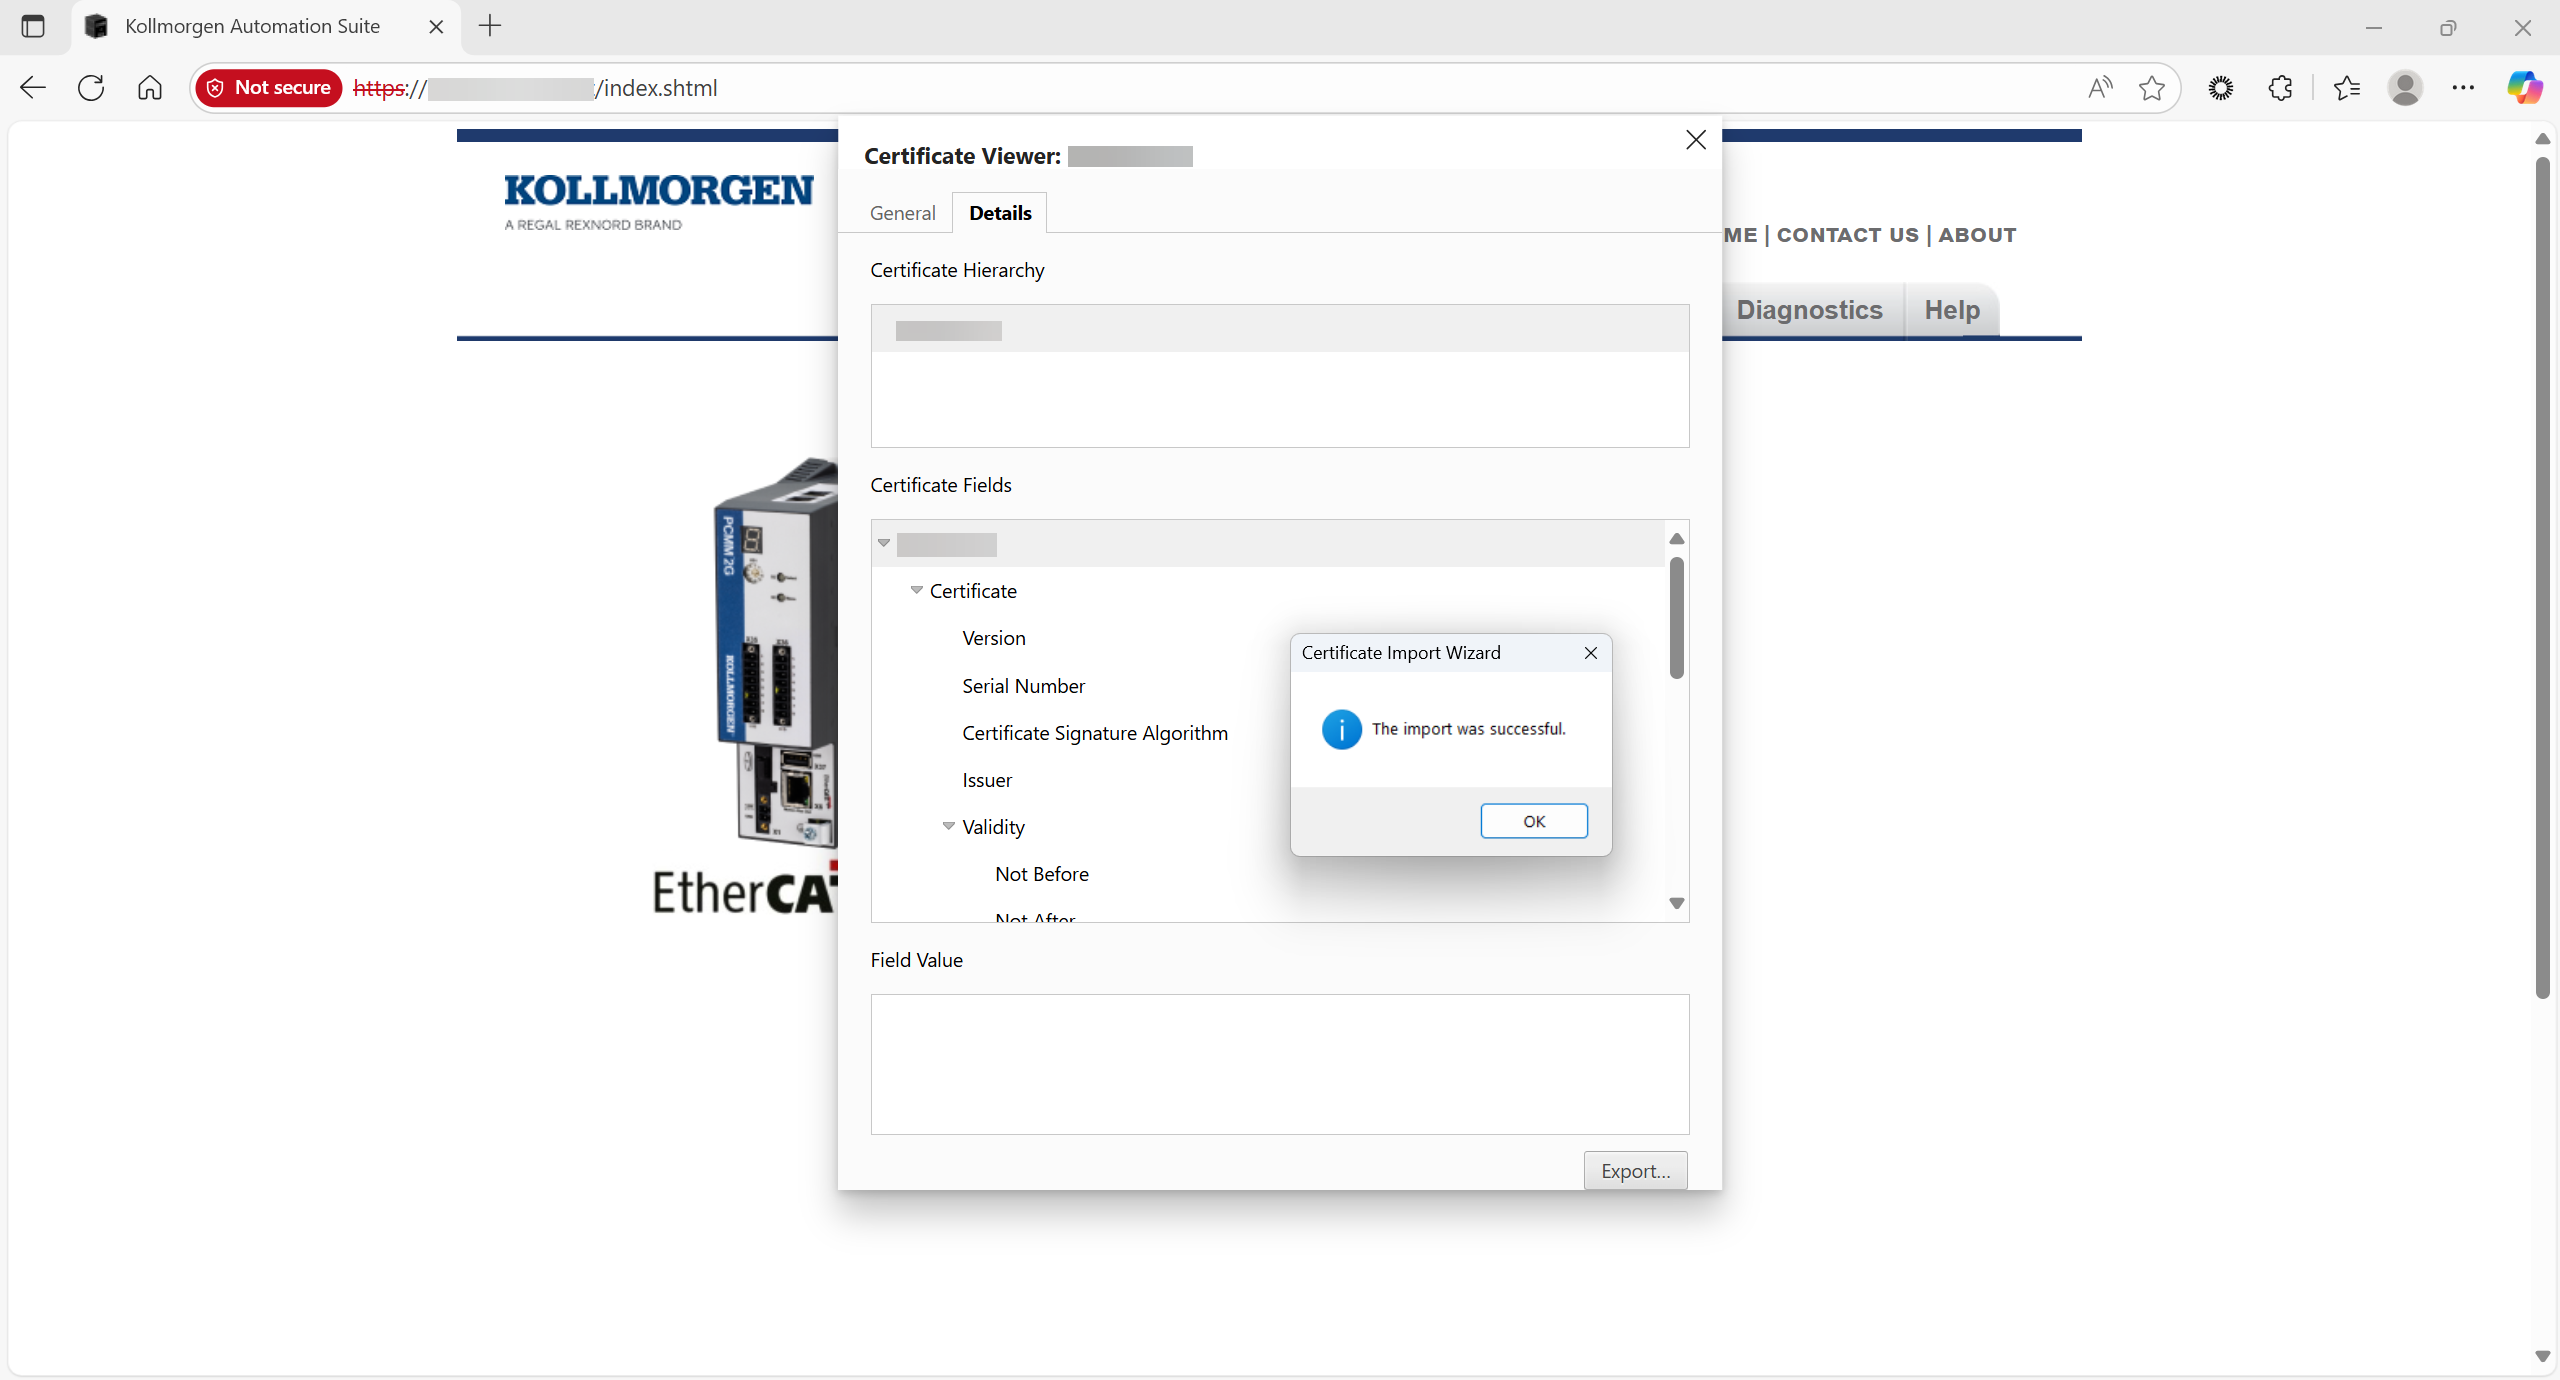
Figure 25: Certificate Import Wizard - The import was successful message
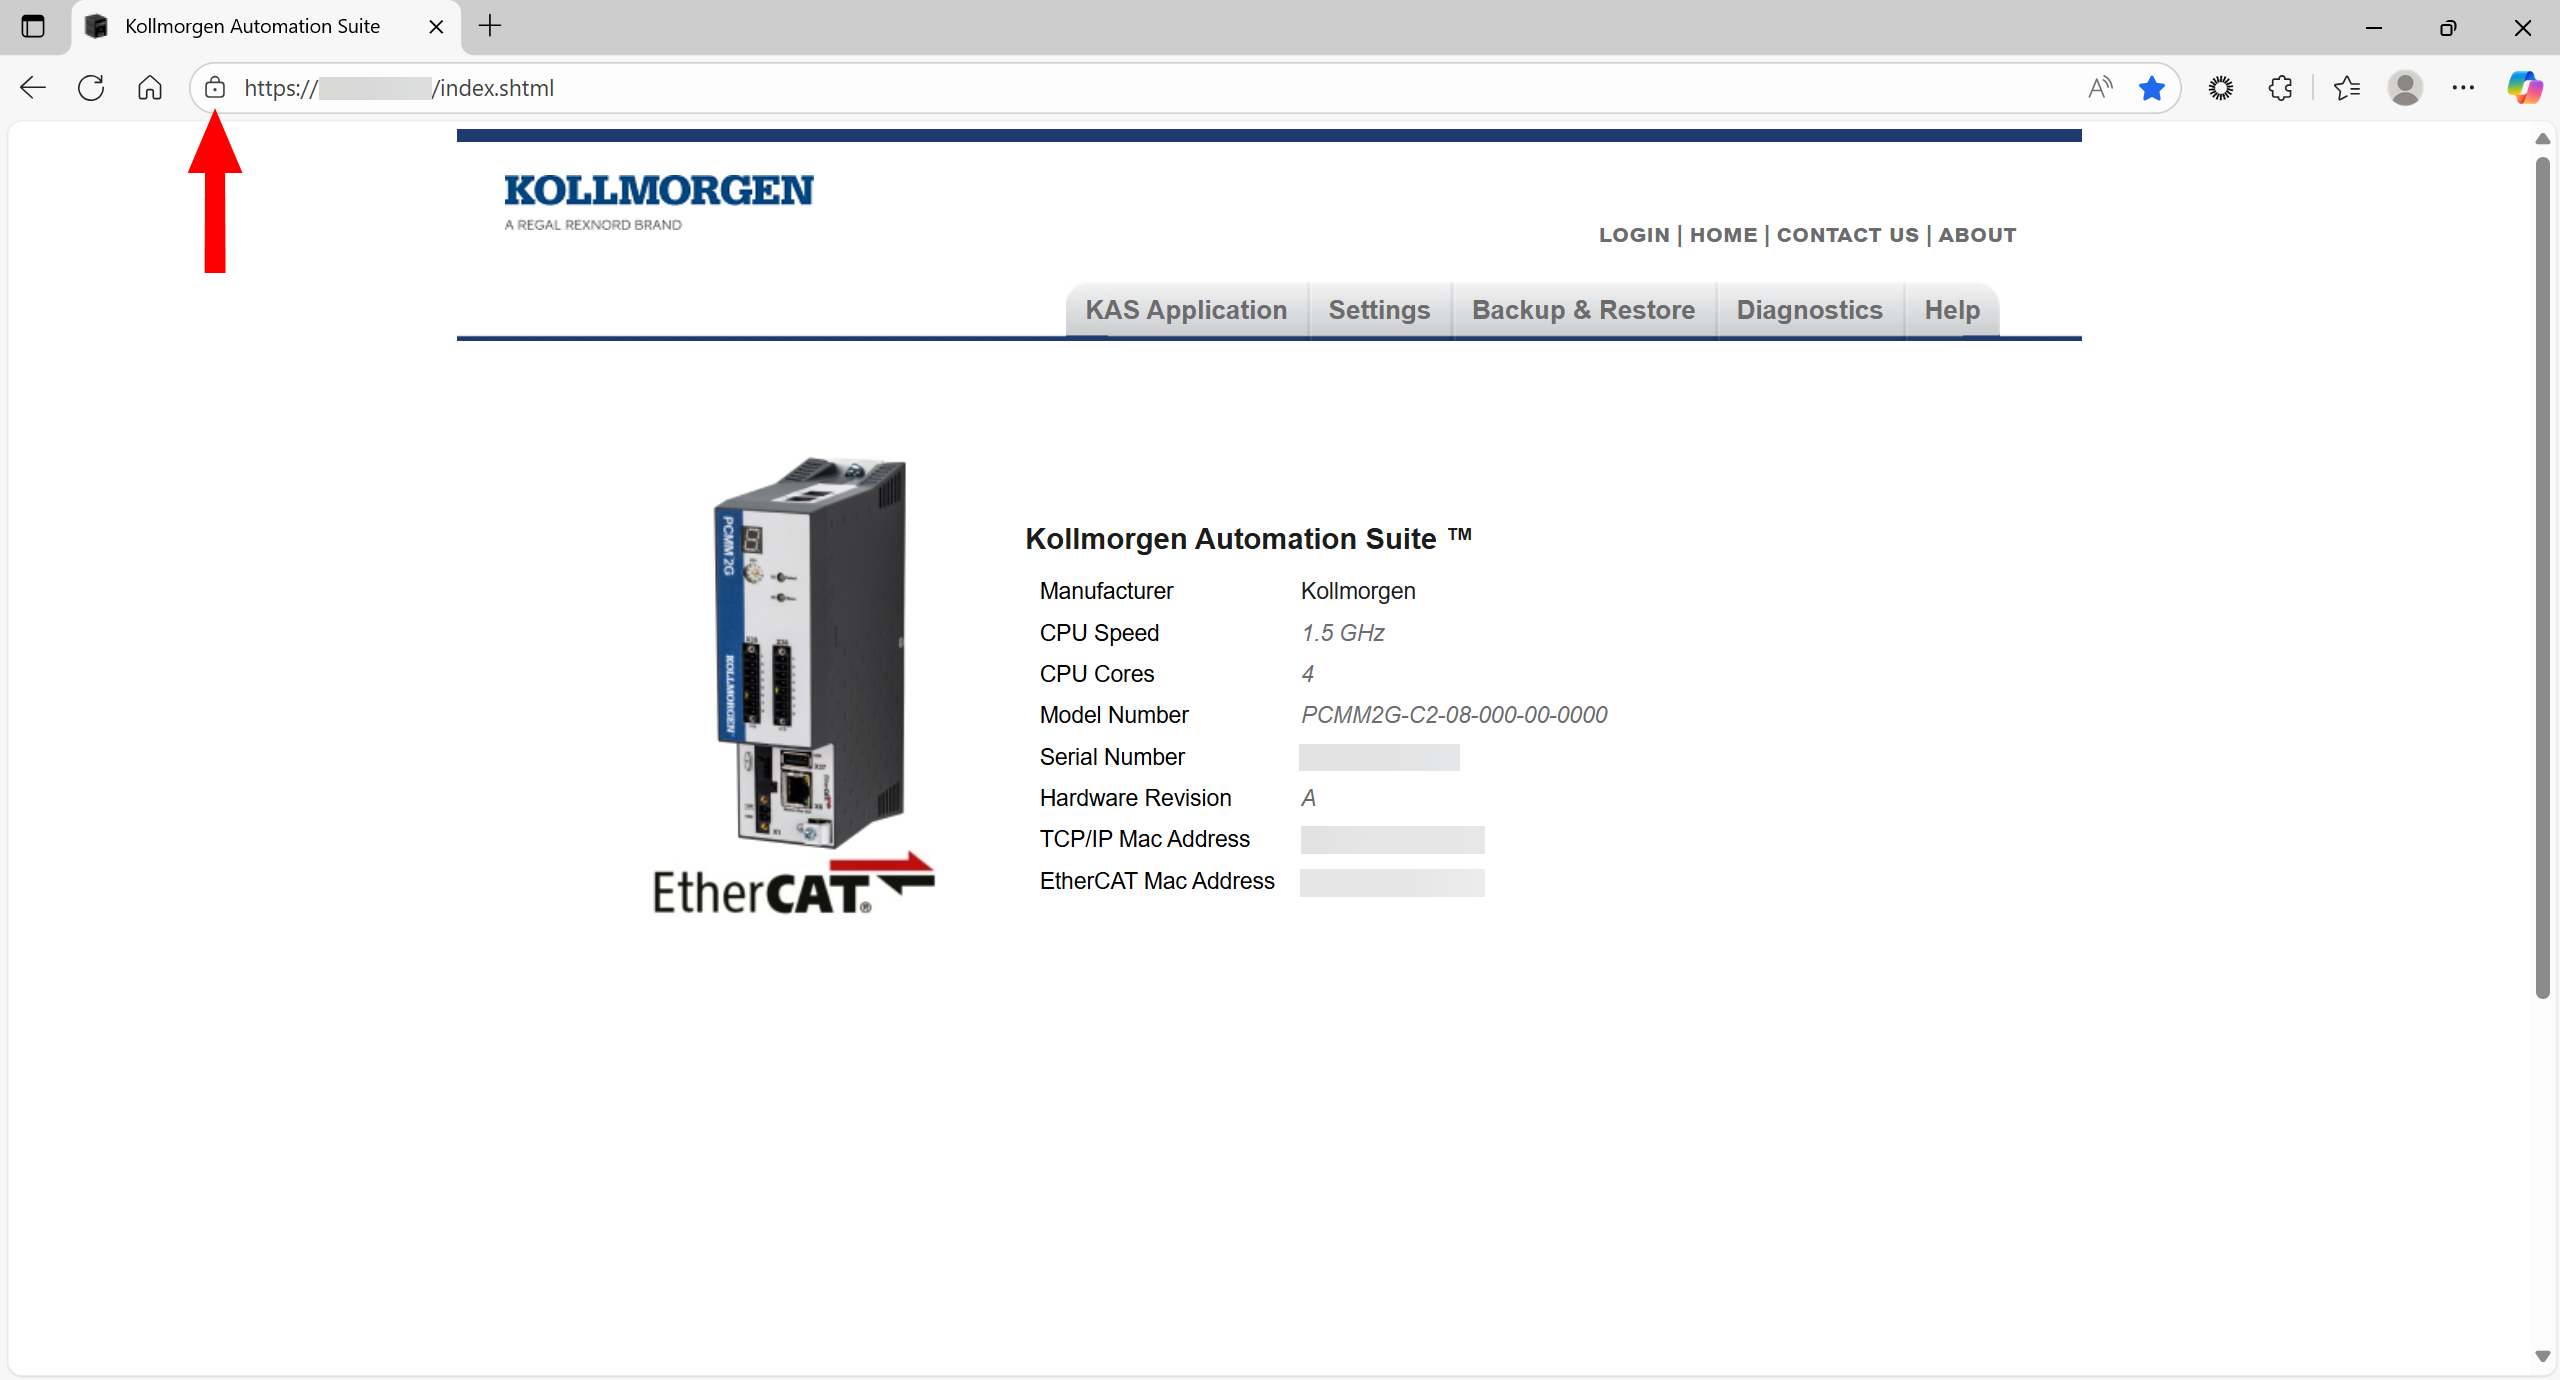
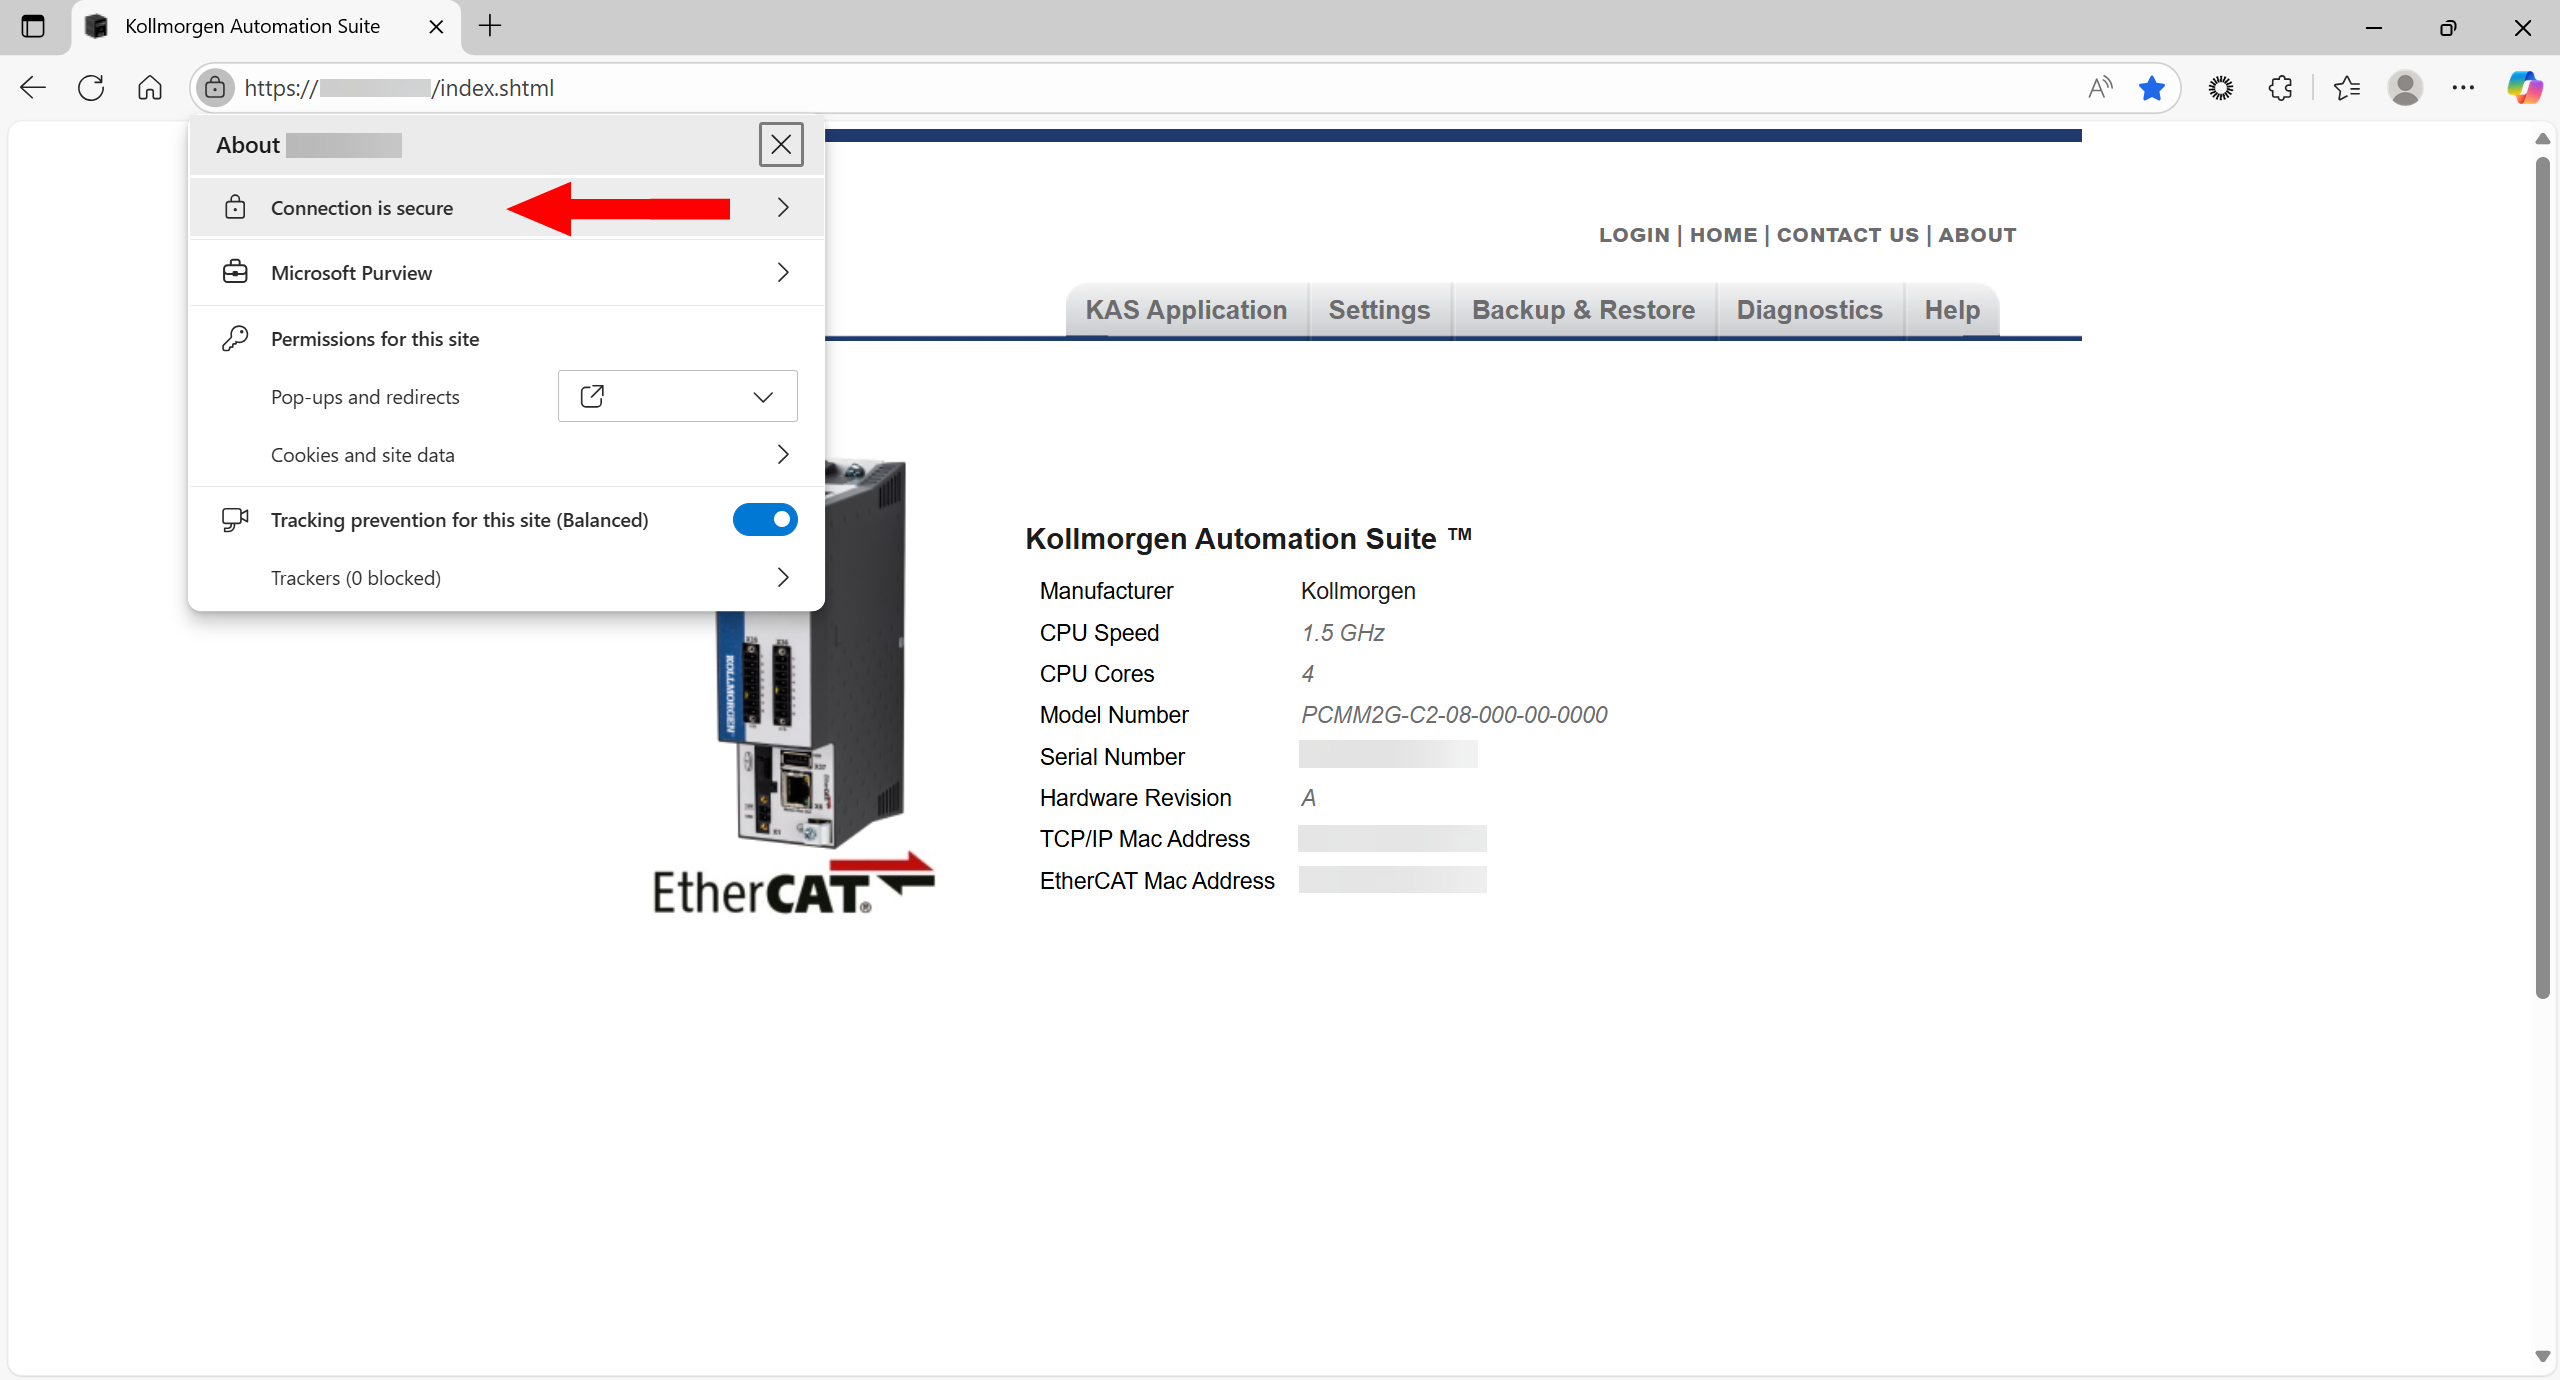
Figure 27: Connection is secure option
The Certificate is secure message appears.
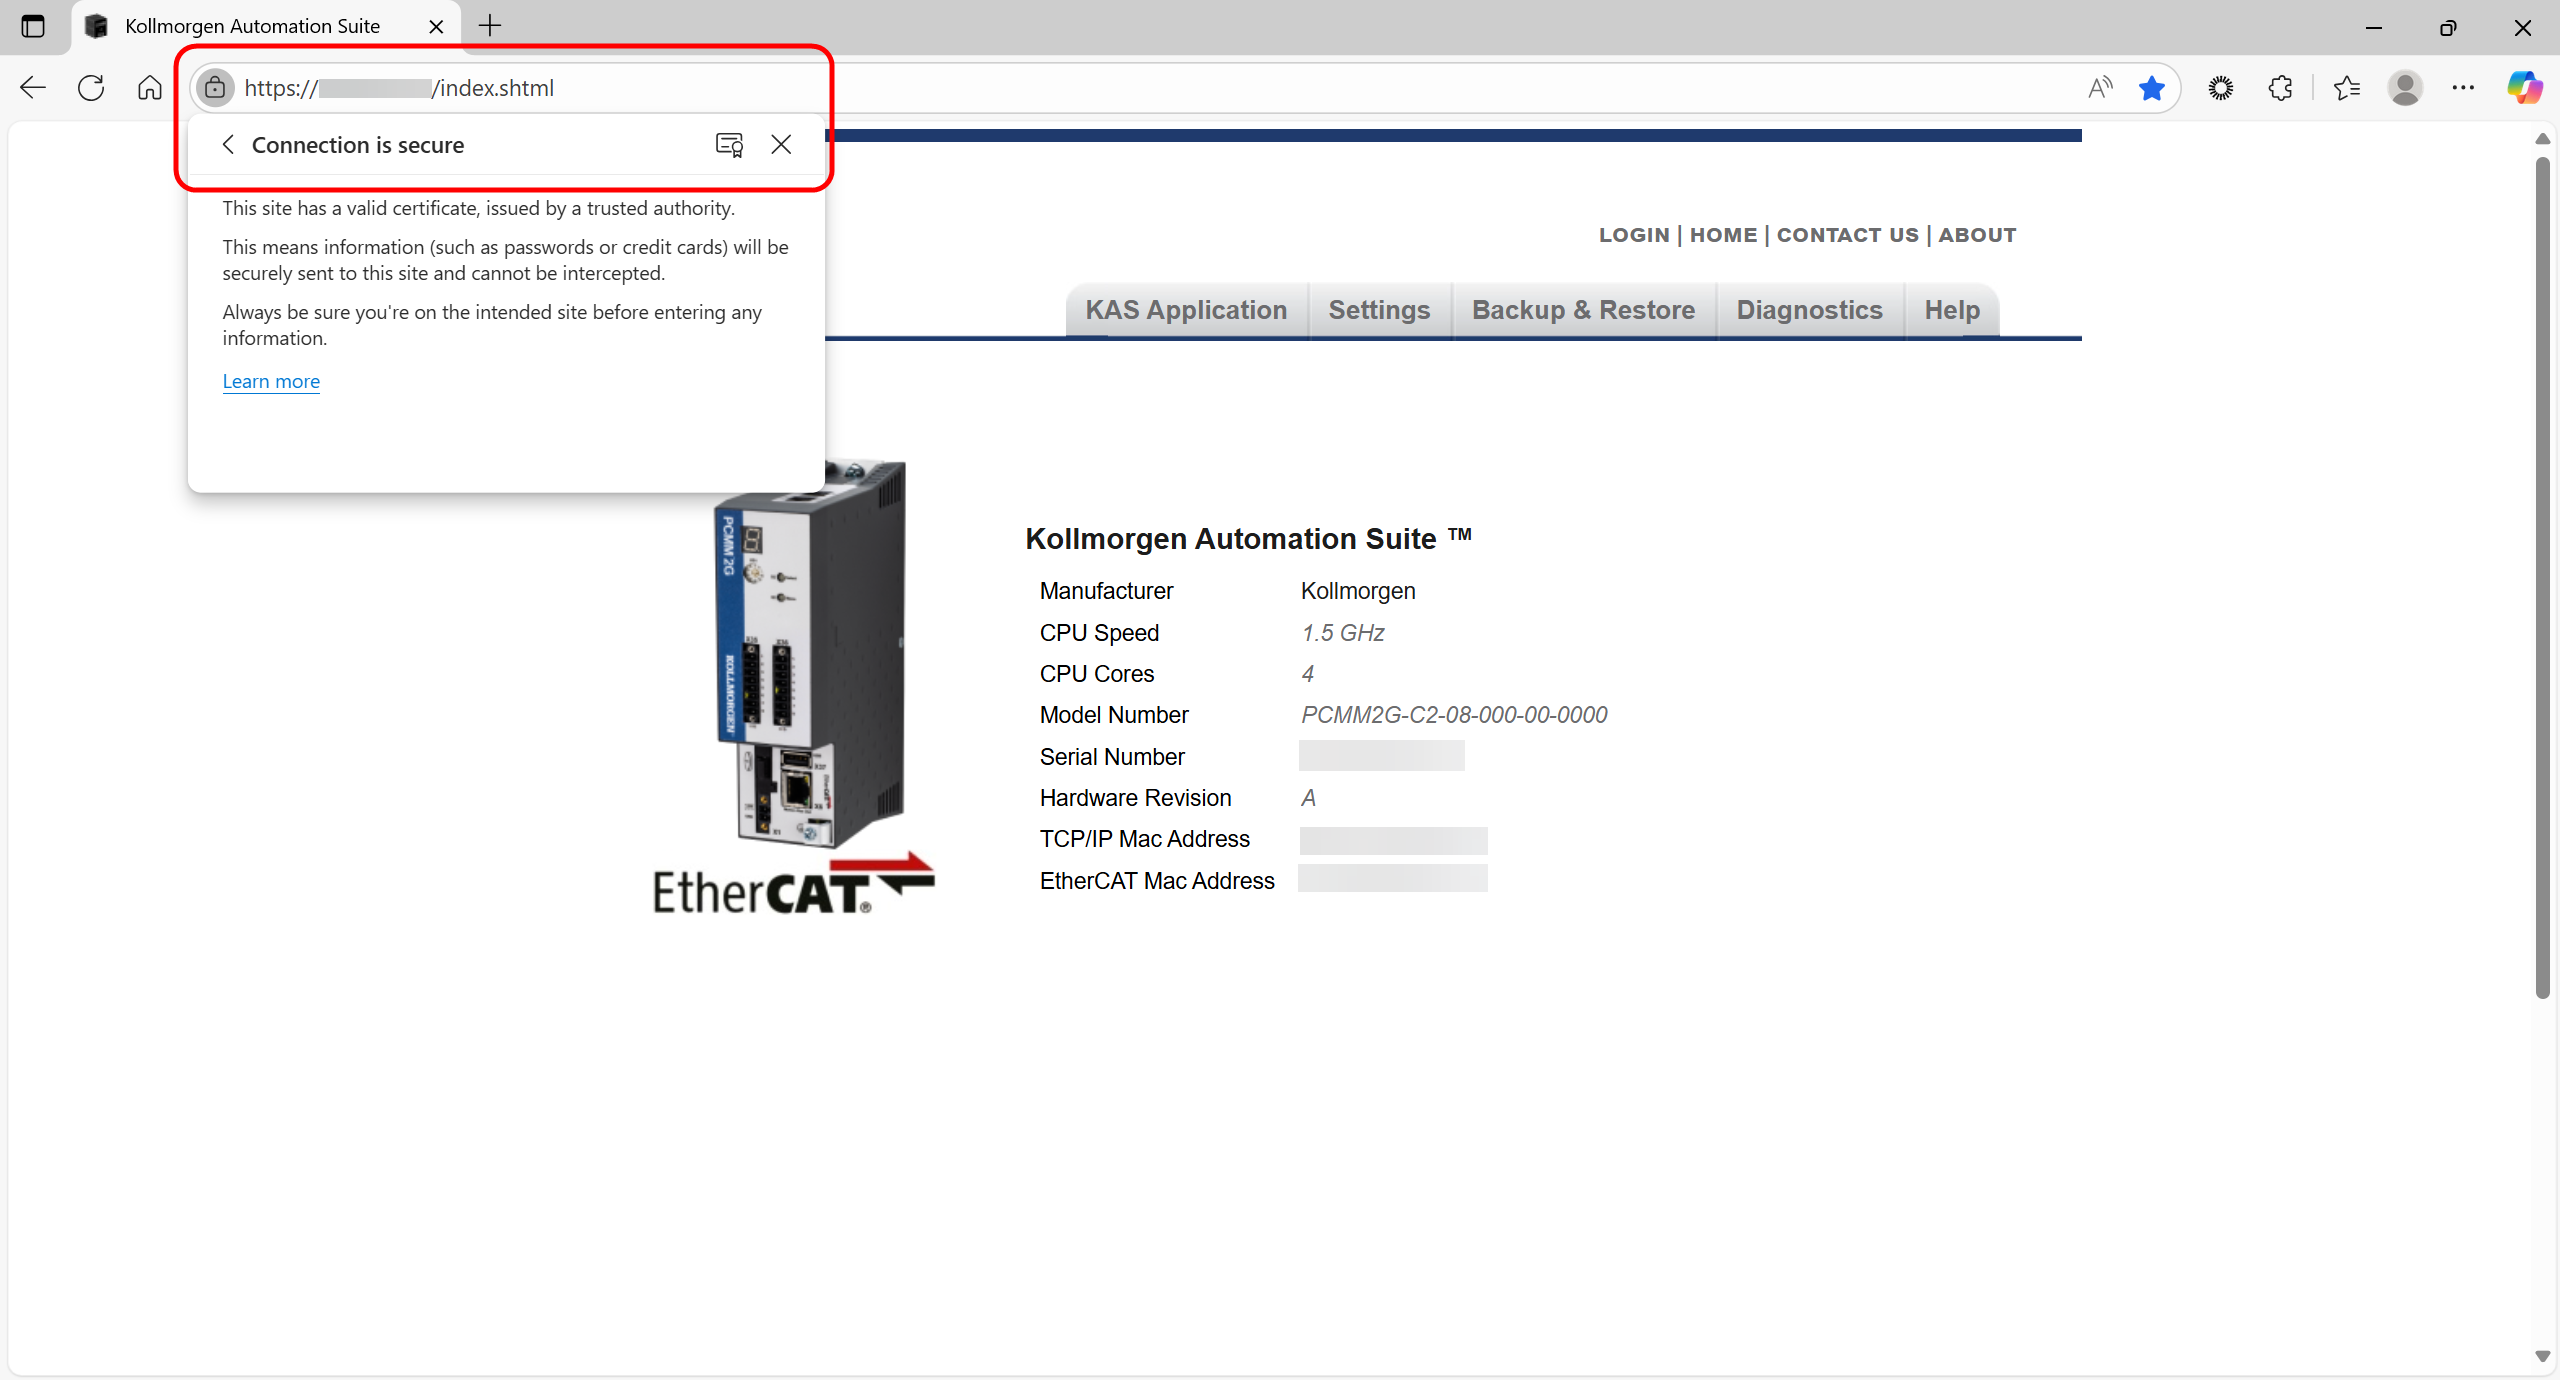
Figure 28: Certificate is secure message
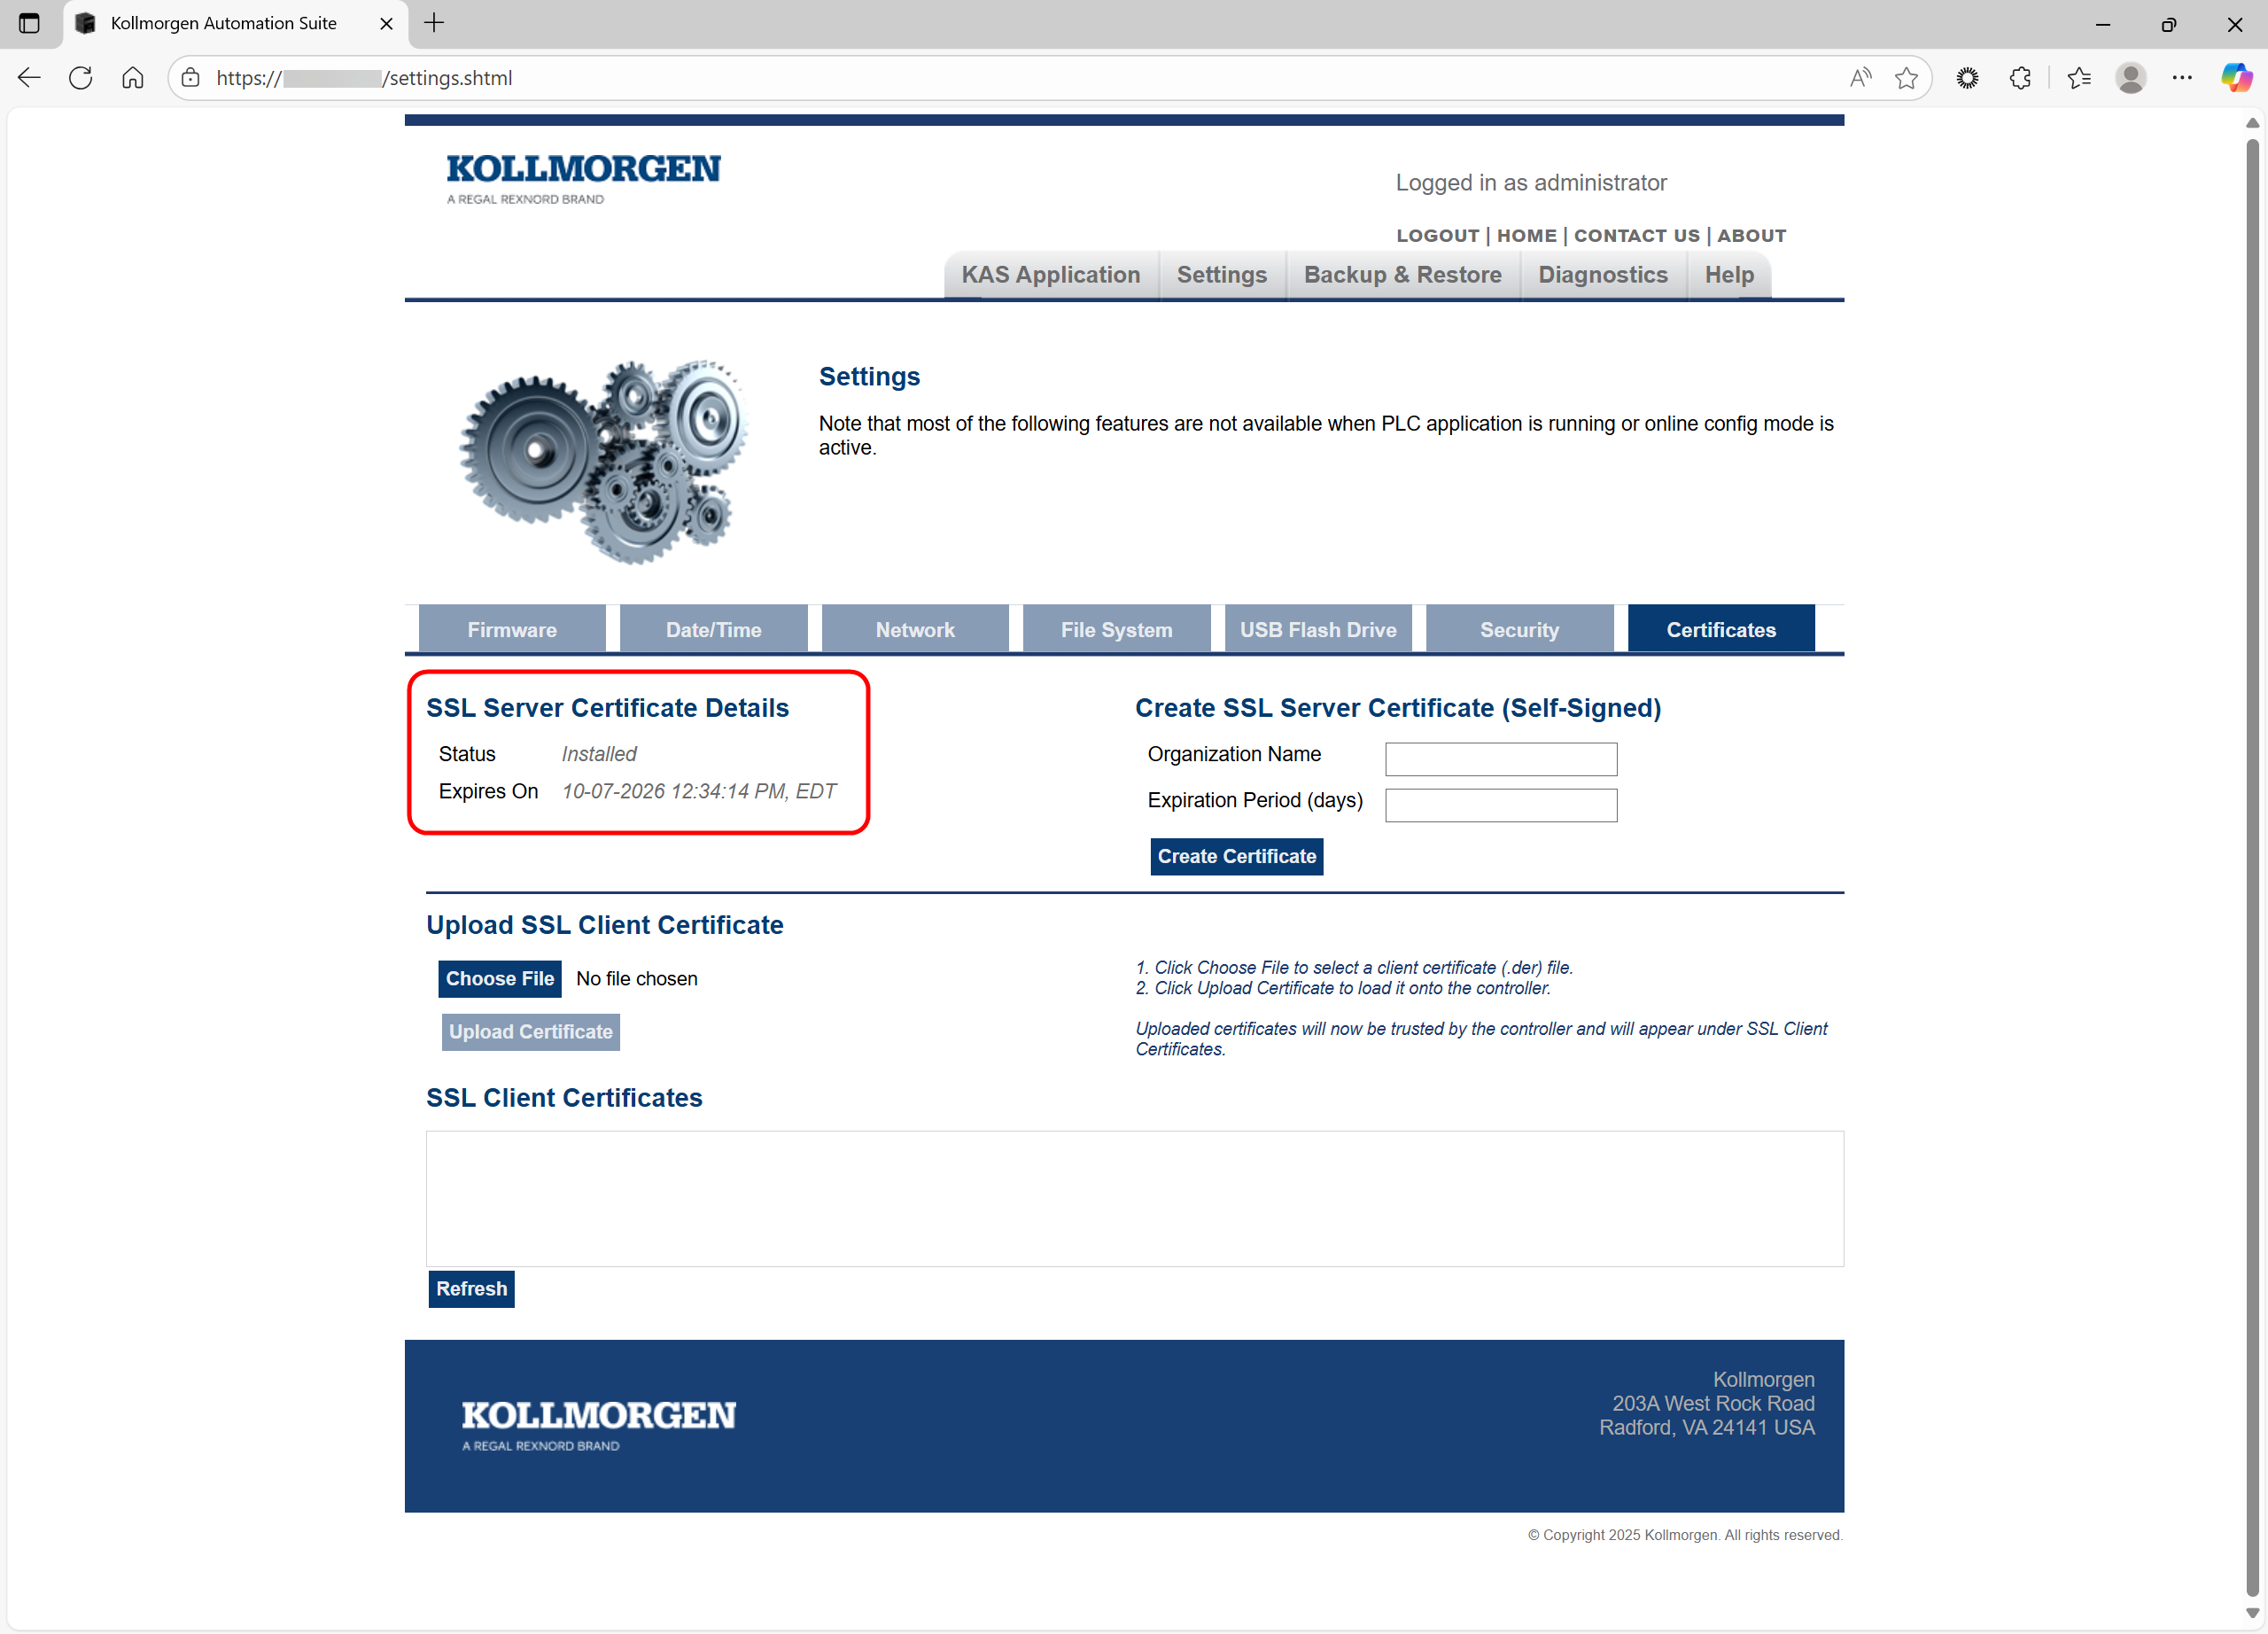
Figure 29: SSL Server Certificate Details area with certificate information
Troubleshooting
The webpage displays a warning:
- KAS IDE warning: The identity of this web site or the integrity of this connection cannot be verified.
- Microsoft Edge / Google Chrome warning: Your connection isn’t private.
- Mozilla Firefox warning: Warning: Potential Security Risk Ahead.
Remedies
- Verify the current certificate:
- has been downloaded and installed onto the machine.
- matches the IP address of the controller.
- has not expired yet
The IP address of the PCMM2G does not match the IP address listed on the SSL certificate.
Remedies
- Create, download, and install a new certificate with the new IP address.
- Configure the IP address with a static IP address matching the certificate’s IP address using the rotary switch.
- See Network tab.
- Reserve the certificate’s IP address for the PCMM2G using a router or server.


