Selecting and Saving Units
The drive uses three primary measures of motion: position, velocity, and acceleration. You must first choose units of measurement for each of these, and then enter the details of the mechanics in order to scale the chosen units appropriately.
The settings for units are automatically applied. The unit settings in the drive will reflect last settings made in the units screen before exiting. To save settings into the nonvolatile memory of the drive, click the Save to Device button in the toolbar.
Units Example
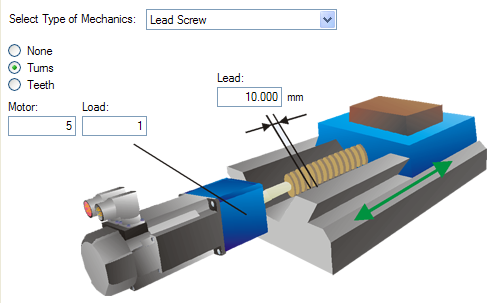
1. Select type of mechanics
To set the units in the drive for a particular application, first select the type of mechanics present.

2. Select Position Units
By default, position is measured in counts. Counts are the smallest unit of position that can be represented in the drive. This unit of measure equates to 4,294,967,296 counts/revolution of the motor. You can use the units screen to change this measurement into a meaningful scale relating to the units of the application.
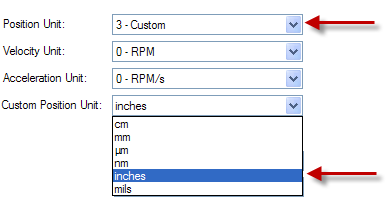
For position units, five selections are available:
0 –Counts (4,294,967,296/revolution)
1 –Radians (2*π /revolution)
2 –Degree (360/revolution)
3 –Custom (set by user according to mechanics of machine)
4 –Counts (16-bit) (65,536 /revolution)
The drive uses full 32-bit quantization for internal calculations regardless of unit settings. User units settings will not affect performance, resolution, or accuracy of the servo system.
Choose “3-Custom”, and then select your desired position units, for example, millimeters.

3. Select Velocity Units
For velocity, select Custom/s to set the measurement to mm/sec.
4. Select Acceleration Units
For acceleration, select Custom/s^2 to set the measurement to mm/sec2.
Once the chosen units of measurement are established, the details of the mechanics need to be entered to establish the scaling of the chosen units.

In this example, a lead screw with a 10 mm lead and a 5:1 gearbox has been selected. A 10 mm lead means the load will traverse 10 mm for every turn of the screw. A scale factor is applied based on the values entered for the chosen mechanics. This scaling is done through UNIT.PIN and UNIT.POUT parameters in the AKD, which are automatically adjusted when the mechanics values are entered.
UNIT.PIN and UNIT.POUT can be directly entered using the Motor Only selection from the Select Type of Mechanics box. In this example, scaling is adjusted as follows:

UNIT.PIN is calculated as follows:
10 mm/screw turn * 1 screw turn/5 motor turns = 2 mm/motor turn
Using Custom Units with Feedback 2
When PL.FBSOURCE = 1 (Feedback 2), UNIT.PIN and UNIT.POUT should reflect the mechanical data of the feedback 2 encoder.
For example, an incremental encoder is connected at the X9 terminal and configured as FB2 (the position feedback signal into the servo position loop). This encoder is then mounted on a circular disk with a circumference of 400mm. One revolution of the encoder will be 400mm. In this case, set UNIT.PIN = 400 and UNIT.POUT = 1.
Related Parameters


