Kollmorgen Essentials Motor Shaft Seal Kit - Installation
|
|
Install the Shaft Seal Kit prior to installation of either keyway that is included with every Kollmorgen Essentials Motor. |
|
|
Remove power (de-energize) to the |


Procedure
- Remove the power to the
- Verify all kit contents and required tools are available for kit installation.
See Kollmorgen Essentials Motor Shaft Seal Kit - Contents, Required Tools and Supplies, Optional Tools. - Remove any installed shaft key (if applicable) from the shaft.
- Inspect all surfaces for any damage, including nicks or burrs.
If nicks or burrs are present, use an abrasive cloth to remove. - Be aware of the sharp edges of the keyway slot in the shaft.
- Use tape to protect the shaft seal lip from damage.
- Place the protective pad on a firm, flat, horizontal surface.
- Place the
- Inspect and clean the motor shaft and pilot ring surfaces where the shaft seal makes contact.
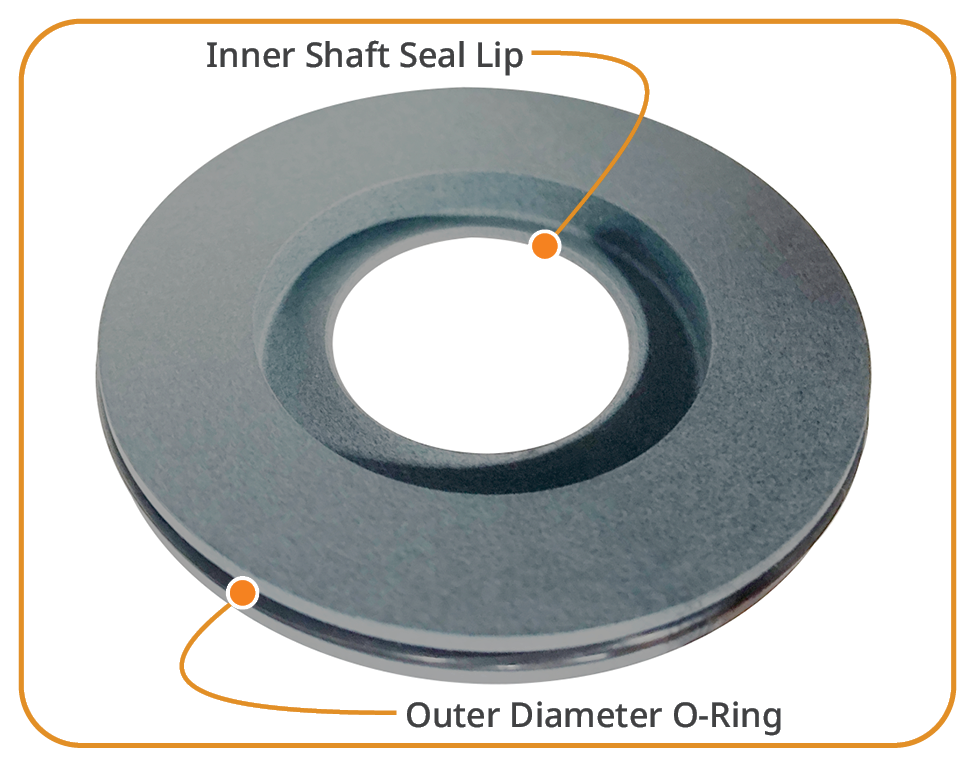
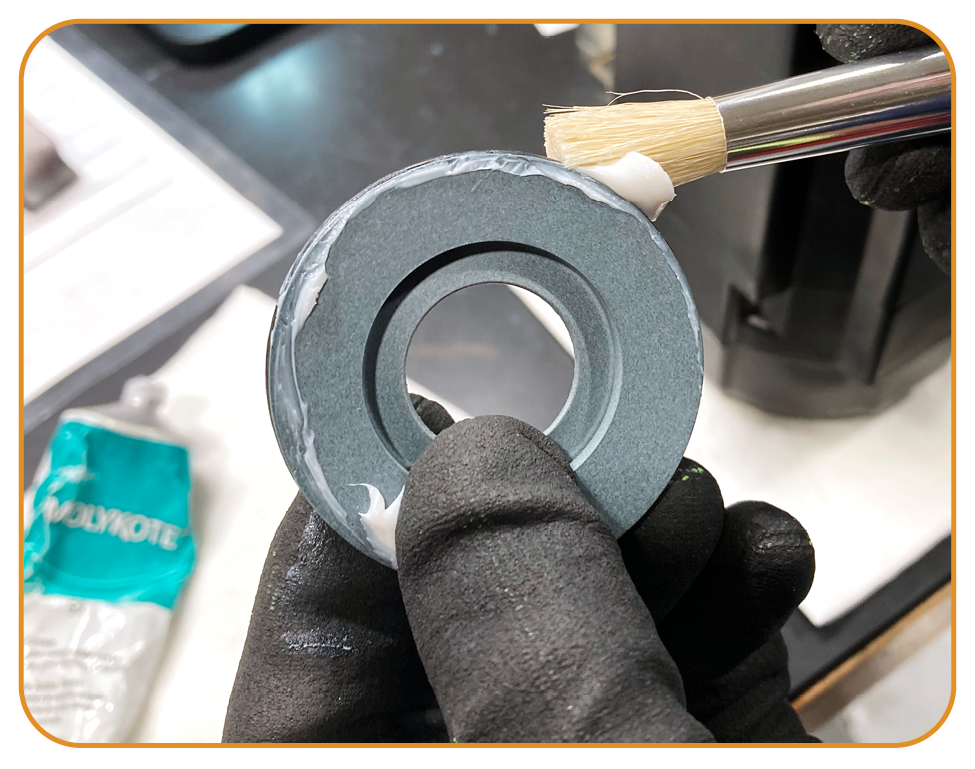
- Using a clean brush with MOLYKOTE grease, coat the inner shaft seal lip (Figure 2) and apply a film of grease to the outer diameter O-ring of the seal (Figure 3).
- Shaft seals require a lubricant to reduce wear.
- Lubricate only the inner shaft seal lip and outer diameter o-ring of the seal.
- Do not lubricate the motor pilot bore.
- Place the lubricated shaft seal over the
- Carefully maneuver the seal inner diameter over the shaft diameter.
- The shaft seal must not be cut or nicked during this operation or the IP rating is compromised.
- If any shaft seal damage is noticed, dispose of the seal and replace with a new one starting with Step 7.
- Insert the shaft seal over the shaft so that the ID lip curves up. (Figure 4)
- Use your hands, or the optional installation tool, to gently press the seal into position. (Figure 5)
See Optional Tools. - Use your hands or the optional installation tool to press the shaft seal until it is seated flush with the
- The beveled retaining ring in front of the bearing should:
- Act as a natural axial limit for the shaft seal.
- Protect against any movement of the rotor assembly that could cause unintentional damage.
- Proper installation is when the seal is flush, or sub-flush, with the front surface of the pilot. (Figure 7)
- Significant force should not be necessary, but do not exceed the limits of the axial force identified in this table:
- Do not press on the shaft during shaft seal installation.
- Pay careful attention to not damage the motor flange during installation.
- Remove the installation tool from the seal and visually inspect the installation. (Figure 8)
- Wipe the excess MOLYKOTE® grease off the shaft. (Figure 9)
- Spin the
- Look and listen for any squeaks, rubs, or tears in the seal.
If the seal installation is suspect, remove and replace the seal starting at Step 7. - Install applicable shaft key into the
See Kollmorgen Essentials Motor Shaft Key Kit - Installation.
|
|
|

|
|
Kollmorgen is not liable for user alterations or damages to the shaft or |
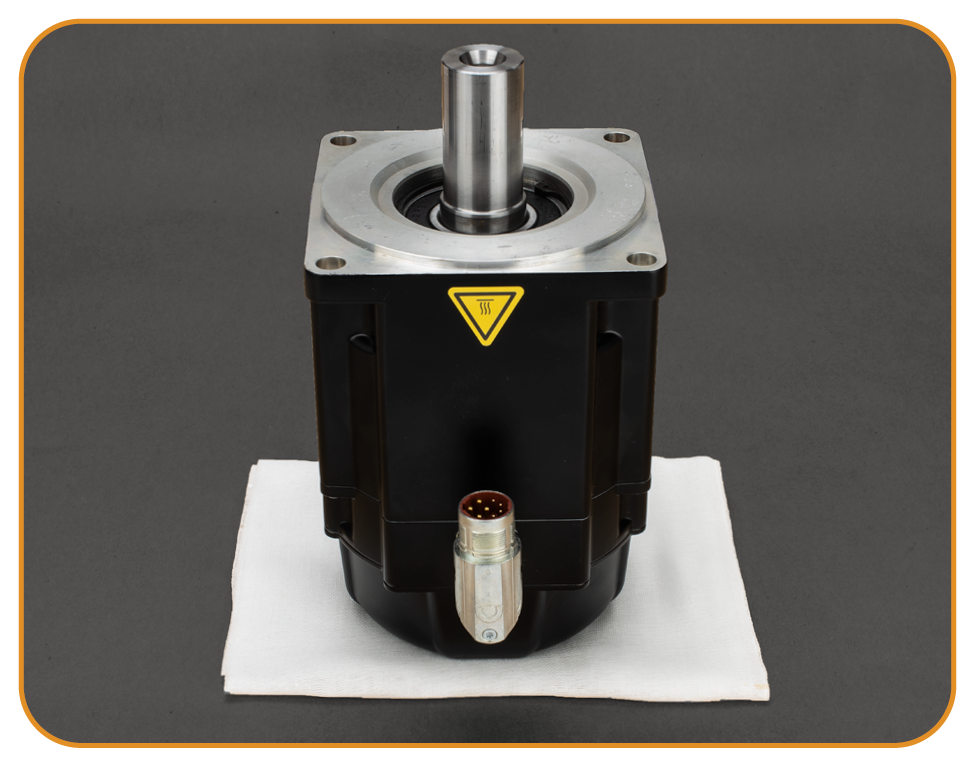
Figure 1:
|
|
|
|
Figure 2: MOLYKOTE® grease to coat the inner shaft seal lip and outer diameter o-ring of the seal |
|
|
|
|
|
|
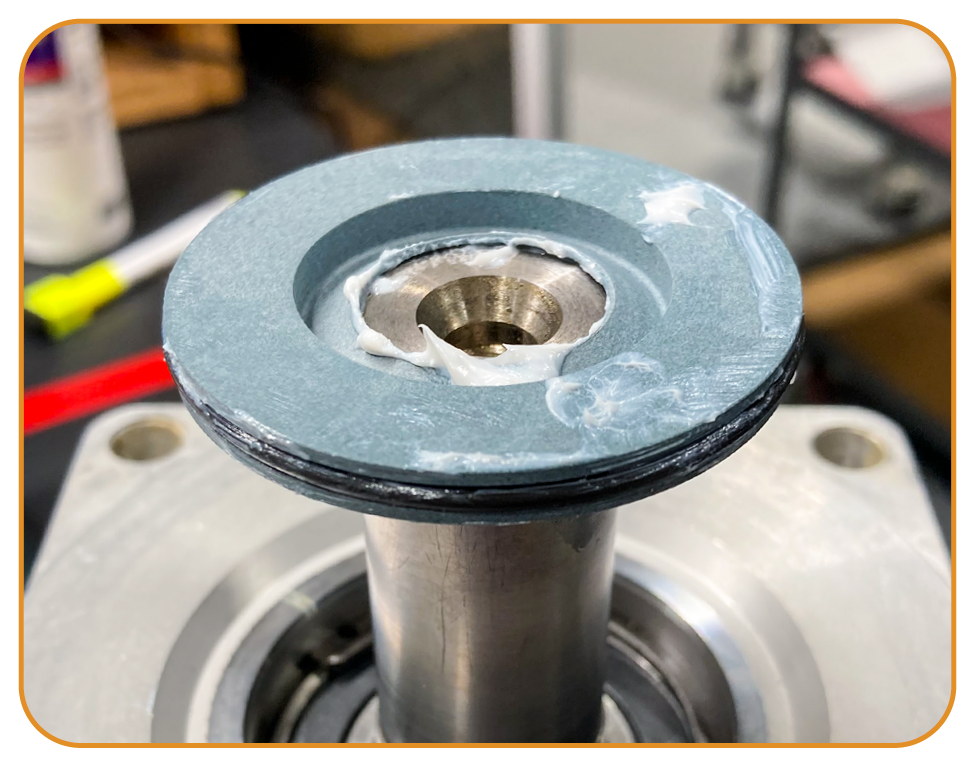
Figure 4: Shaft seal over the shaft
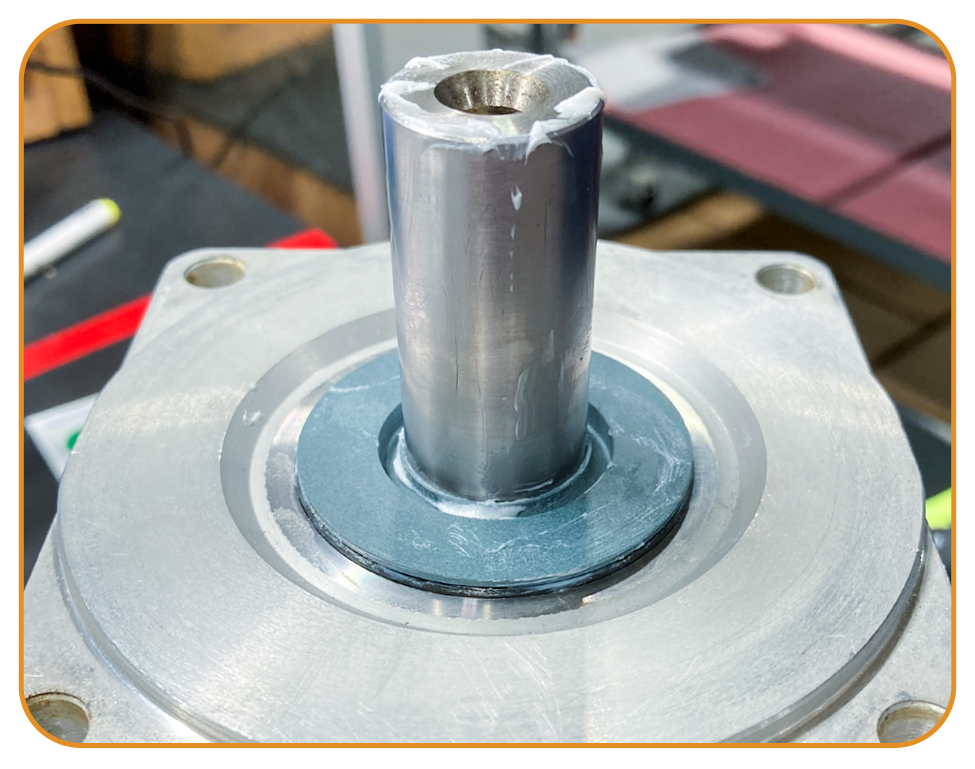
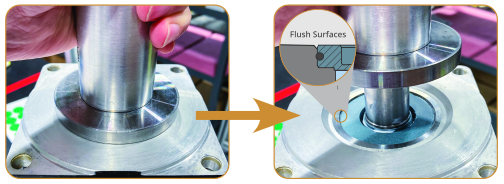
Figure 6: Installation tool used to press the shaft seal
|
|
|
|
|
|
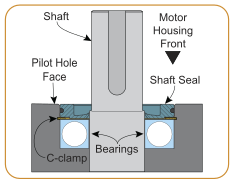
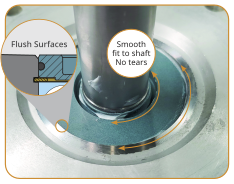
Figure 8: Inspect the installation
|
|
The outside diameter of the shaft seal should be flush or sub-flush with the motor pilot height. (Figure 8) |
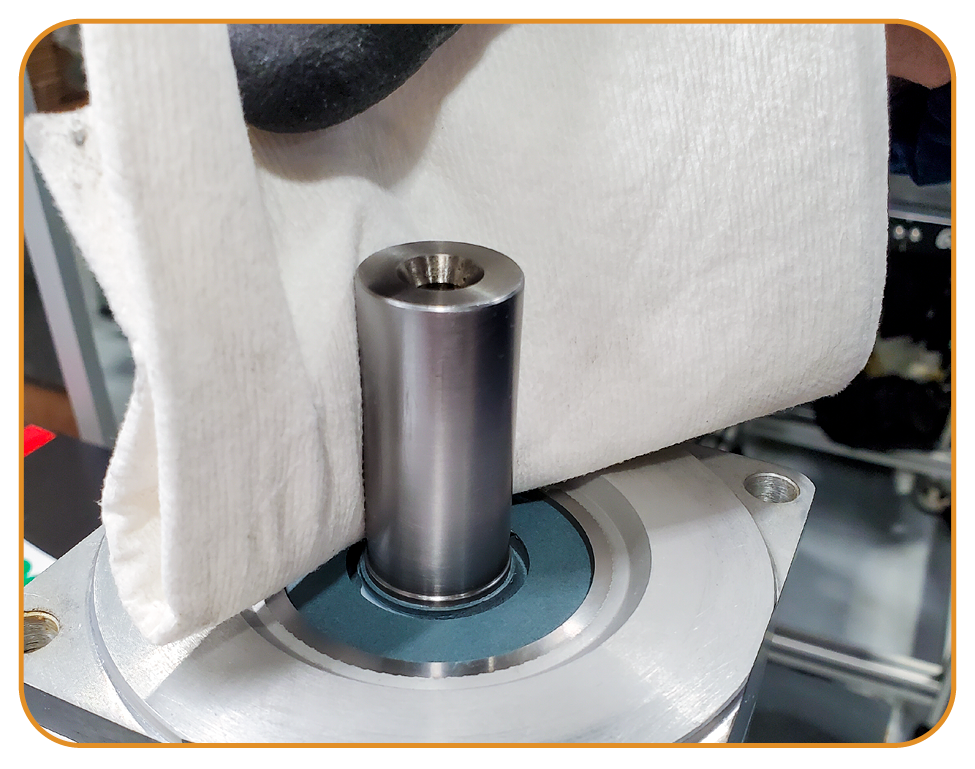
Figure 9: Wipe off the MOLYKOTE grease
See Also


