OPC-UA - Establish a Server Connection without Certificates - UaExpert
These are the overall steps without using certificates for an OPC UA Server connection:
- 1. PCMM2G Configuration (without Certificates)
- 2. UaExpert Configuration (without Certificates)
- 3. UaExpert Connection to the PCMM2G (without Certificates)
-
-
Videos of these features are here: PCMM2G OPC UA Server Setup in KAS-IDE.
1. PCMM2G Configuration (without Certificates)
The procedure in this section configures the PCMM2G for connection to UaExpert.
- Verify the OPC-UA - UaExpert Installation procedure is completed.
- Start the KAS-IDE.
- Create a new project or open an existing KAS project.
- Double-click an OPC UA Server node in the Fieldbus Editor project tree.
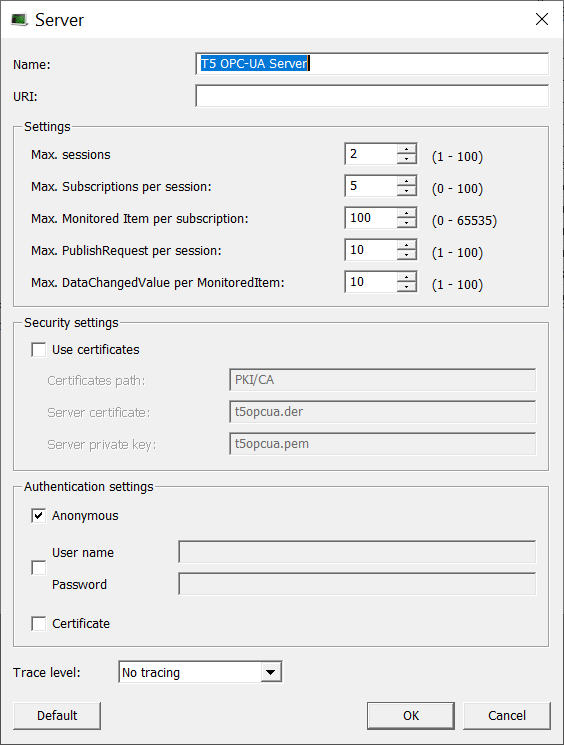
The OPC UA - Server dialog box opens. (Figure 1) - In the Authentication settings section:
- Keep the Anonymous check box selection.
- Optional: Click the User name/Password check box to activate the User name and Password text boxes.
- If applicable, enter a User name and Password for the configuration.
- Click OK to save the changes or selections and close the dialog box.
The Fieldbus Editor returns showing the added OPC UA Server node.
- On the vertical toolbar, click the Insert Master/Port button (
 ).
).
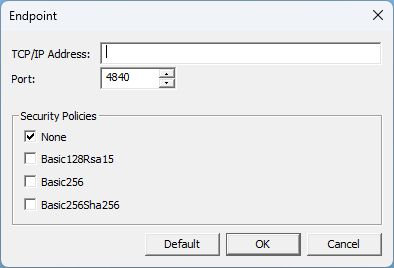
The OPC UA - Endpoint dialog box opens. (Figure 2) - In the Security Policies section, accept the default selection of None.
- Click OK to save the changes or selections and close the dialog box.
The Fieldbus Editor returns. - Add applicable groups and variables using the OPC UA - Add Multiple Groups and Variables to the Driver Configuration procedure.
- Compile and download the project to the KAS controller (e.g., PCMM2G).
- Continue with 2. UaExpert Configuration (without Certificates).
2. UaExpert Configuration (without Certificates)
The procedure in this section configures UaExpert for connection to PCMM2G.
- Verify the procedure in the 1. PCMM2G Configuration (without Certificates) section is completed.
- Start UaExpert.
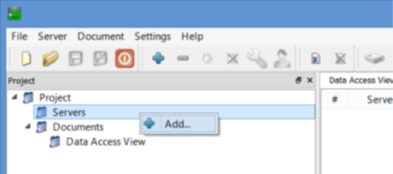
The UaExpert main window opens. - In the Project tree, right-click Servers and click Add. (Figure 3)
- Under Custom Discovery, double-click the text.
The Enter URL dialog box opens. - Enter the URL as opc.tcp://(PCMM2G_IP_Address) to add the OPC UA Server. (Figure 5)
- Click OK to save the changes or selections and close the dialog box.
The Add Server dialog box returns. -
-
A Replace Hostname message may appear. (Figure 6)
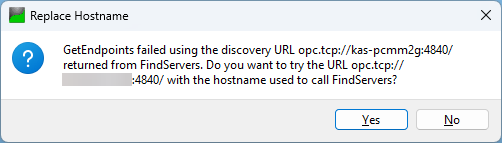
Figure 6: Replace Hostname message
This prompt appears because the PCMM2G supports OPC UA device discovery using its IP address, not by its hostname.
Click Yes to continue.
-
-
A None security policy must be configured for the OPC UA Server in the KAS project.
- Under Custom Discovery, expand the newly added node.
- Under the opc.tcp://(PCMM2G_IP_Address), select None. (Figure 7)
- A Username and Password can be used if this Authentication Setting option is enabled in the KAS project. (Figure 8)
- The password is always encrypted if Use Certificates is enabled in the KAS project.
- Click OK to save the changes or selections and close the dialog box.
The server is now available in the UaExpert project tree. - Continue with 3. UaExpert Connection to the PCMM2G (without Certificates).
The Add Server dialog box opens. (Figure 4)
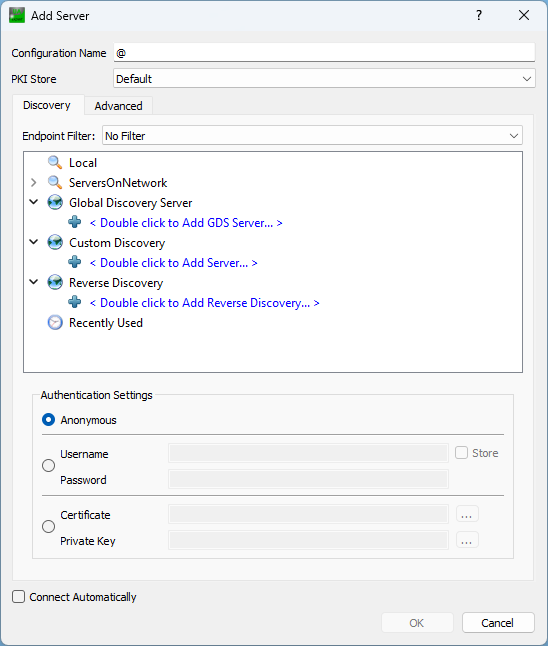
Figure 4: UaExpert Add Server dialog box
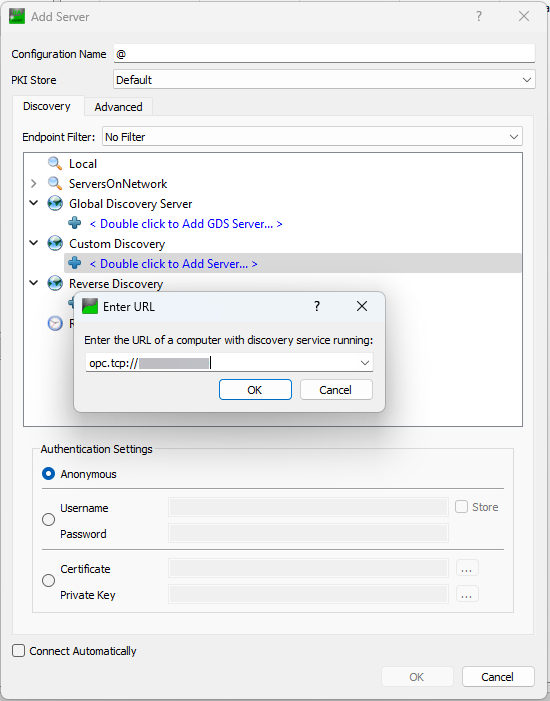
Figure 5: Enter URL dialog box
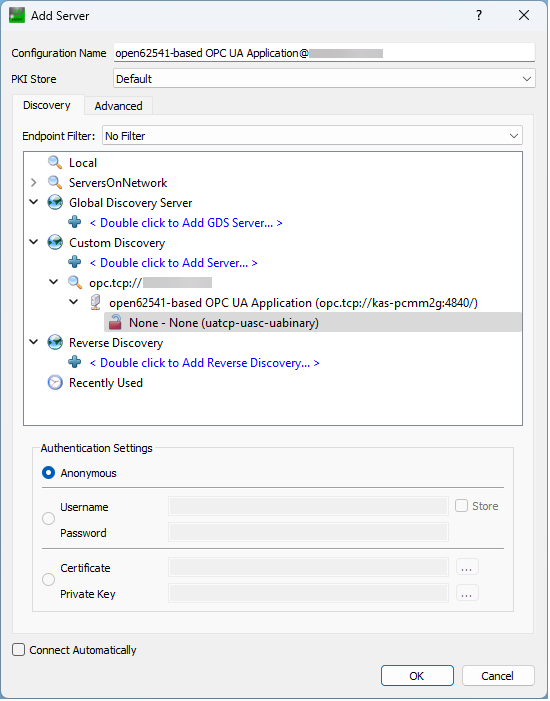
Figure 7: Add Server dialog box - None
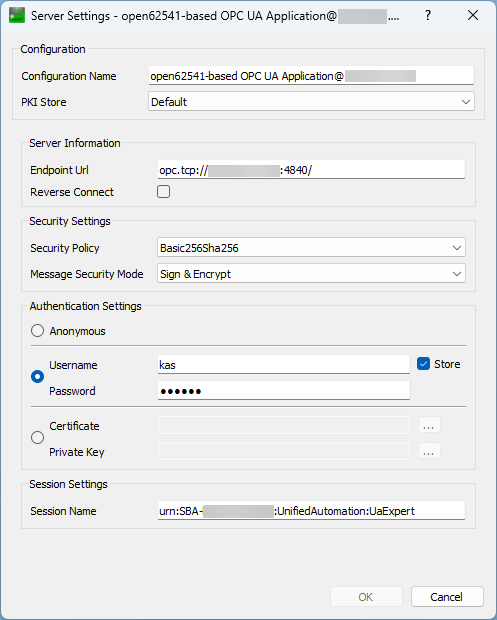
Figure 8: Server Settings dialog box - Username and Password
3. UaExpert Connection to the PCMM2G (without Certificates)
The procedure in this section connects UaExpert to the PCMM2G.
- Verify the procedure in the 2. UaExpert Configuration (without Certificates) section is completed.
- On the toolbar, click the Connect button (
 ) to connect to the server.
Data is now available from the KAS/PCMM2G OPC UA Server. (Figure 9) - In the Address Space scroll box, select the applicable PLC object.
- Drag-and-drop the selected objects to the Data Access View table. (Figure 10)
- Verify the values of PLC objects in the Data Access View table matches with the KAS project running on the PCMM2G.
- In the Data Access View table, select a variable.
The Attributes panel appears. - Scroll through the variables to locate a variable with an AccessLevel set to CurrentWrite. (Figure 11)
- Double-click the applicable Value column cell and change its value.
- Switch to the KAS-IDE window.
- Navigate to the OPC UA Server Fieldbus Editor. (Figure 12)
- Change a variable value in the KAS-IDE.
- Verify the change in UaExpert.
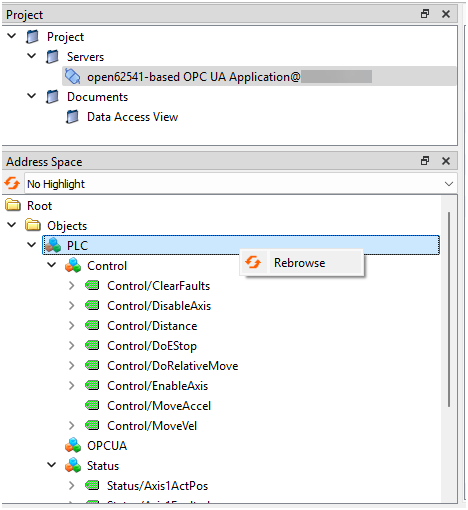
A re-browse of the variable value in UaExpert may be necessary to refresh the visible values. - Select the PLC object and right-click to use Rebrowse. (Figure 13)
-
-
- A maximum of 100 OPC UA client connections are accepted simultaneously.
- Established connections are disconnected if no data is exchanged within 30 seconds.
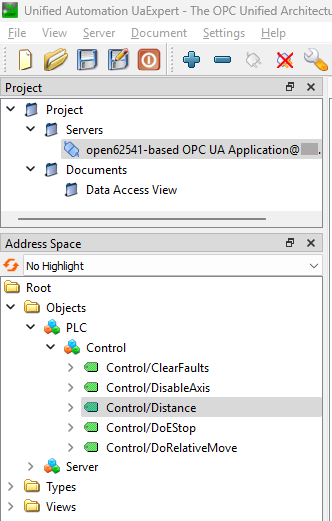
Figure 9: UaExpert - KAS OPC UA Data Objects
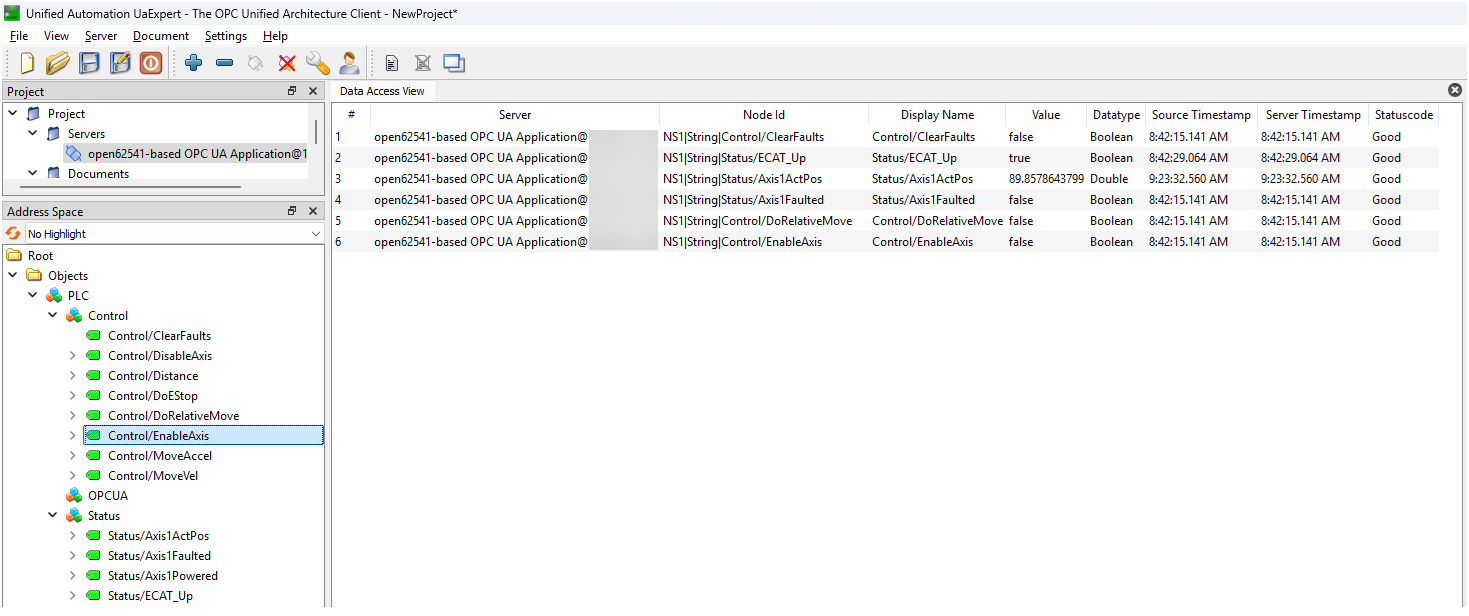
Figure 10: Data Access View table
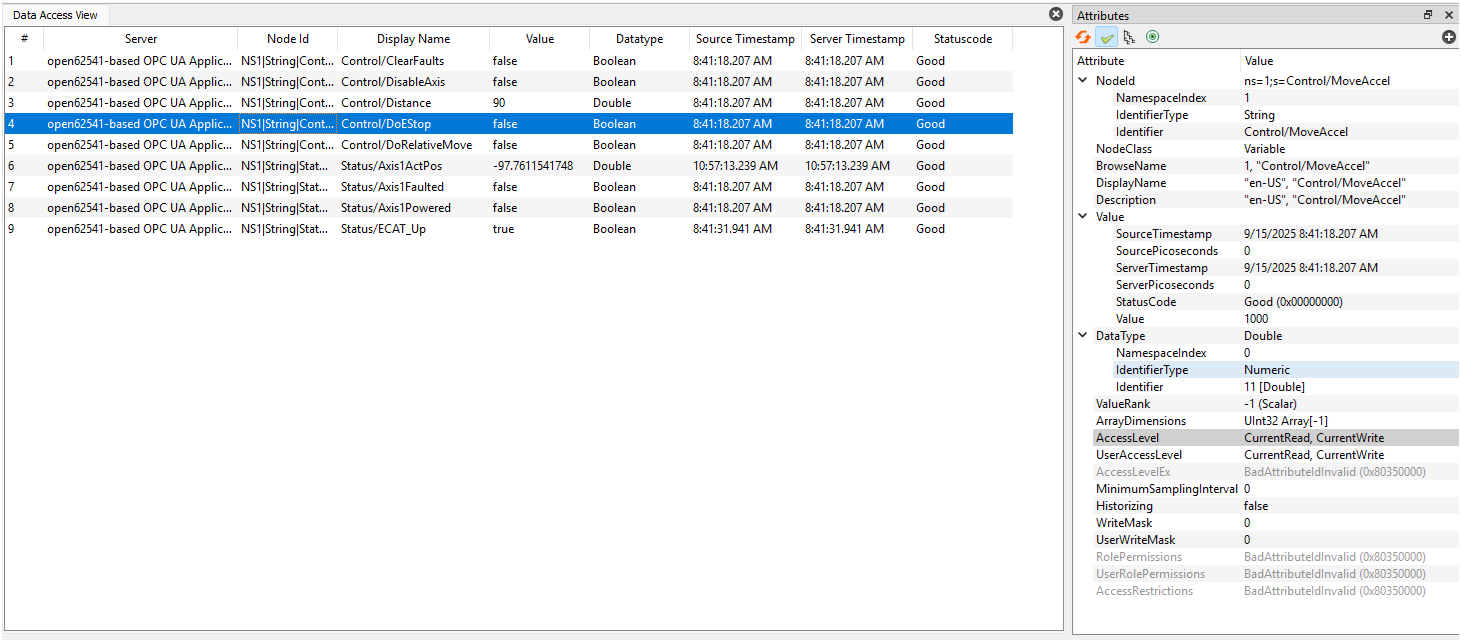
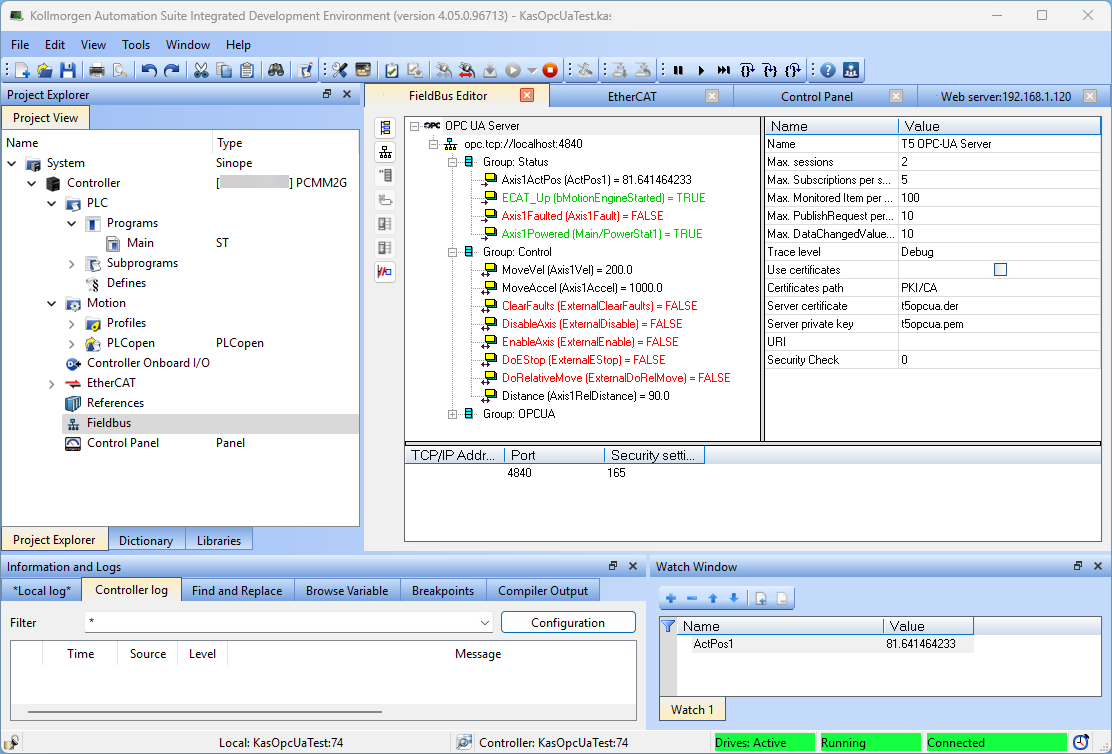
Figure 12: KAS Fieldbus Editor
See Also


